
If the red Enable LED does not light up when you press the Enable Button or turns OFF during a job, there may be an alignment issue between your Lid and the Interlock PCB’s.
This issue occurs most commonly after the Emblaser has been transported or repositioned (during shipped, for example) though may occur over time also.
Step 1:
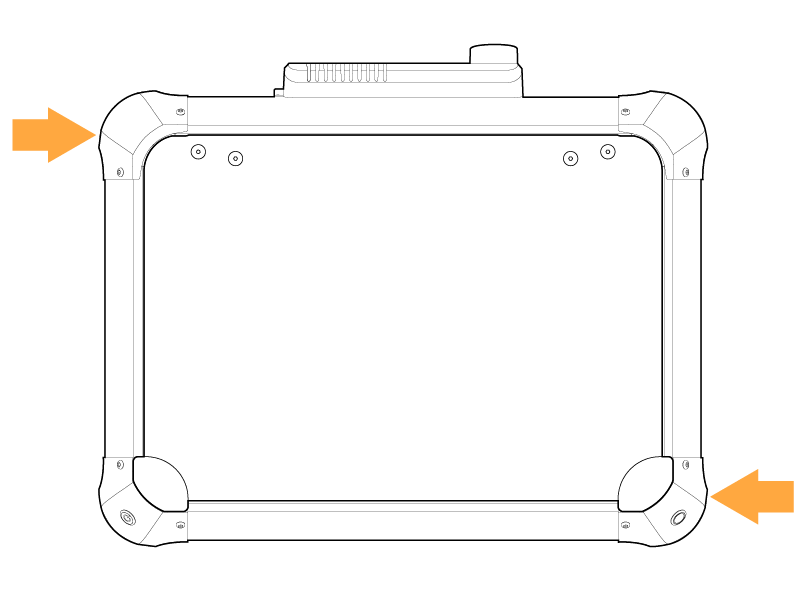
First, check to make sure your Emblaser 2 is sitting on a flat surface and that the Lid closes fully.
Note: Make sure each of the Emblaser feet are sitting on the same surface.
Step 2:
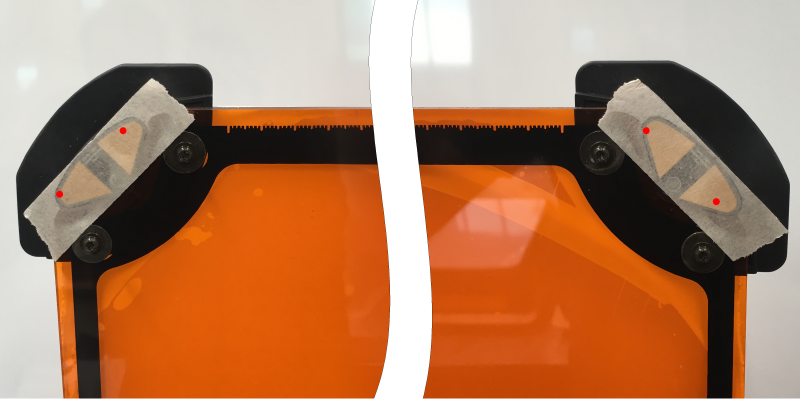
Take a 6cm strip of masking tape and cover each of the Interlock PCB contacts on the left and right corners of the Lid.

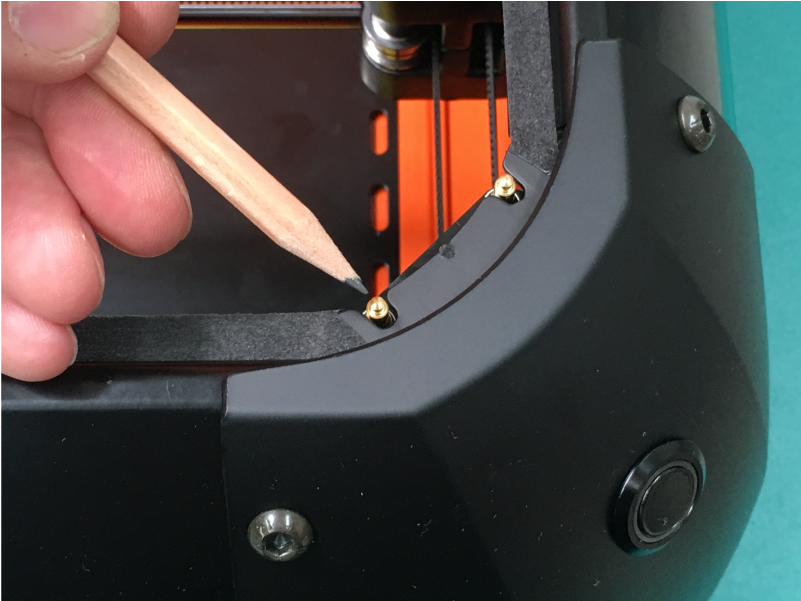
Step 3:
Use a pencil to mark the top of each of the Interlock Pins.
Step 4:
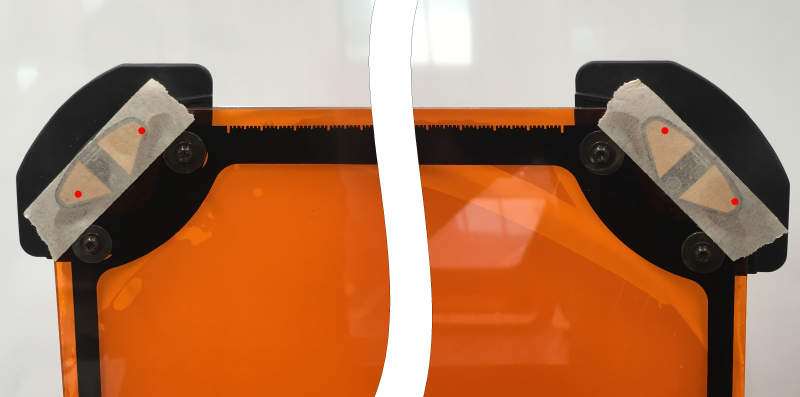
Close the Lid and press down onto each corner.
This will leave a small mark on the masking tape, where the pins have made contact.
Step 5:
If the marks are not contacting evenly on each side, you can use the two possible outcomes below to adjust your Lid and Lid Interlocks accordingly.
Possibility A:
If your marks are as the image above, place pressure on your Emblaser chassis as shown in the image below.
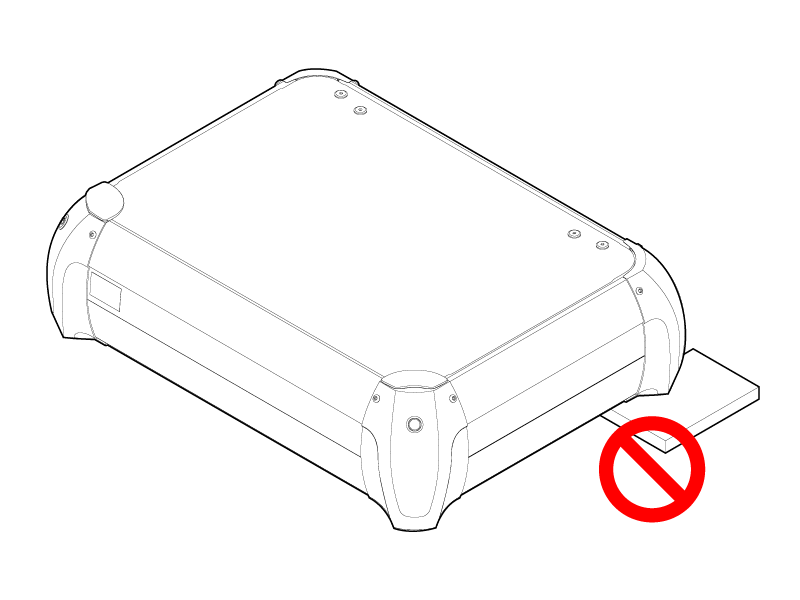
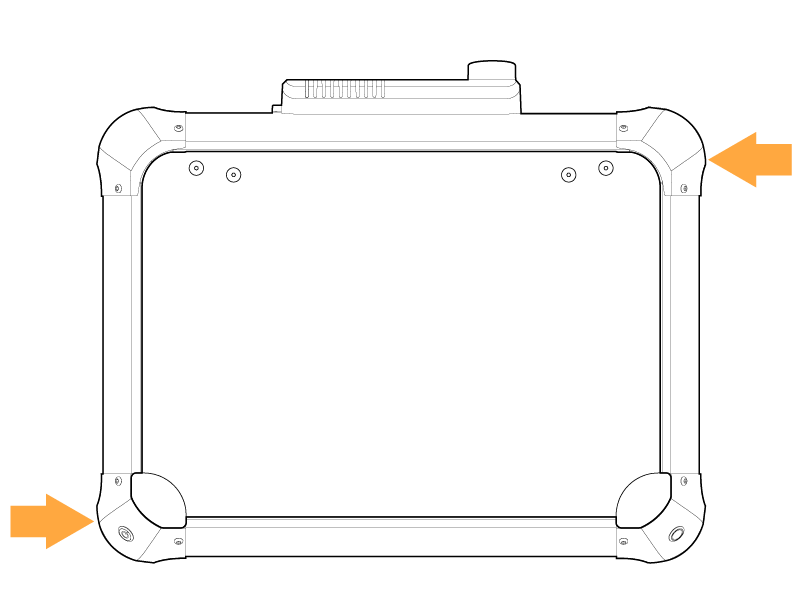
Possibility B:
If your marks are as the image above, place pressure on your Emblaser chassis as shown in the image below.
Step 6:
Remove the masking tape and wipe any residue off the corner Interlock pins, then check that the Enable LED lights up when the Enable Button is pressed and does not turn OFF during a job.
