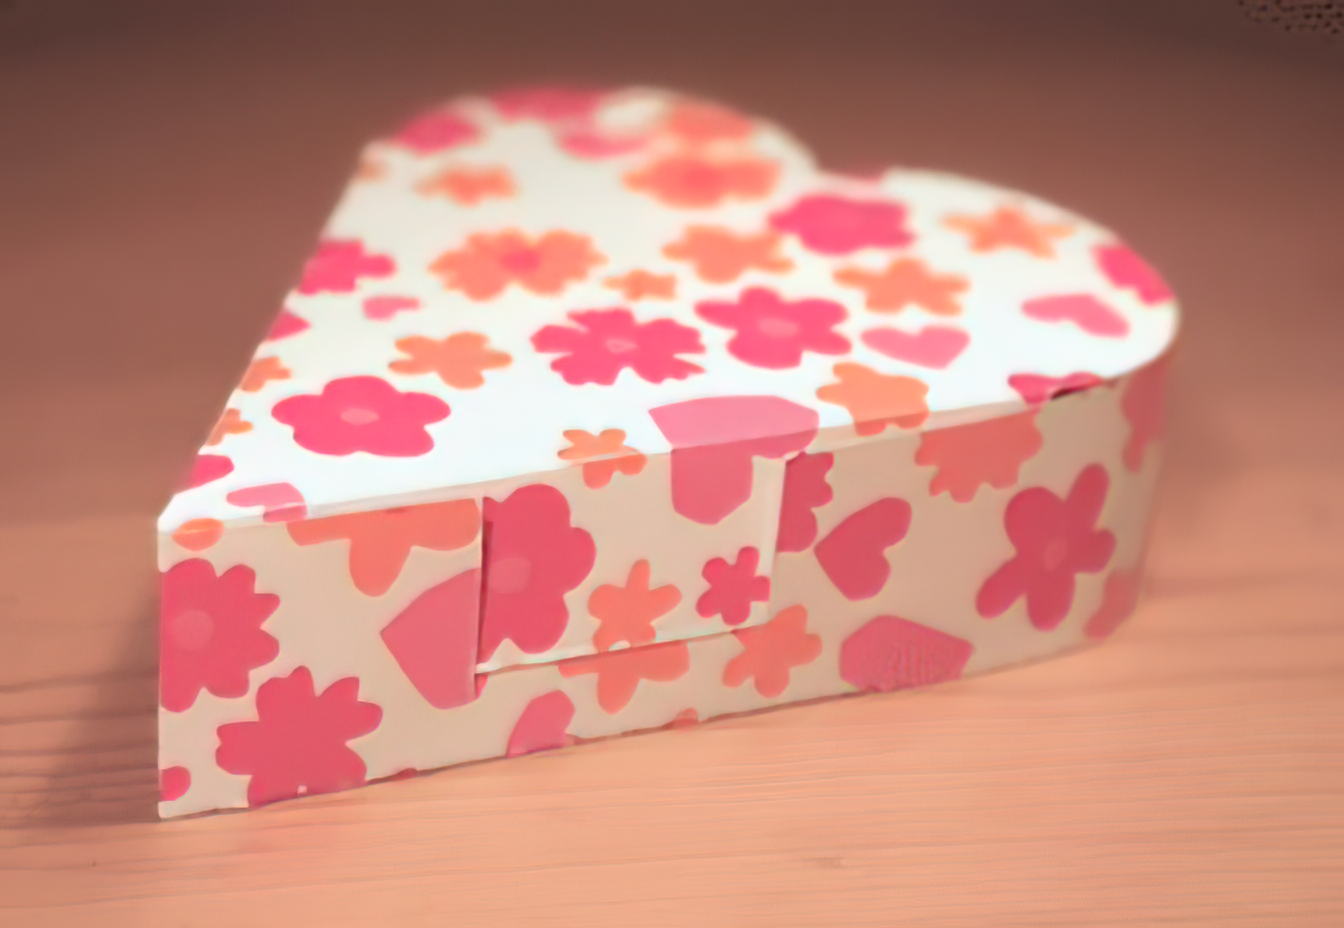
This lesson shows you how to create the perfect little gift box for those special occasions.
Notice:
This design was downloaded from Template Maker at http://www.templatemaker.nl
There are many interesting designs on this site which can also be made by following the steps in this tutorial.
What you will learn:
- How to add to an existing design using the drawing tools
- How to alter the cut settings within a layer.
Note: We recommend competing the previous LightBurn lessons first.
Project Files:
Materials:
- 150-300 gsm paper/card measuring at least 300x180mm.
Step 1:
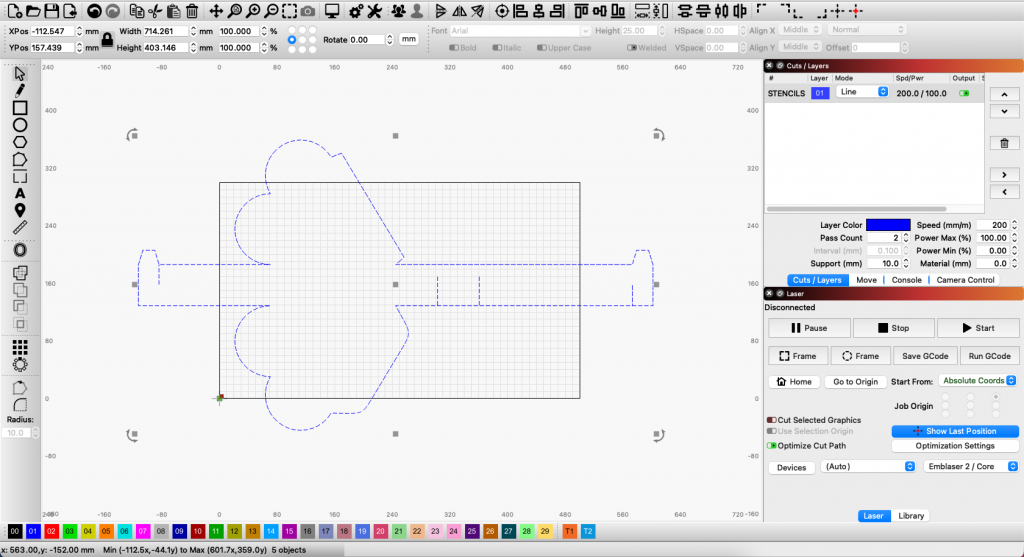
Import the Gift Box Template file into LightBurn.
Step 2:
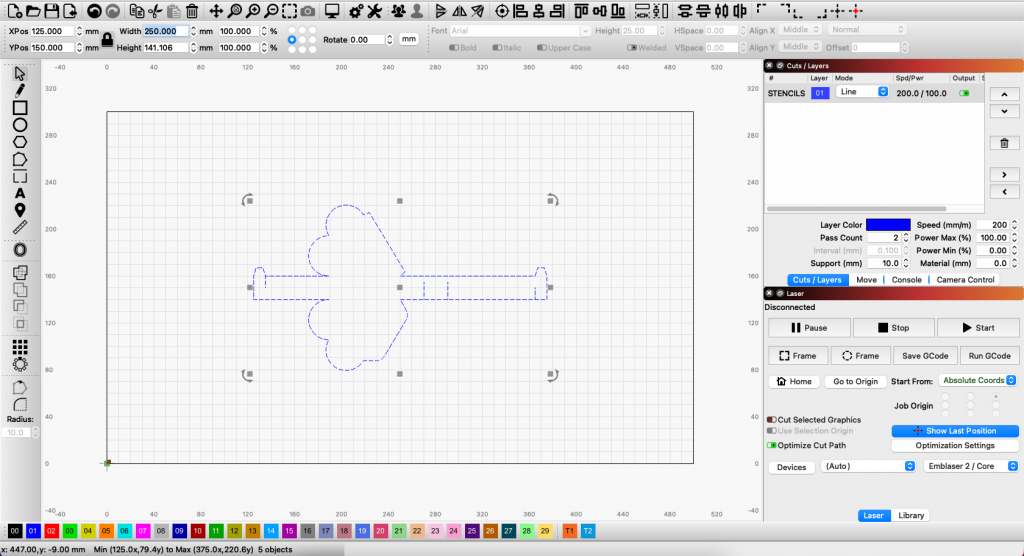
Resize the design to be 250mm wide and position the design in the centre of the workspace.
Step 3:
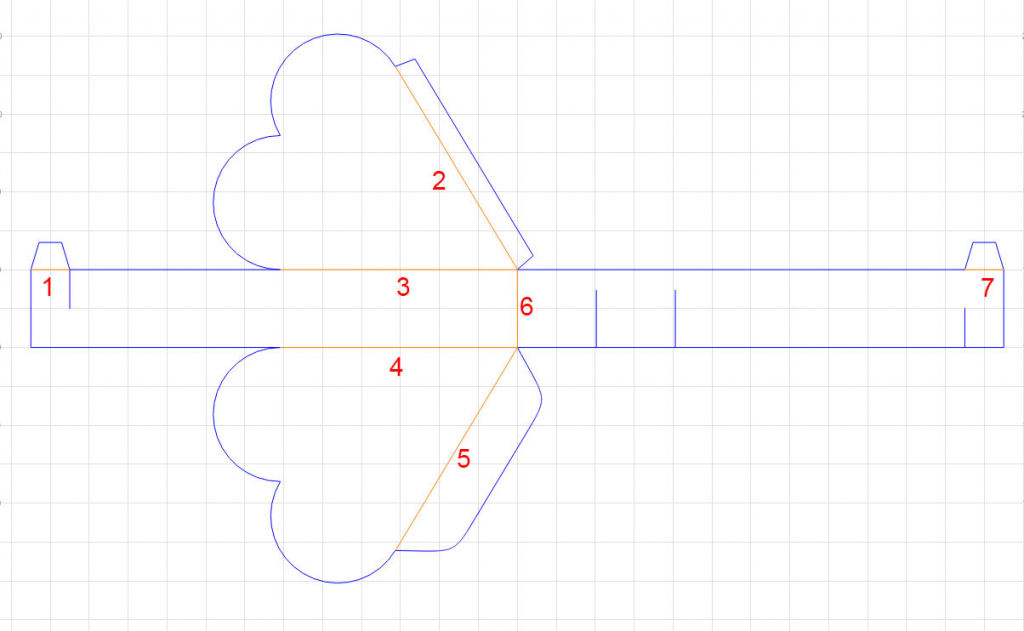
To make assembly of our gift box easier, we are going to create ‘scoring’ lines to help with folding.
Select the orange colour from the colour swatches along the bottom of the LightBurn workspace. While this colour is selected, new shapes, lines or text added using the LightBurn tools will be assigned to the ‘orange’ line layer.

Select the Draw Lines tool from the left tool menu.
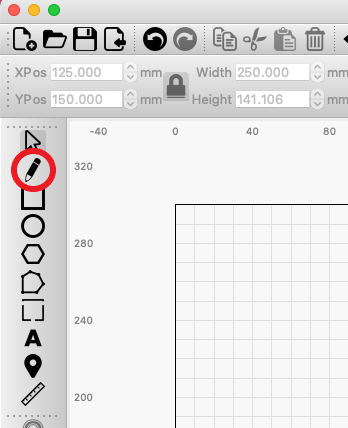
The Draw Line tool works by clicking where you want a line to begin and clicking where you want the line to end.
Press the ESC key if you want to stop drawing.
Draw the 7 lines as shown in the image below, to indicate where the design will need to be folded.
Step 4:
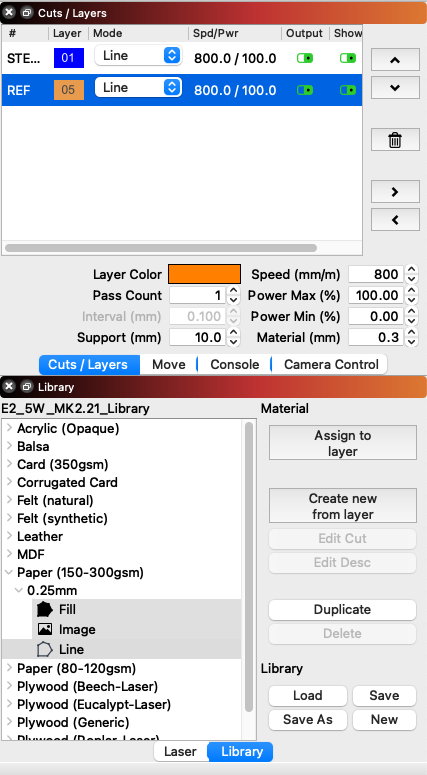
Apply the ‘Paper 150-300gsm – Line’ preset in the library to both of the layers in your cuts list.
Step 5:
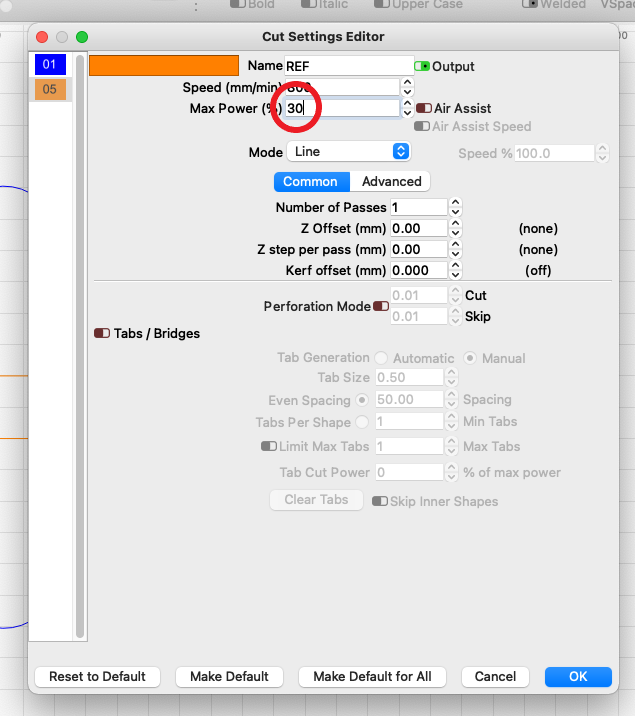
We will now modify the orange cut layer to prevent it from cutting all the way through the paper.
Double-click on the orange layer in the Cuts/Layers menu to open up it’s Cuts Settings Editor.

Reduce the ‘Max Power %’ to 30%.
Then press ‘OK’ to close this window.
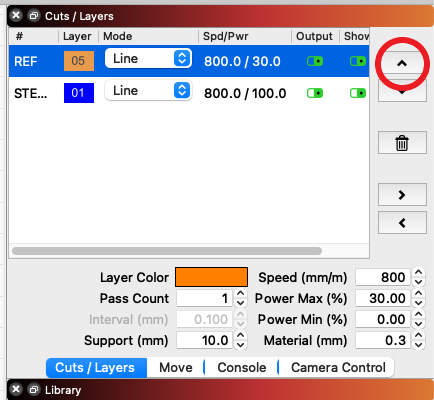
Step 6:
Since we want our ‘scoring’ layer to be cut first, move this layer to the top of the cut list using the arrows on the right side of the Cuts menu.
Step 7:
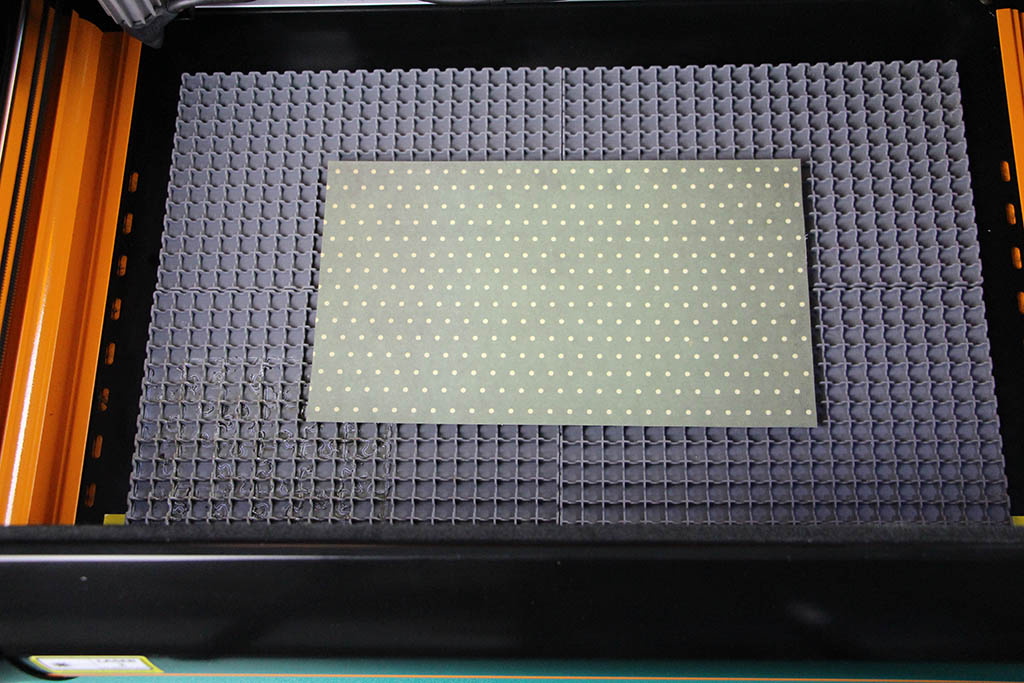
Place your material into the middle of the workspace.
Step 8:
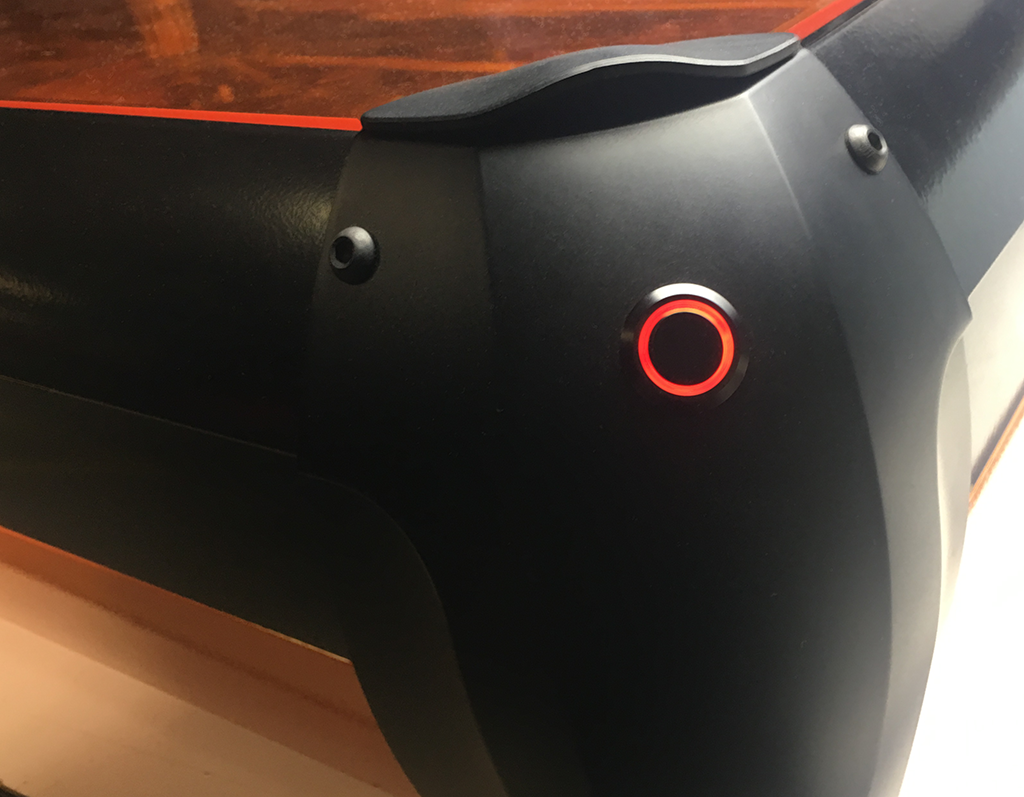
Close the lid of your Emblaser 2 and press the ‘Enable’ button on the front right corner. The button will illuminate red to indicate the laser has been enabled.
Step 9:
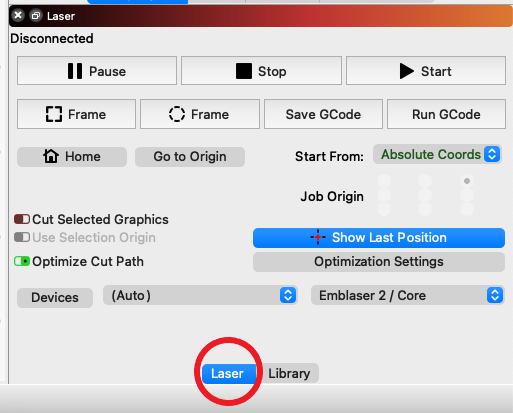
Select the ‘Laser’ tab to display the Laser menu.
Then press the ‘Start’ button to start your job running.
Done!
For assembly instructions please visit: LINK