IMPORTANT:
Windows 7, 8, and earlier operating systems are no longer supported by Microsoft. Although we will do our best to continue providing a working driver for our products, unexpected updates to these operating systems may cause issues.
For your best experience with our products, we encourage customers to use Windows 10 and onwards.
Windows 10: Do not install these drivers on a Windows 10 machine – No drivers are required.
STEP 1
Make sure your Emblaser is not plugged in via USB and start Windows7.
Download the device driver from this location: LINK
Unzip the zip file to your desktop.
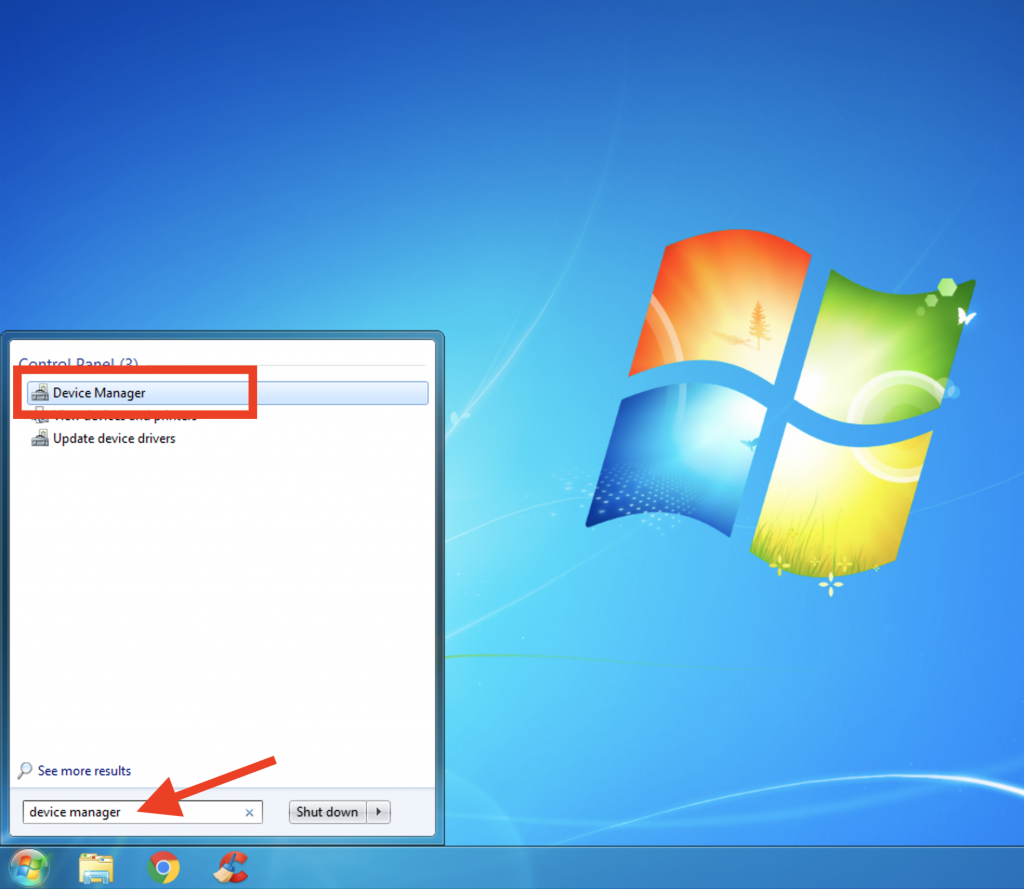
STEP 2
Click the ‘START’ icon and type ‘Device Manager’ into the search field.
Run the ‘Device Manager’ by clicking on its name at the top of the search results.

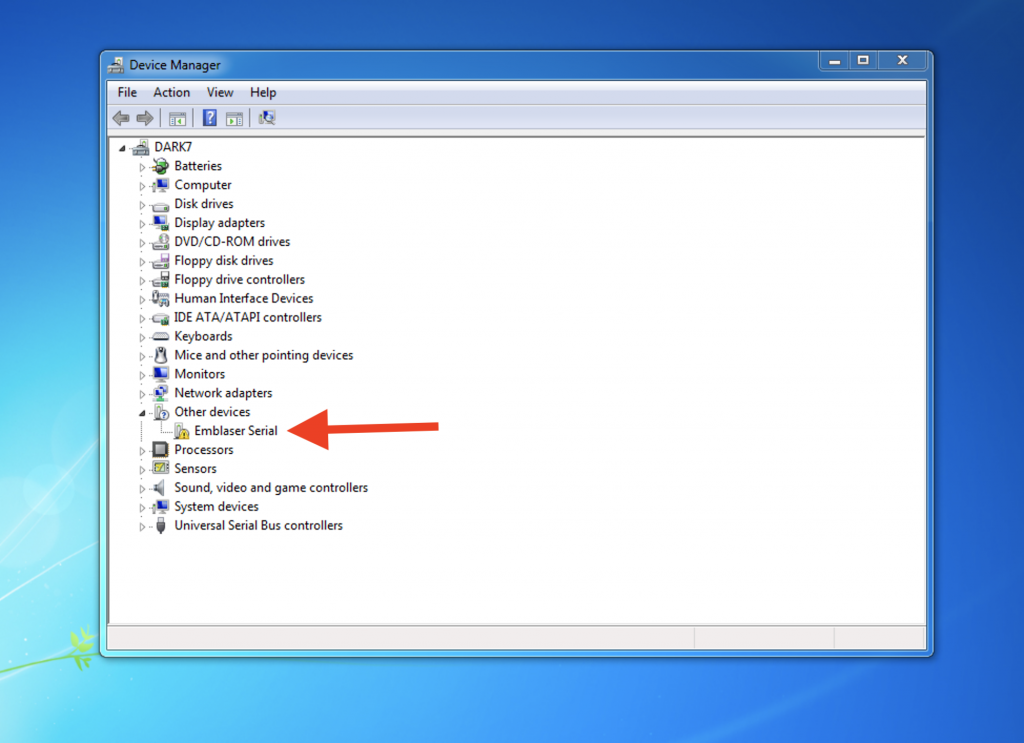
STEP 3
With your Emblaser turned on, plug in its USB cable to your computer.
After a few seconds you will see ‘Emblaser Serial’ or ‘Unknown Device’ appear in the ‘Other Devices’ list.
The yellow exclamation mark shows that a suitable device driver was not found.
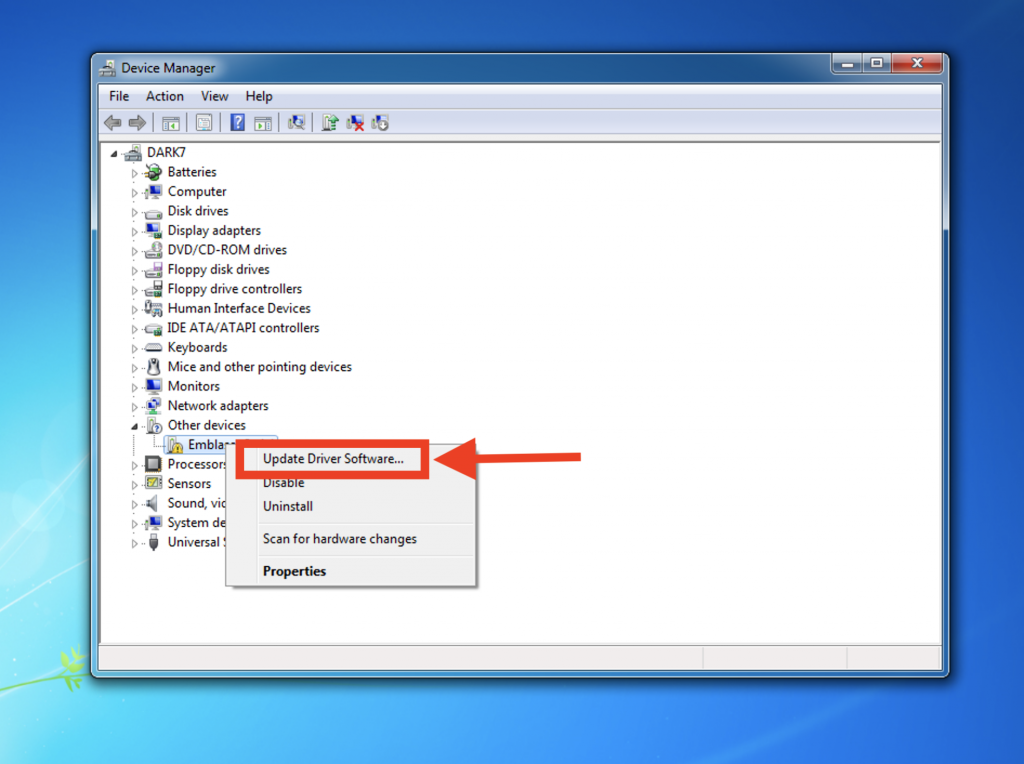
STEP 4
Right Click on the device and select ‘Update Driver Software’.
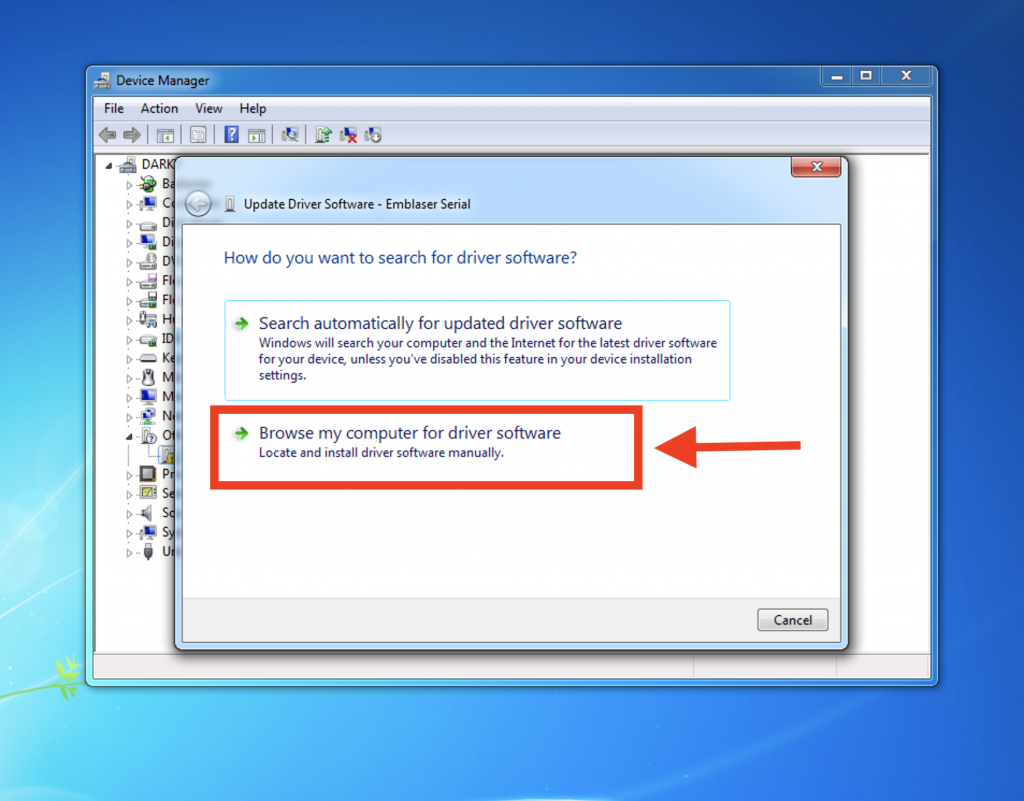
STEP 5
Select ‘Browse my computer…’
STEP 6
Select ‘Let me pick from a list…’

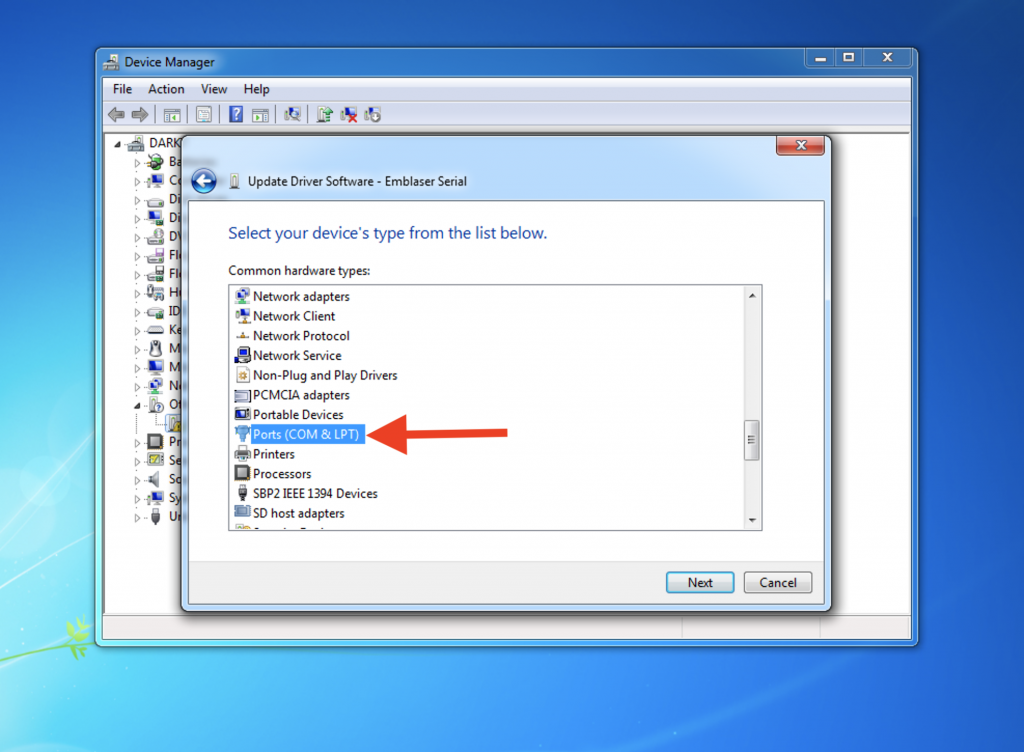
STEP 7
Scroll down the list and select ‘Ports (COM & LPT) and click next.
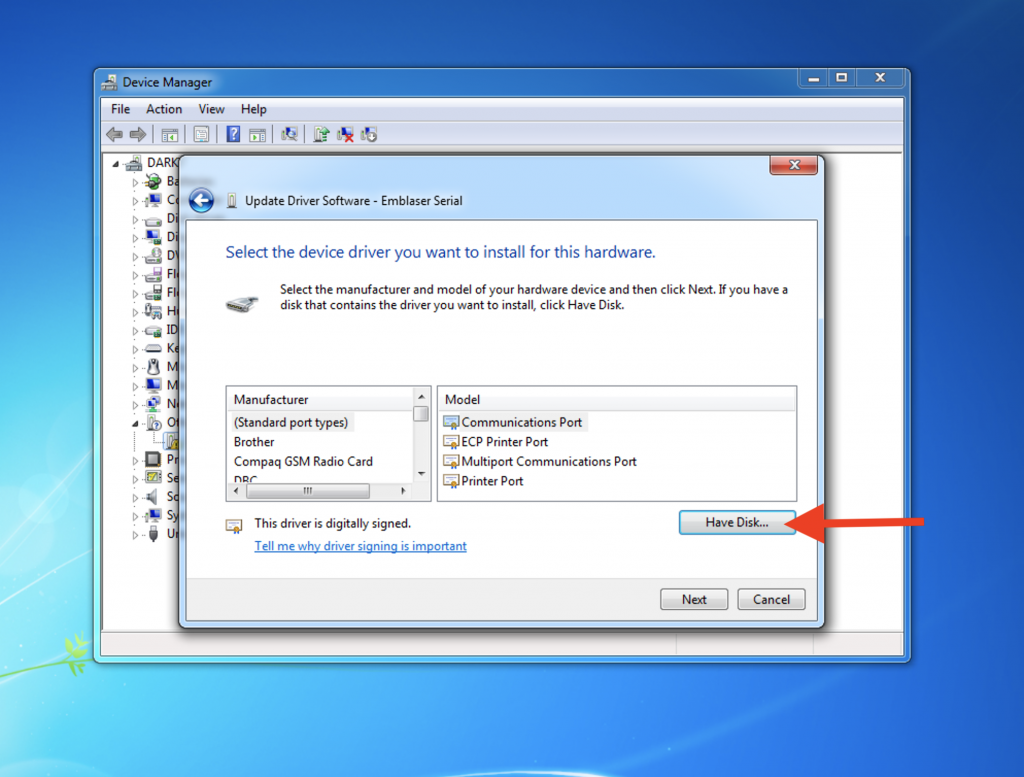
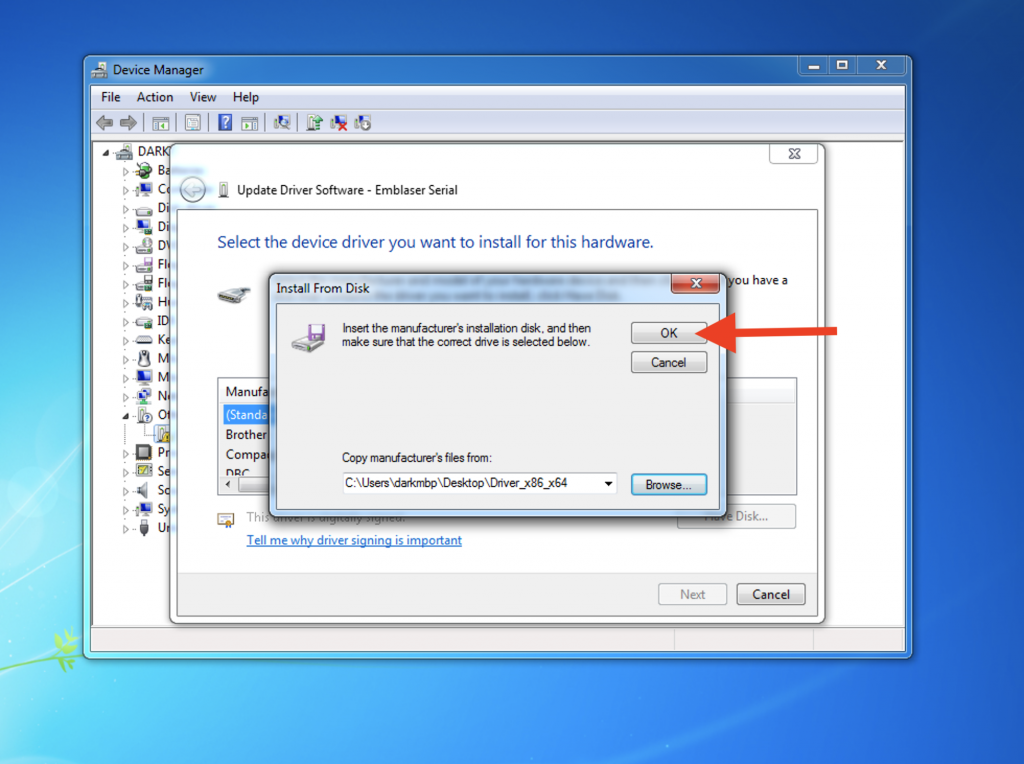
STEP 8
Select ‘Have Disk’ and click next.
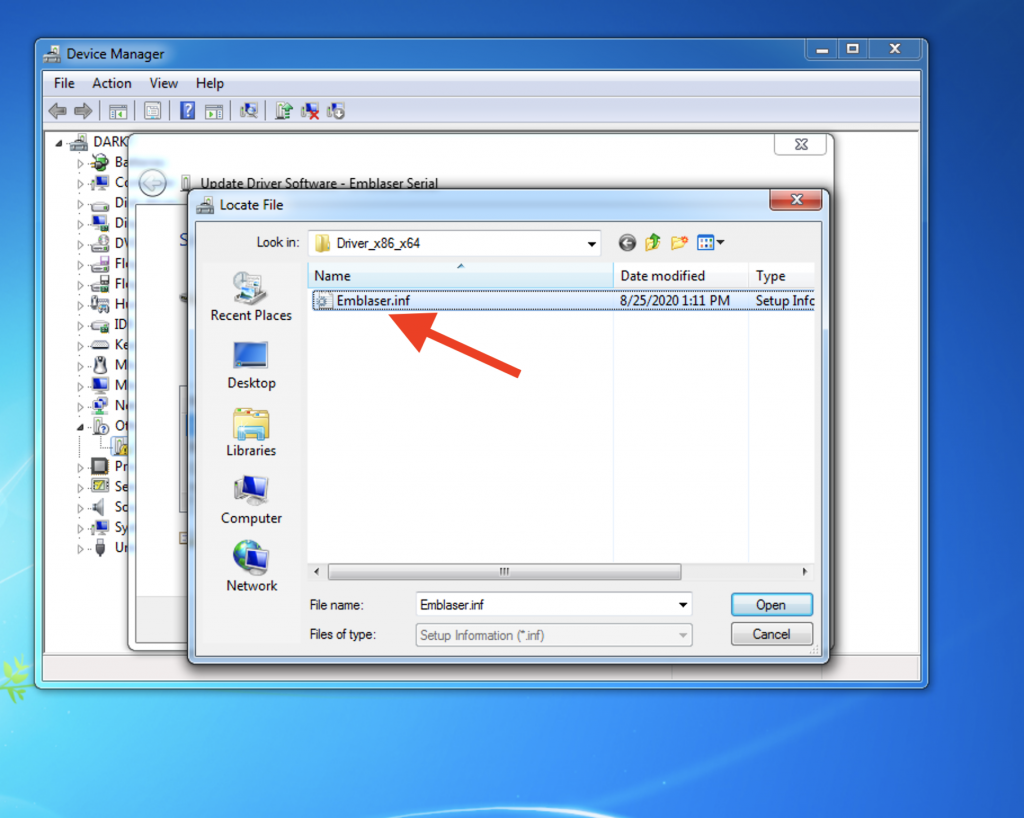
STEP 9
Navigate to where you unzipped the device driver and select ‘Emblaser.inf’
Press open then OK.
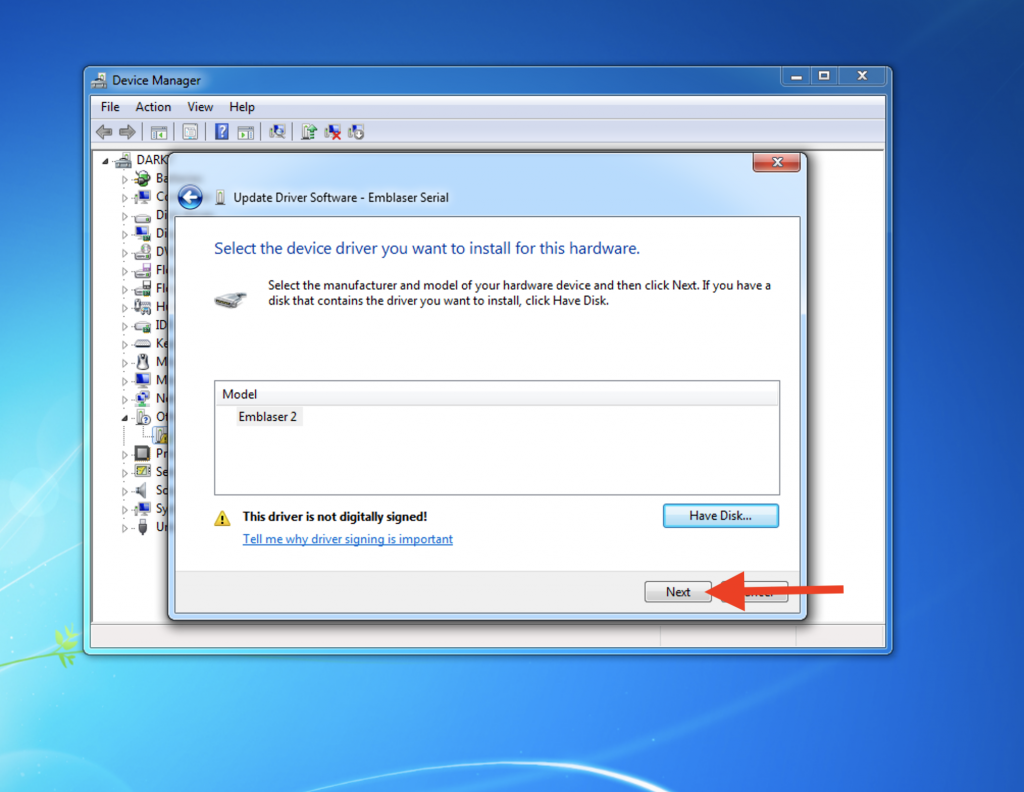
STEP 10
In the next window, press next.
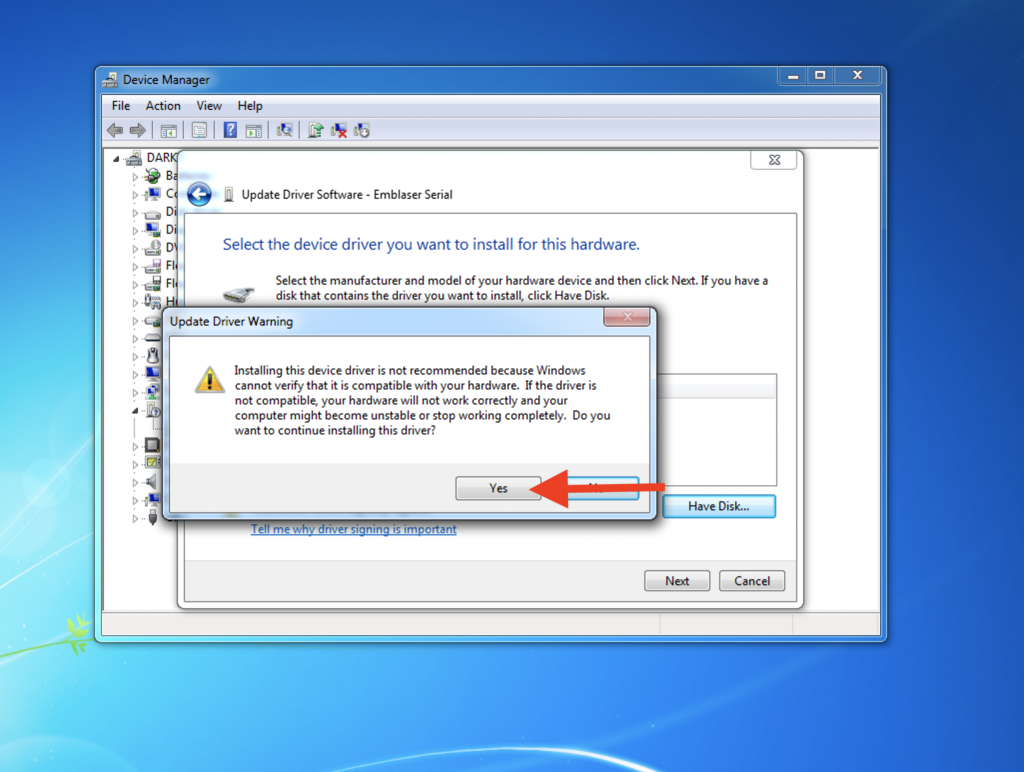
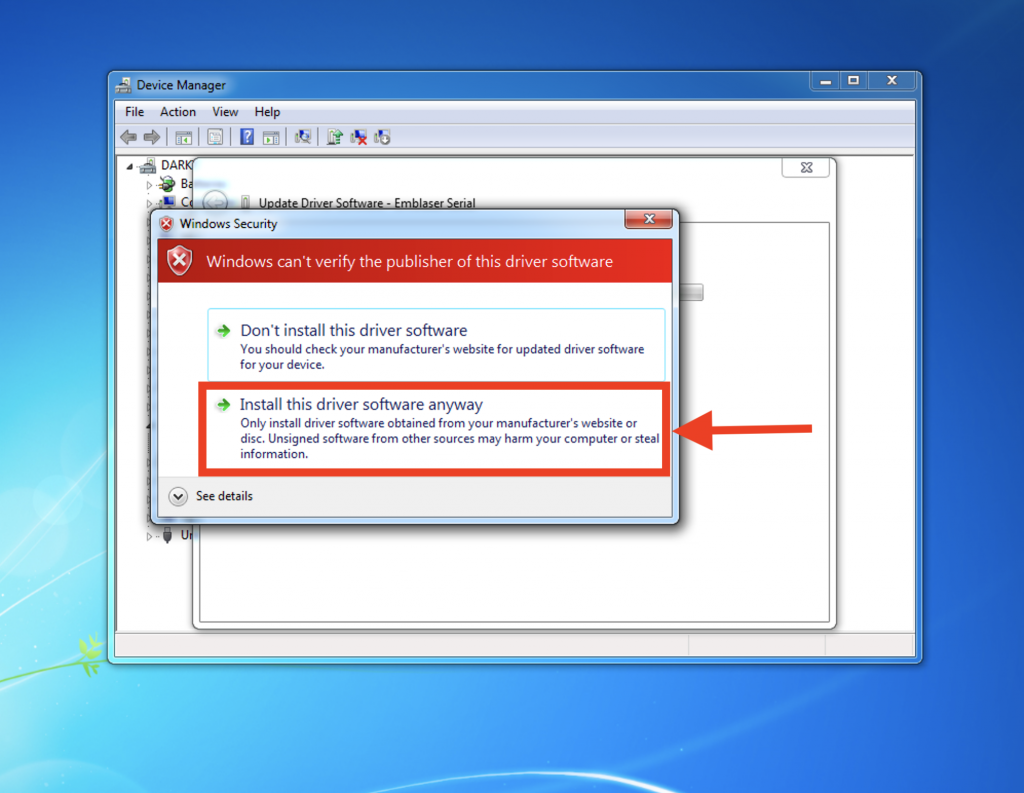
STEP 11
You may be asked a couple of times whether you would like to continue with the installation.
Select to continue.
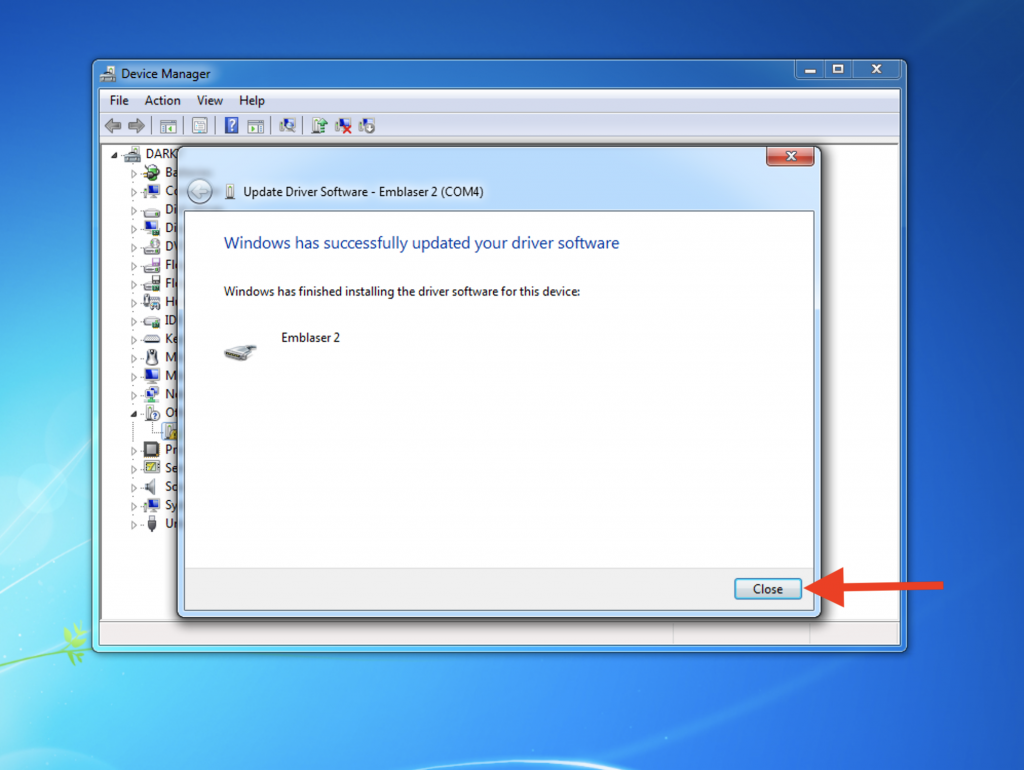
STEP 12
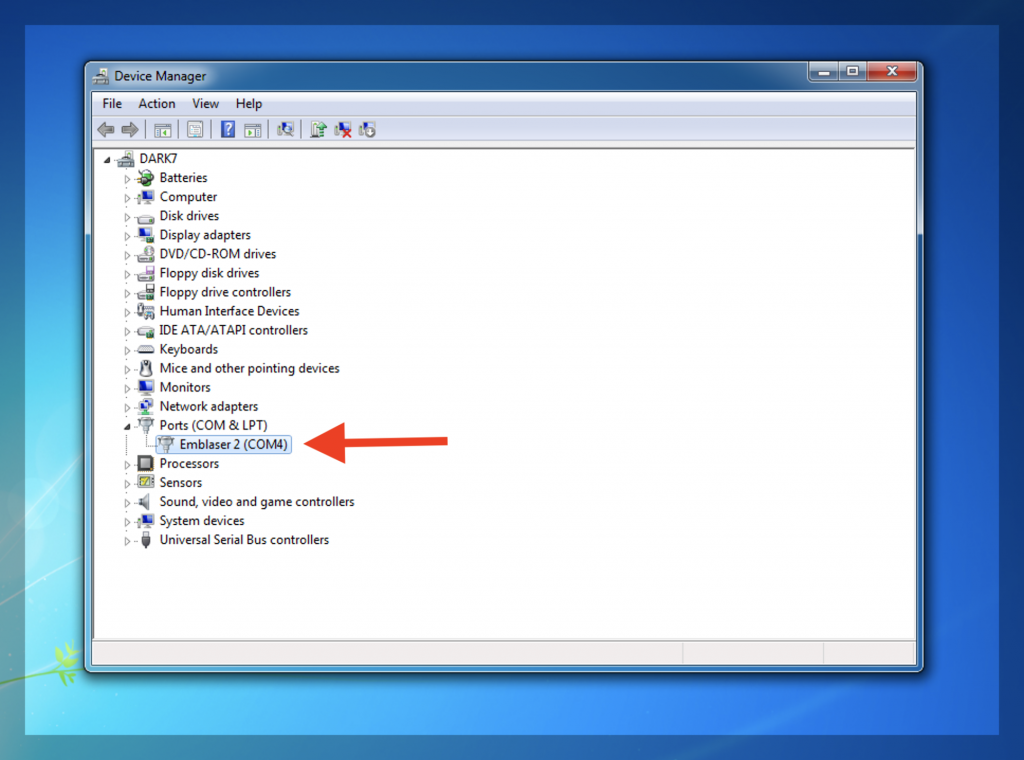
Your device driver should now be installed.
If your Emblaser is not recognised, unplug and re-plug the Emblaser USB cable to your computer.