
LightBurn is the new software package for the Emblaser. This article will outline the steps needed to update your Emblaser 1 (A3 or A4) to the latest Firmware, which LightBurn supports.
IMPORTANT: Due to some changes in the Firmware, Cut2D-Laser may not function correctly. If you need to continue using Cut2D-Laser, we recommend not performing this update.
Step 1: Purchase a LightBurn license key
Visit our online store to purchase a LightBurn Update License Key: LINK
OR
Proceed to the next step if you wish to trial LightBurn for 30 days.
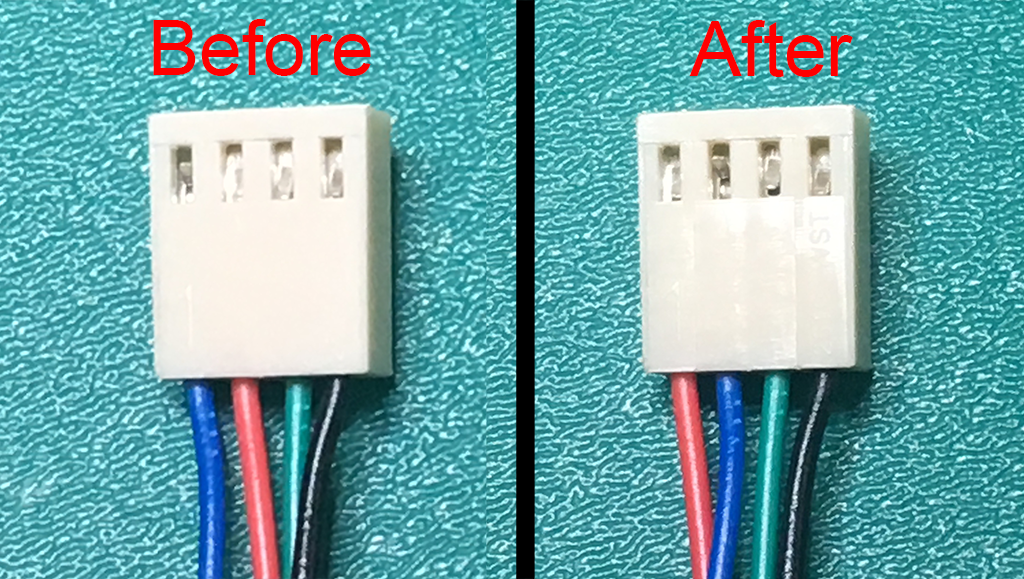
Step 2: Modify the motor cable
Due to revisions in the latest firmware, you will need to make a small change to the SHORTER motor cable.
Use a pin or very small screwdriver to gently depress connector clip for the red and blue wires to remove them from the connector.
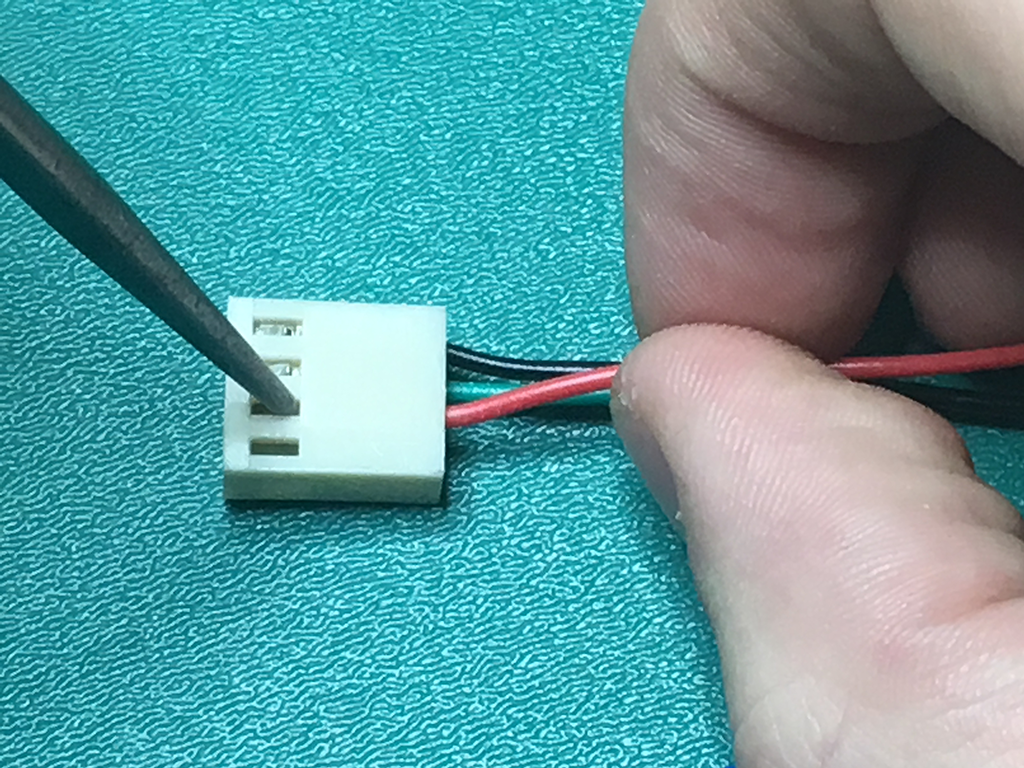
Then re-insert them as shown in the image below.
The new order should be: RED – BLUE – GREEN – BLACK
Step 3: Update the firmware
Download the latest version of the Emblaser 1 Firmware from here: LINK
Ensure your Emblaser 1 is plugged a USB port and turned on.
For Windows Users
- Download and install XLoader from here: LINK
- Run the XLoader.exe file to start the program. You will see this window:
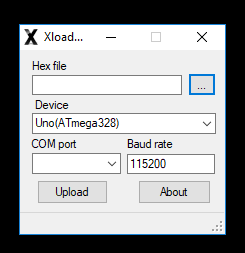
- Select the Firmware file you downloaded for you your machine.
- Ensure the ‘Device‘ selected is ‘Uno(AtMega328).
- Select the ‘COM port‘ for your machine from the drop down list.
- Ensure the ‘Baud rate‘ is set to 115200
- Press ‘Upload‘
For Mac / OSX Users
- Download and install HexUploader from here: LINK
- Run the HexUploader app. You will see this window:
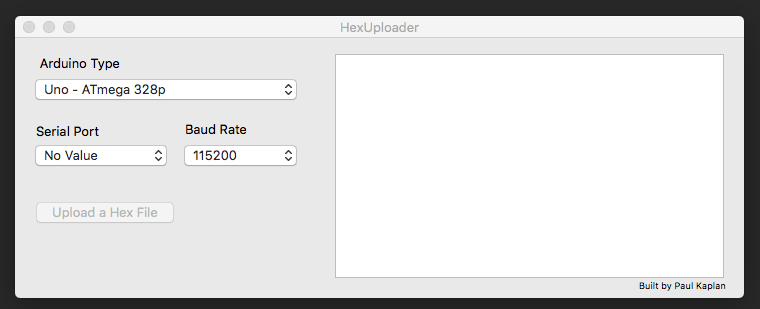
- Ensure the ‘Arduino Type‘ is set to ‘Uno – ATMega 328p‘.
- Select the ‘Serial Port‘ for your Emblaser from the drop down list.
- Ensure the ‘Baud Rate‘ is set to 115200.
- Click the ‘Upload a Hex File‘ and select the Firmware you downloaded.
Step 4: Download & install LightBurn (trial)
Download and install the latest ‘trial’ version of the LightBurn: LINK
If you purchase a license key during the trial you can enter this in: Help > Manage License. This will allow you to continue using LightBurn.
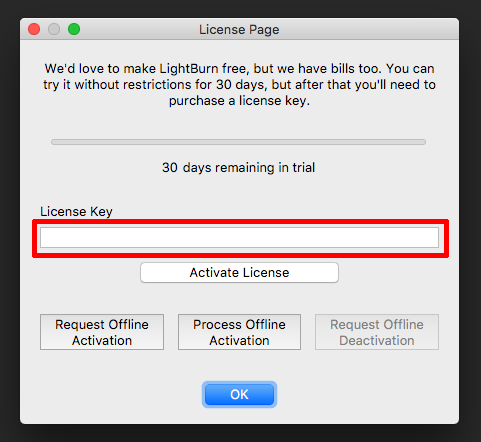
Step 5: Enter license key
When you first run LightBurn, you will be presented with the License Page. Enter your license key as shown and press ‘Activate License’. You will then be prompted to restart LightBurn.
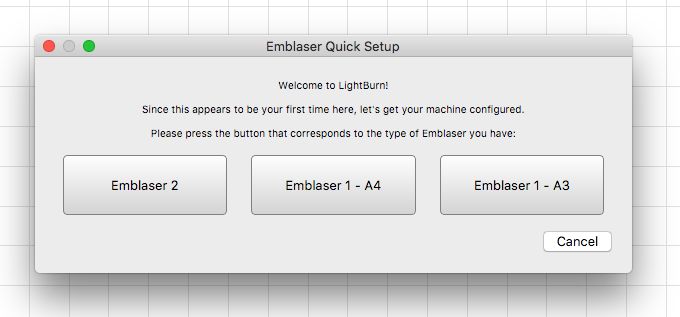
Step 6: Create Emblaser 1 Device
When LightBurn restarts, you will be presented with the ‘Emblaser Quick Setup’ window.
Select the appropriate ‘Emblaser 1’.
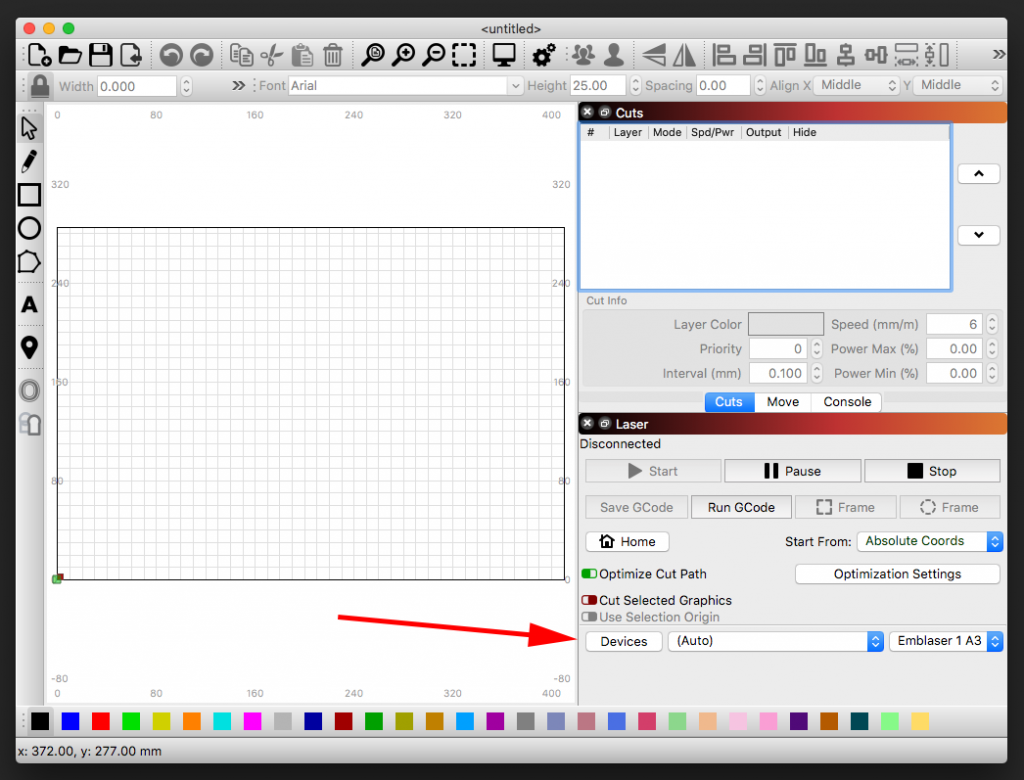
Step 7: Ready To Go
Your Emblaser 1 device will now appear within the ‘Laser‘ tab and will automatically find and connect to your machine.
If it does not auto-connect, choose your machine’s port from the drop down list.
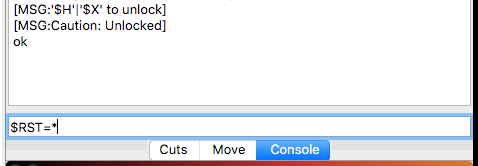
Step 8: Reset GRBL settings
With your Emblaser connected, select the ‘Console‘ Tab.
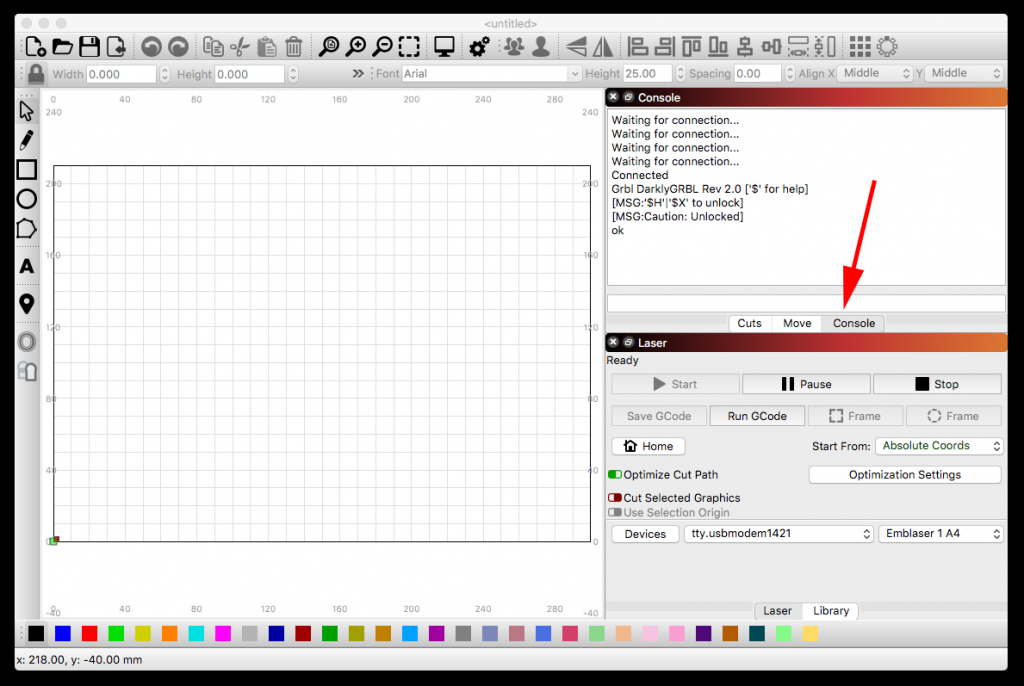
Enter the command: $RST=* and press enter, as shown below.
Next, enter the command: $#
This will return a list of co-ordinate information. Ensure that all the values are 0.00 as shown in the image below.

Done!
You can now start using LightBurn with your Emblaser 1.
*** Be sure to ‘Home’ your machine. ***
