
The Focus Calibration wizard is accessible from the Emblaser dropdown in the menu bar within LightBurn.
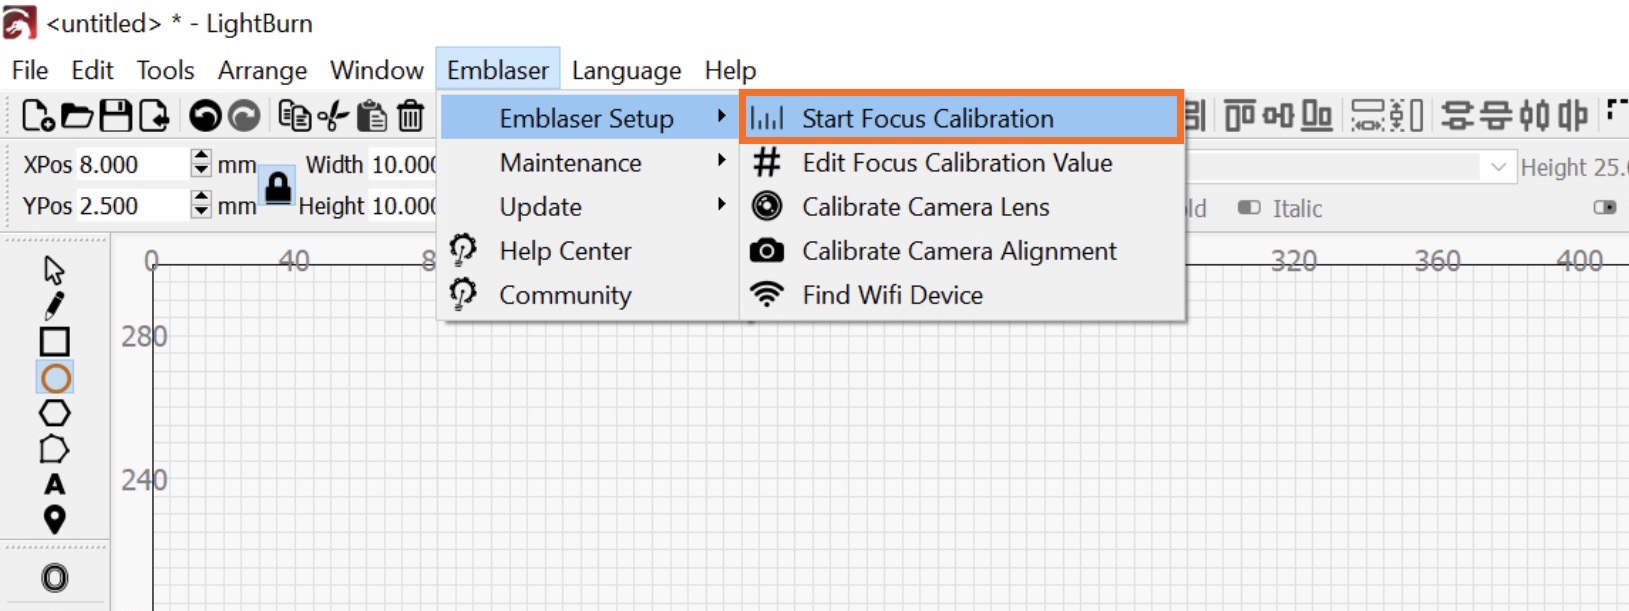
The wizard is designed to help you identify the best possible focus for your Emblaser. Having the Focus Value set correctly is critical as several other settings rely on this.
If you are having trouble because the Focus Calibration program is not producing clear lines, all lines are out of focus, or no lines are engraved, please check the following:
Calibration Cards / Setup:
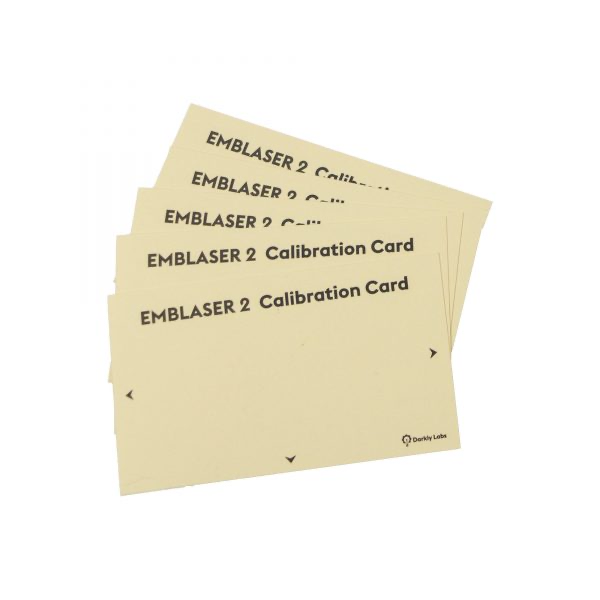
Be sure to use the included Calibration Cards (pictured above). Alternatively, cream manilla folder card also works. Note: white paper will not work as it is too reflective.
The card should be positioned on the Silicon Mats or 10mm above the Base Plate in the centre of the workspace, as per the instructions in the wizard. Precise alignment is not critical.
It is normal for not all of the lines of a Focus Calibration to be visible, or for some of the less focused lines towards the edge of the card to be ‘patchy’.
Focus Lens Orientation:
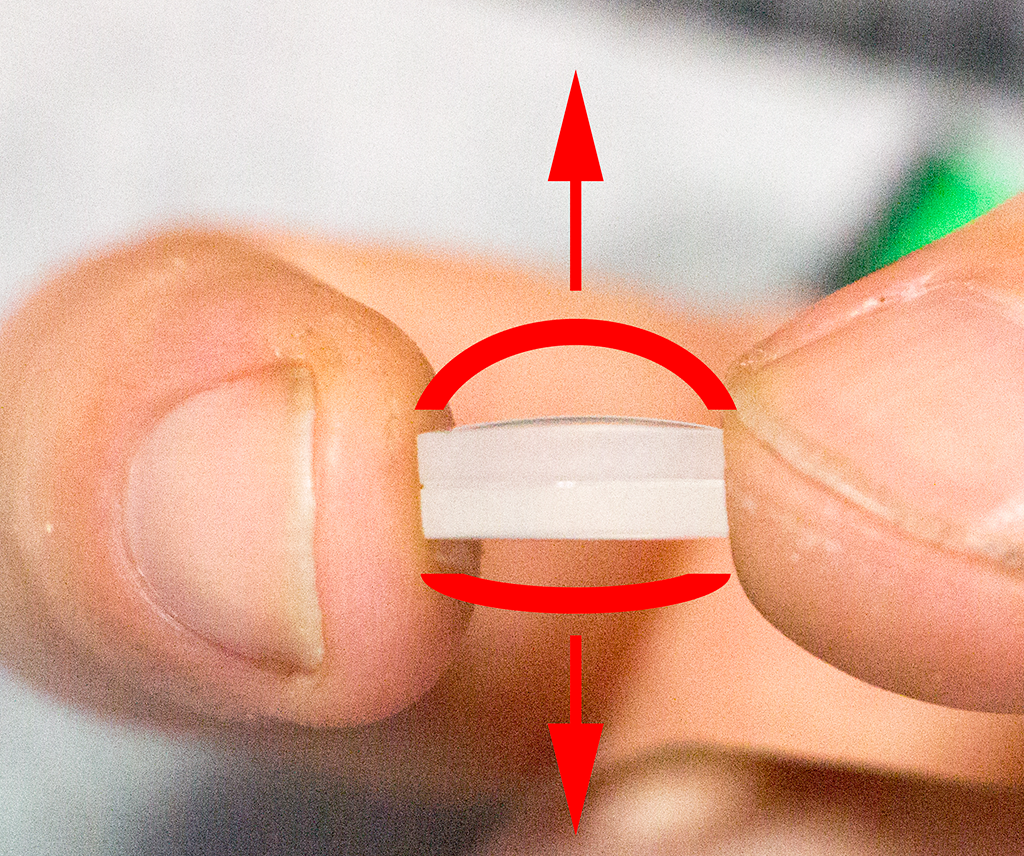
Make sure that the Focus Lens is installed in the correct orientation, with the more curved surface facing up. If the lens is installed incorrectly cutting performance will be effected.
Z-Axis Motion:
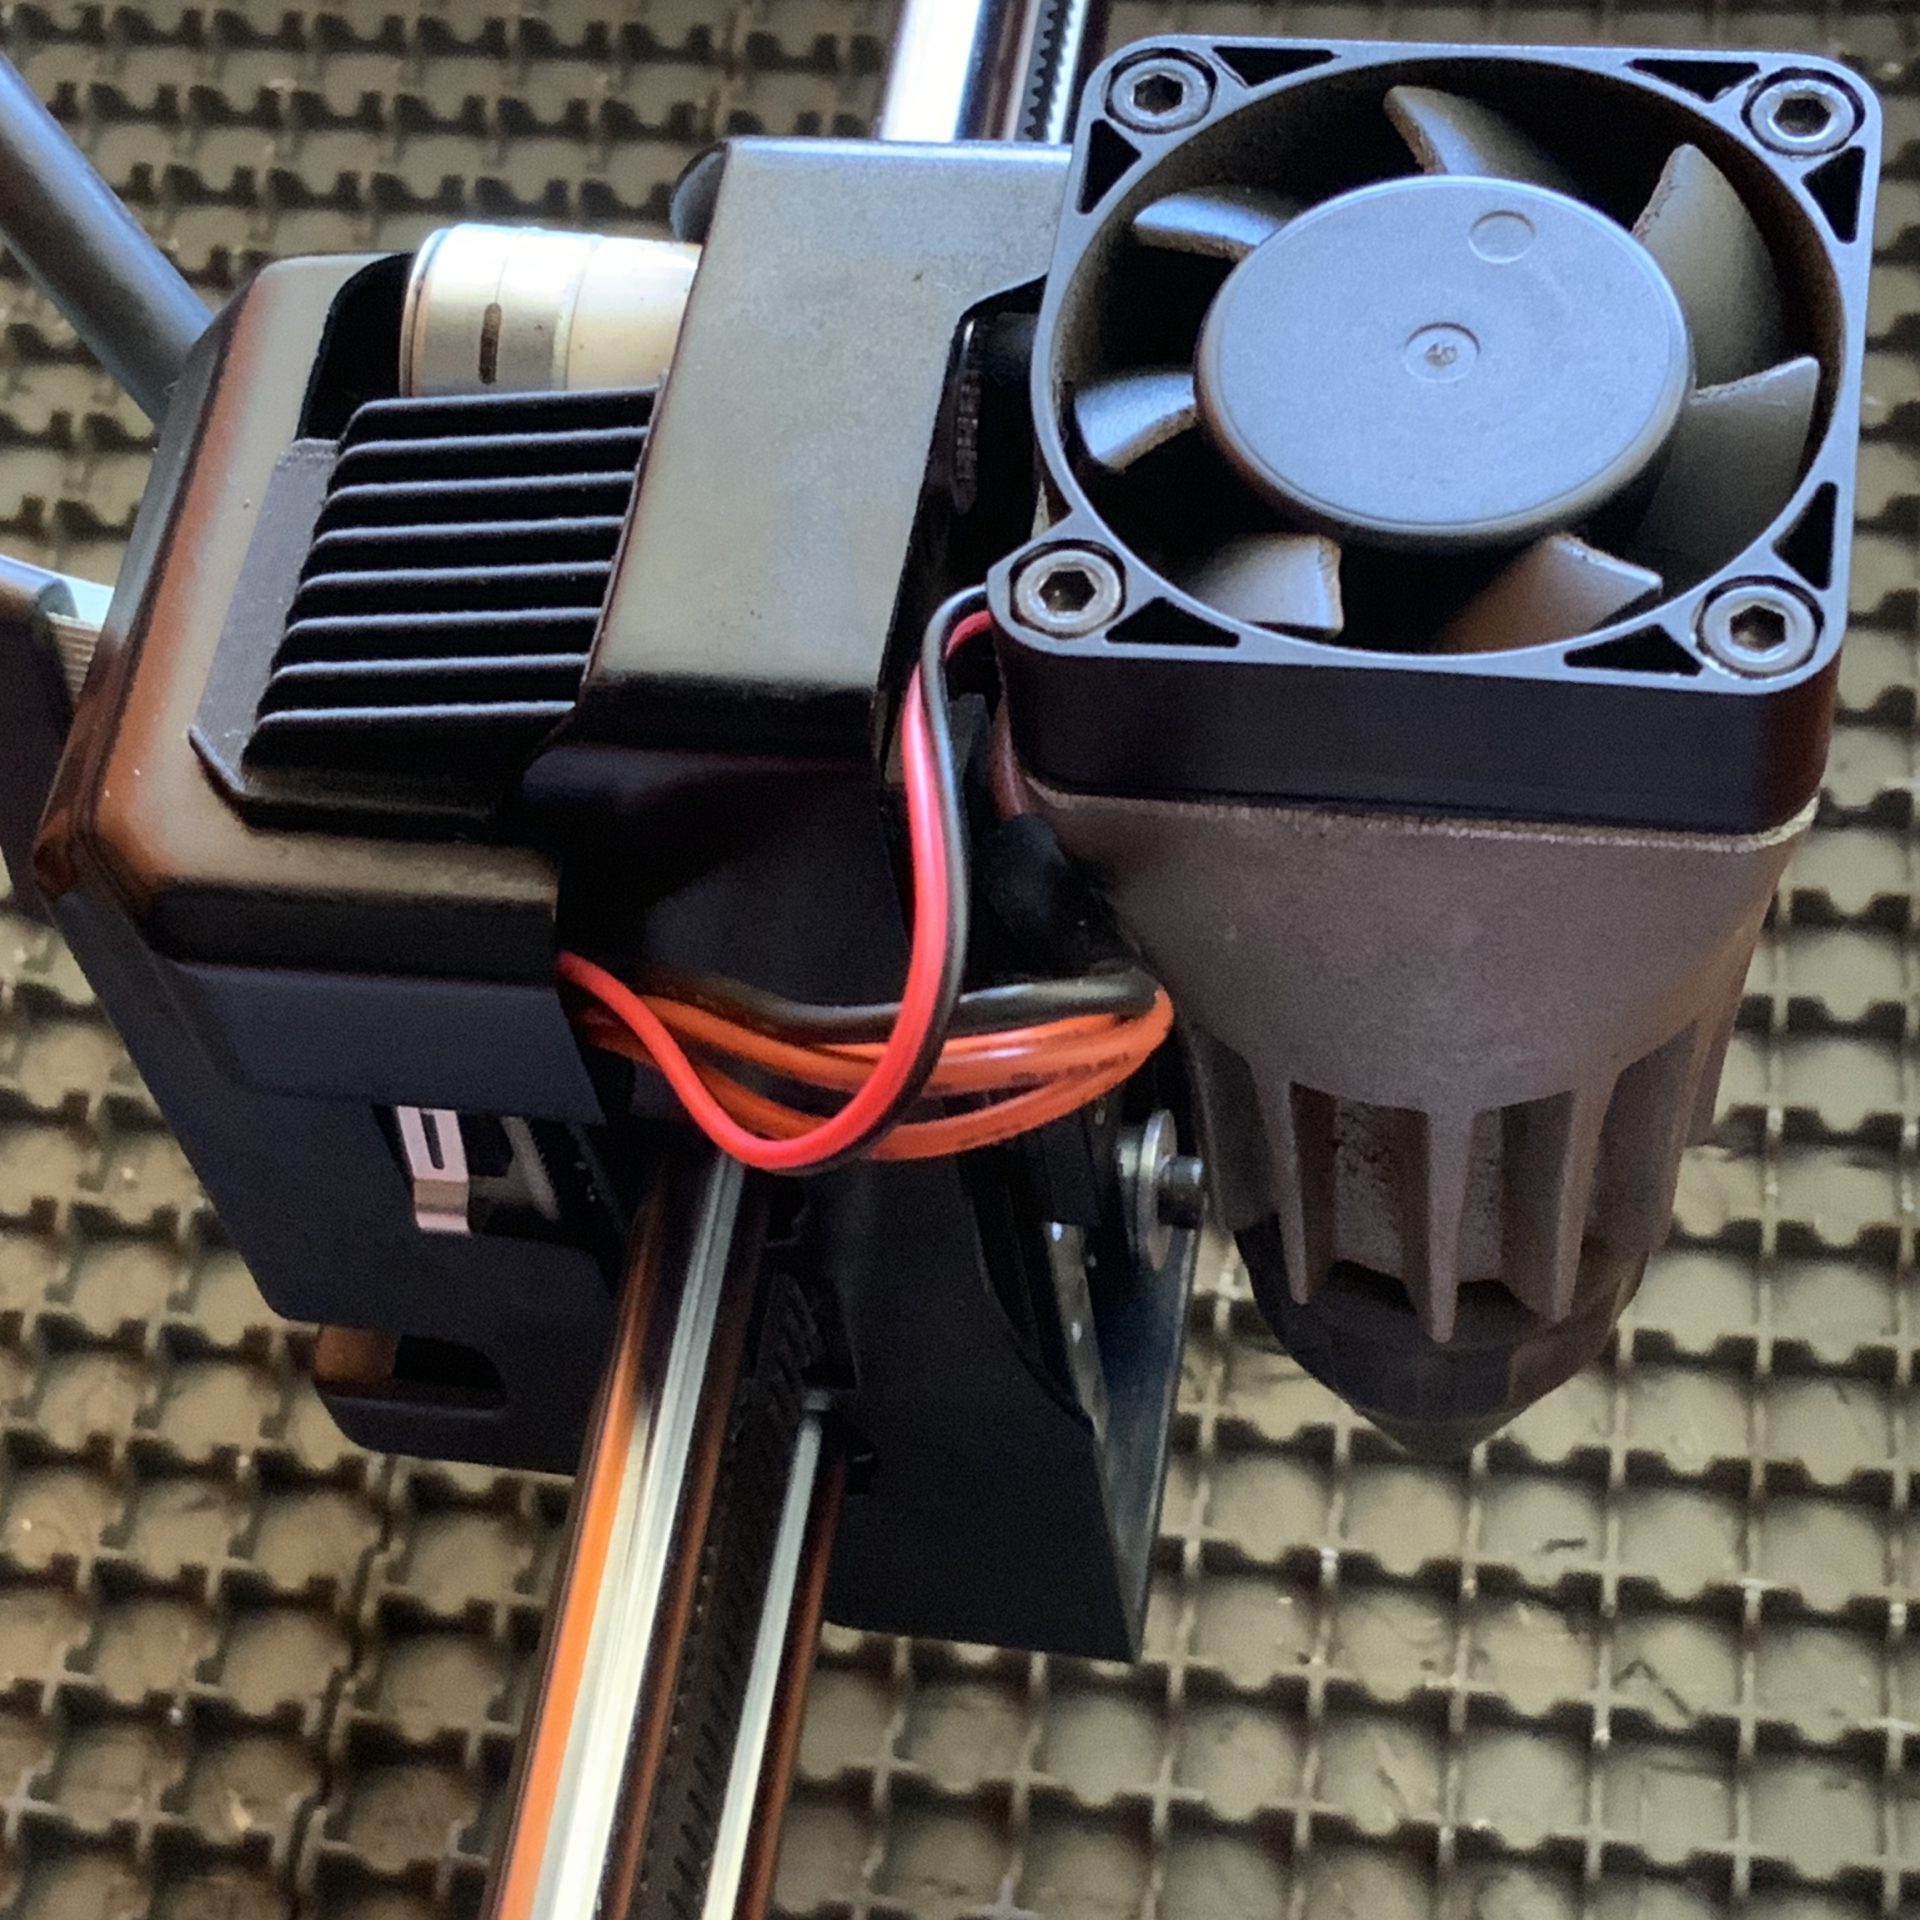
Sometimes the Laser Cooling Fan or Laser Diode cables can catch on the Laser Carriage when lowering, particularly after assembly, or maintenance is performed. The wires may need to be moved to the side of the Laser Carriage to ensure they do not restrict Z-Motion.
Laser Driver PCB Power & Communications:
If the Laser Driver PCB is receiving power from the Controller Board the Laser Cooling Fan on top of the Laser Unit should spin when you turn on your Emblaser.
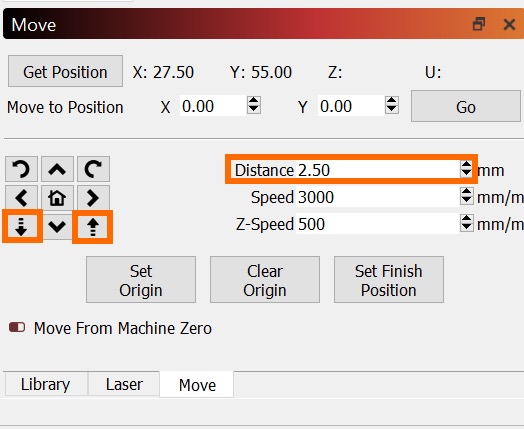
You can also use the [Up]/[Down] buttons in the Move tab to check that the Z-Axis is responding. Be sure the Distance value is set above 2.00mm.
If the Z-Azis is unresponsive, or moves intermittently, or in the wrong direction please contact support@darklylabs.com
Lens Housing Position:
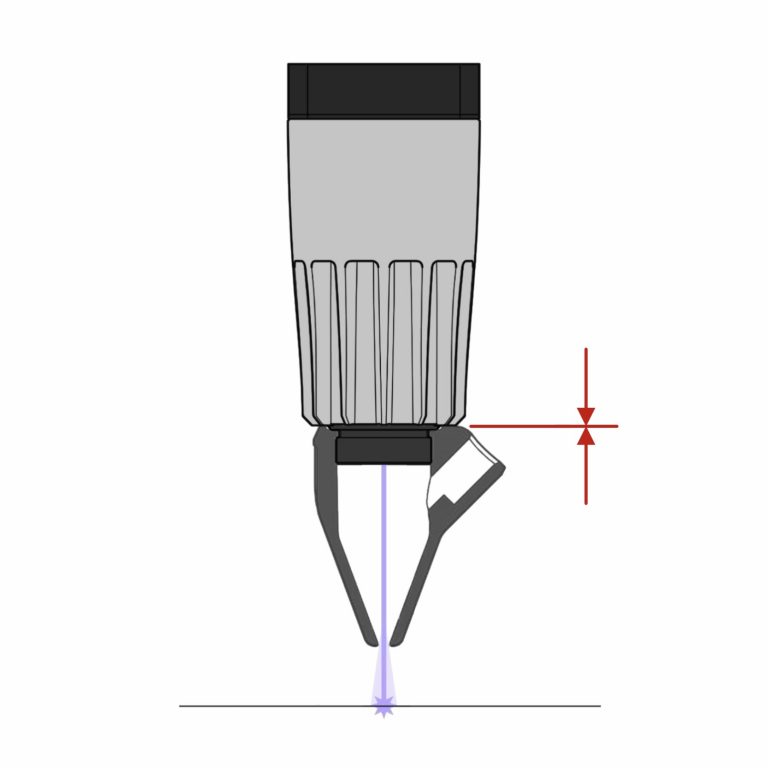
Check that the Lens Housing is set at the correct height within the Laser Unit:
- If you have an Aperture Nozzle (included with the Air Assist Accessory), when installed on the Lens Housing, the Nozzle should sit flush against the bottom of the Laser Unit.
- If you do not have an Aperture Nozzle, you will see a recessed ring near the bottom of the Lens Housing. The top of this ring should sit flush with the bottom of the Laser Unit.
There is a small grub screw that retains the Lens Housing located on the rear face of the Laser Unit, and accessible when the Laser Unit is lowered completely. This screw tightens against a corresponding recess on the Lens Housing to set its height.
Calibration works but cutting is out of focus/unsuccessful:
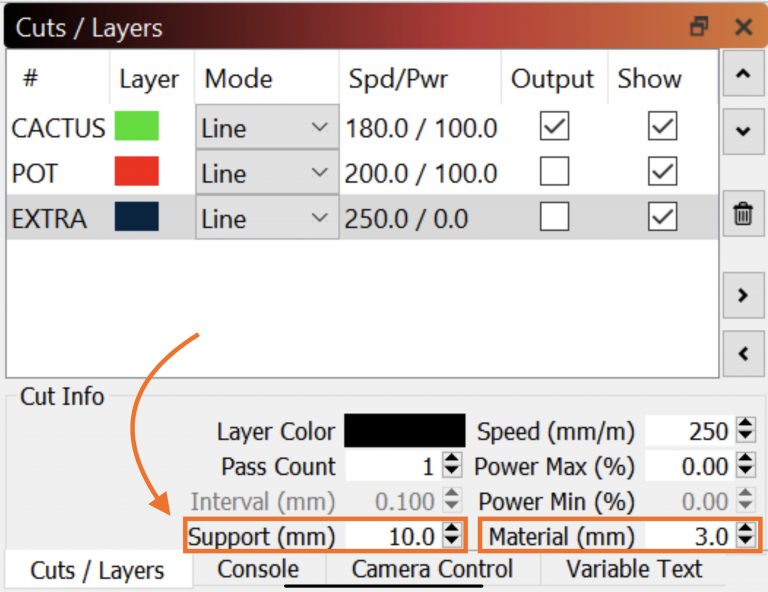
Check that the Support and Materials values in the Cuts / Layers tab reflect the correct values.
If using the silicone Cutting Mats, Support should be 10mm.
If you are cutting 3mm ply, for example, Material should be 3mm.
Using WiFi:
The Focus Calibration process needs to be performed using a USB connection. Once complete, the focus value is stored on the Emblaser and you can return to a WiFi connection if desired.
If the issue remains:
If you are unable to resolve the issue please send through a description of the issue, the steps above that you tried and images of the front and back of your most recent Focus Calibration attempt to: support@darklylabs.com
