
This article contains a list of the first things to check whenever you feel your Emblaser 2 / Core is not performing at it’s best, namely:
- Enable the Laser
- Focus Lens
- Focus Calibration
- Air Assist Nozzle
- Support and Material Settings
- Cut Settings
Enable the Laser:
Make sure the Enable Button has been pressed, and that the red Enable LED is ON.
Focus Lens:
The Focus Lens, in most applications, is the part of the machine that needs the most regular attention and is identified in the image below.
Note: Not all Focus Lens Assemblies have the same Lens Cap and/or an O-Ring.
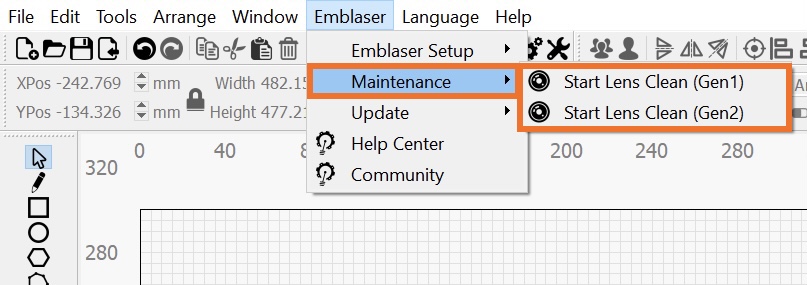
It is recommend that the Focus Lens be cleaned weekly or more frequently if required, as per the instructions accessible from LightBurn via the menu bar: Emblaser > Maintenance > Start Lens Clean
Gen 1 or Gen 2:
To check which version you have, you can refer to this guide: Emblaser 2: Which Lens Unit do I have?
Lens Orientation:
To operate correctly, the Focus Lens must be installed with the curved face upwards, when installed in the machine. If the Lens is installed backwards this will impact the size of the focal point and cutting performance.
Focus Calibration:
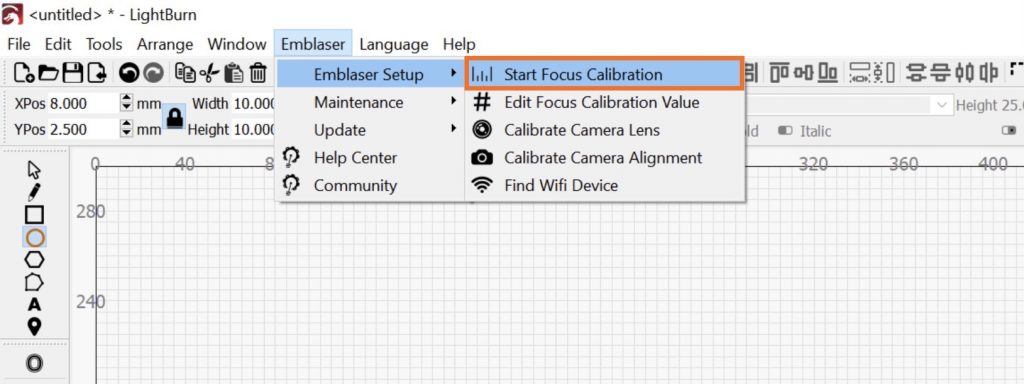
After cleaning the Focus Lens, if you are still experiencing issues, it is best practice to run a Focus Calibration from LightBurn, via the menu bar: Emblaser > Emblaser Setup > Start Focus Calibration
Remember to remove the Air Assist Nozzle when performing a Focus Calibration.
For further information on calibrating, please see this article: LightBurn: Focus Calibration Wizard (0.9.19 and later)
Air Assist Nozzle:
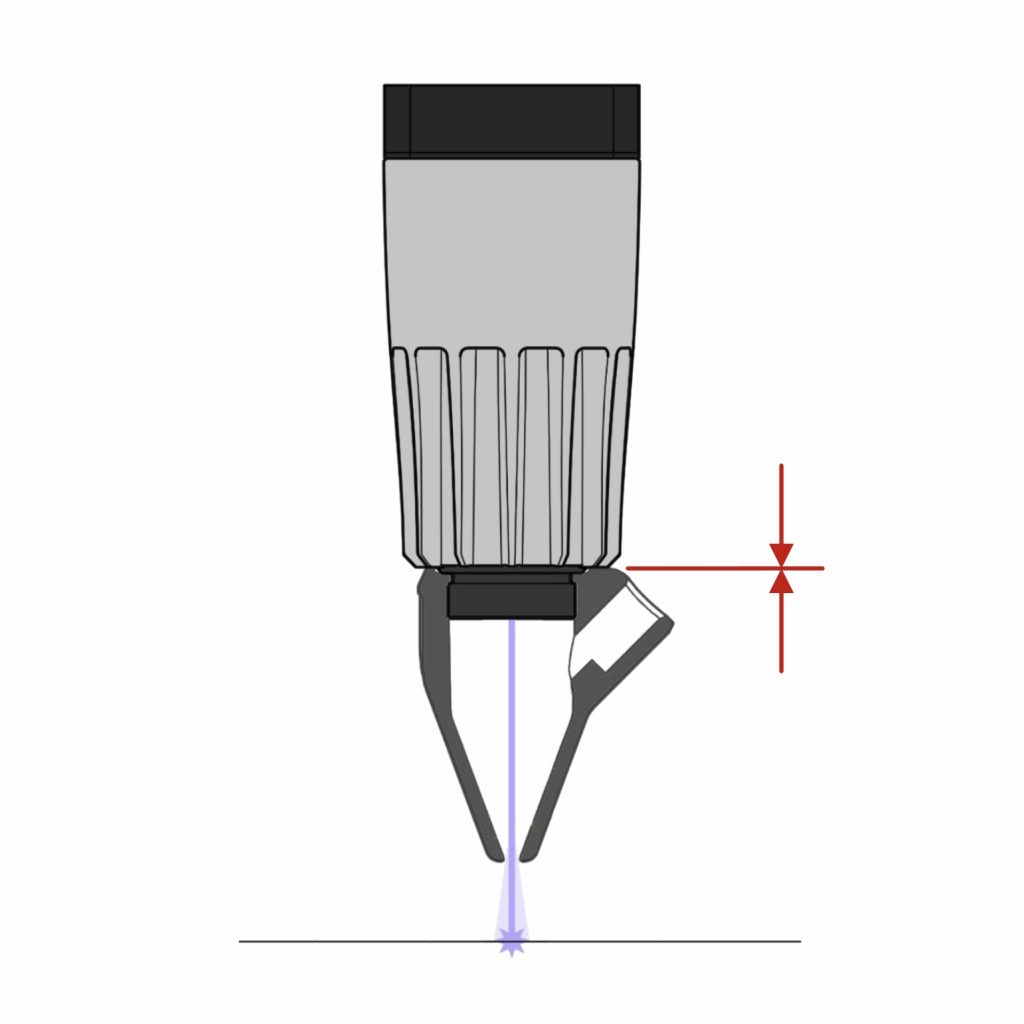
Sometimes the Air Assist Nozzle can interfere with the laser beam.
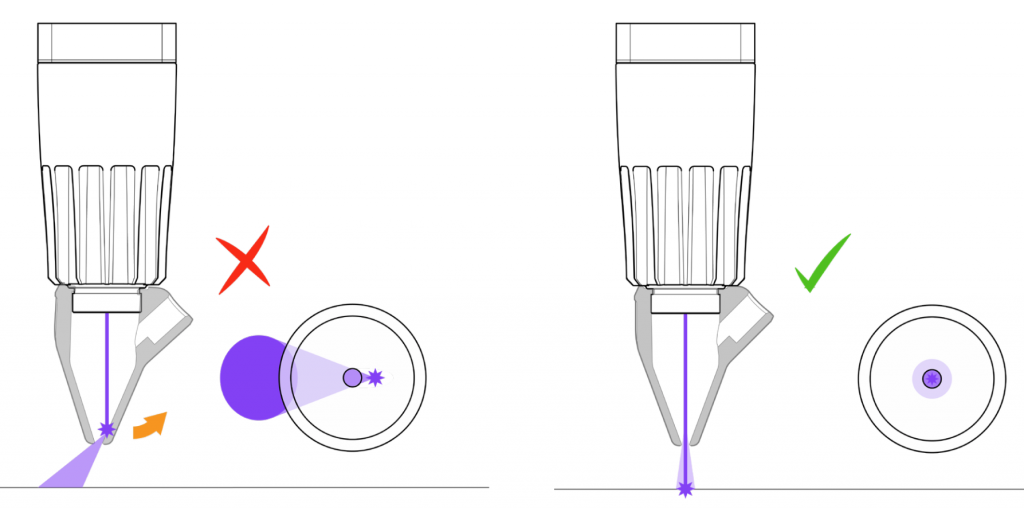
Ensure your Nozzle is positioned in the groove against the face of the Laser Unit itself, as shown in the image below:
Support and Material Settings:
LightBurn calculates the location of the surface of the material based on the Support and Material values. When combined with the Focus Calibration value, this insures the focal point of the laser is at the optimal height.
The Support and Material values can be edited from the Cuts / Layers tab.
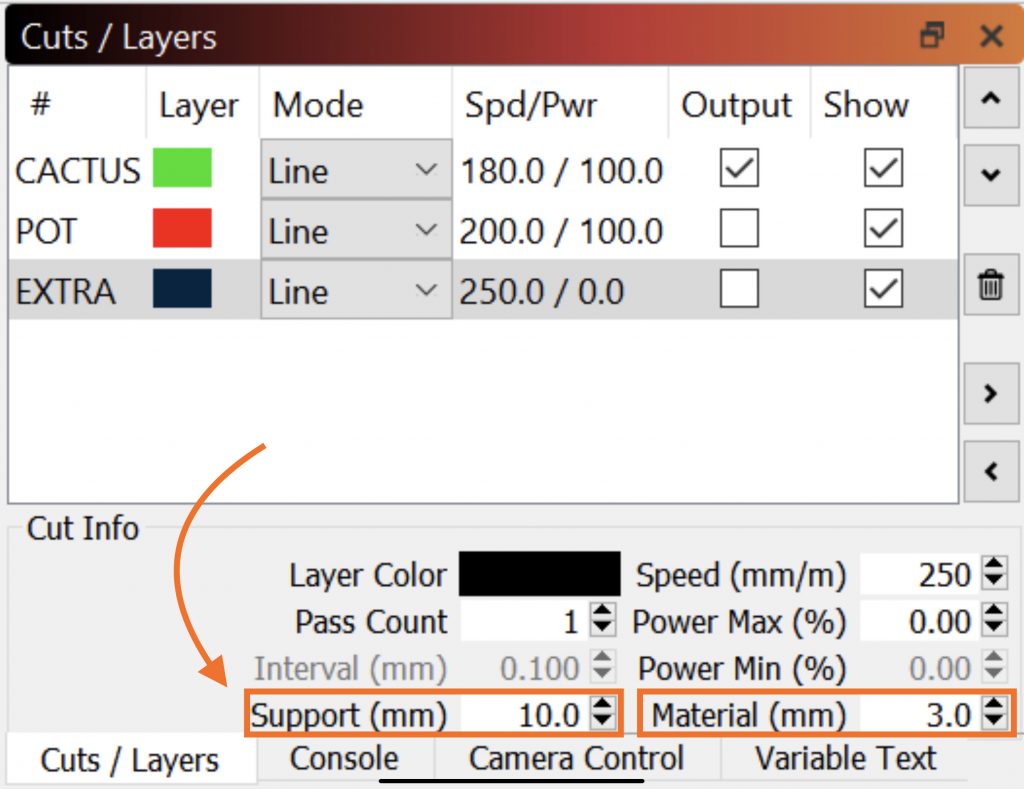
It is not recommended to enter a Material value that differs from the ‘as measured’ material thickness, as this in most cases, negatively effects cutting performance.
The Support value should be 10mm if using the Silicon Mats, or reflect the ‘as measured’ value if not using the mats.
Cut Settings:
We recommend starting with the Library settings for a material, then making any necessary tweaks to produce consistency results on your machine, with the material you have.
You can read more about the Materials Library here: LightBurn: Materials Library
If the issue remains:
If you are unable to resolve the issue after the above steps, please send your location, machine type (E-Core / E2) a brief description of the issue and an image of the front and back of your most recent Focus Calibration attempt, to: support@darklylabs.com
If you have a sample LightBurn file you can share, as well as an image of the resulting cuts, this would also be helpful.
