
This article will explain how to use AngryIP (free 3rd party WiFi scanner software) to check that your Emblaser is connected to your local network.
This page assumes you have already followed the WiFi Setup instructions in the Emblaser Core or Emblaser 2 manual and have entered your local network details in the black and orange window that opens after you first connect to your Emblaser’s WiFi.
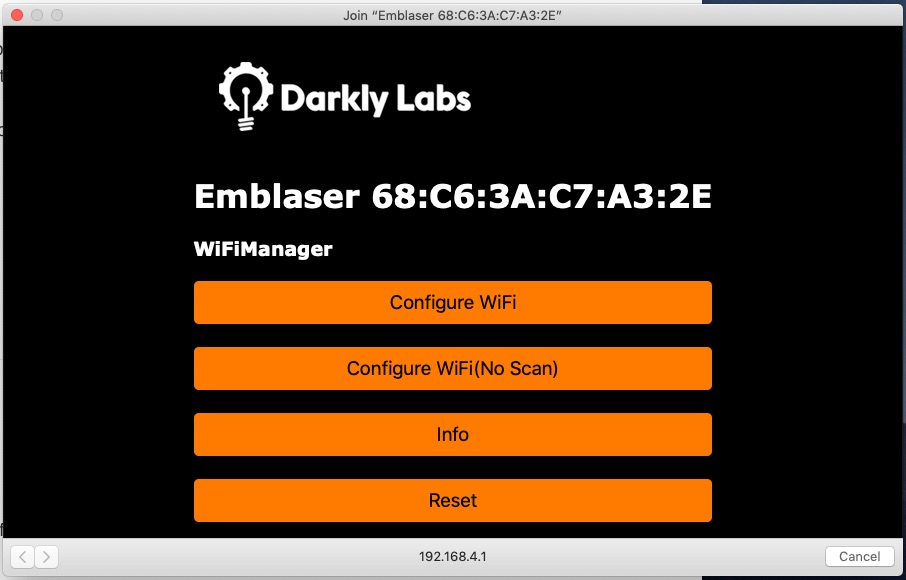
If you have not seen this window, please refer to the WiFi setup section of the relevant manual, linked to above.
Step 1:
Download AngryIP from this LINK and install the application.
Step 2:
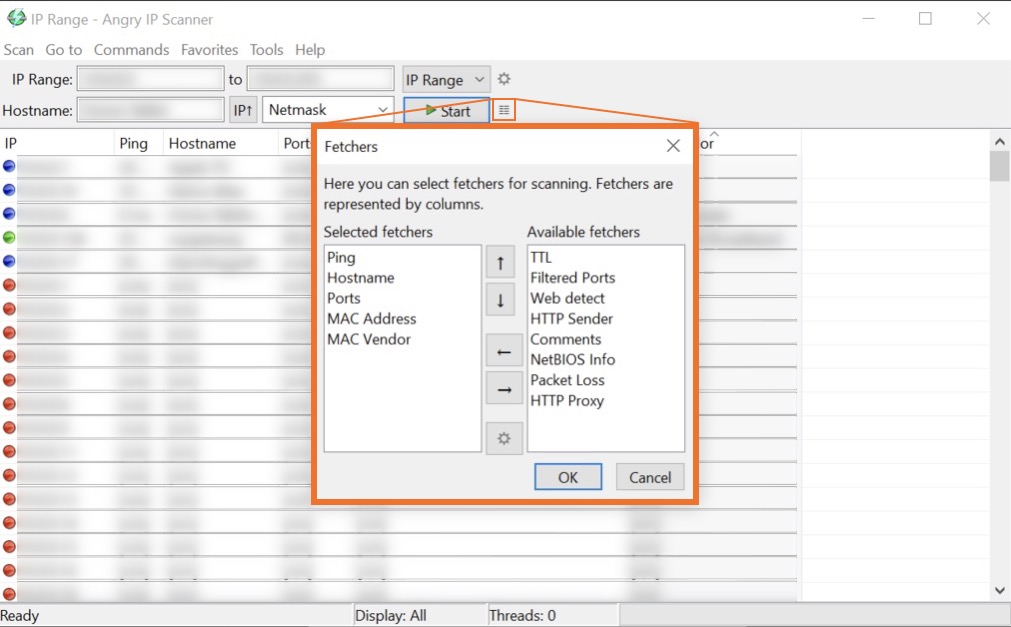
Open AngryIP and insure the view is setup as follows by left clicking the icon with three lines beside the [Start] button:
Step 3:
The software should automatically detect the IP Range to scan based on your local network.
Click the [Start] button, then wait until the scan is complete and click [OK] on the pop-up completion alert.
Step 4:
Left click on the MAC Vendor column heading and select Sort by MAC Vendor.
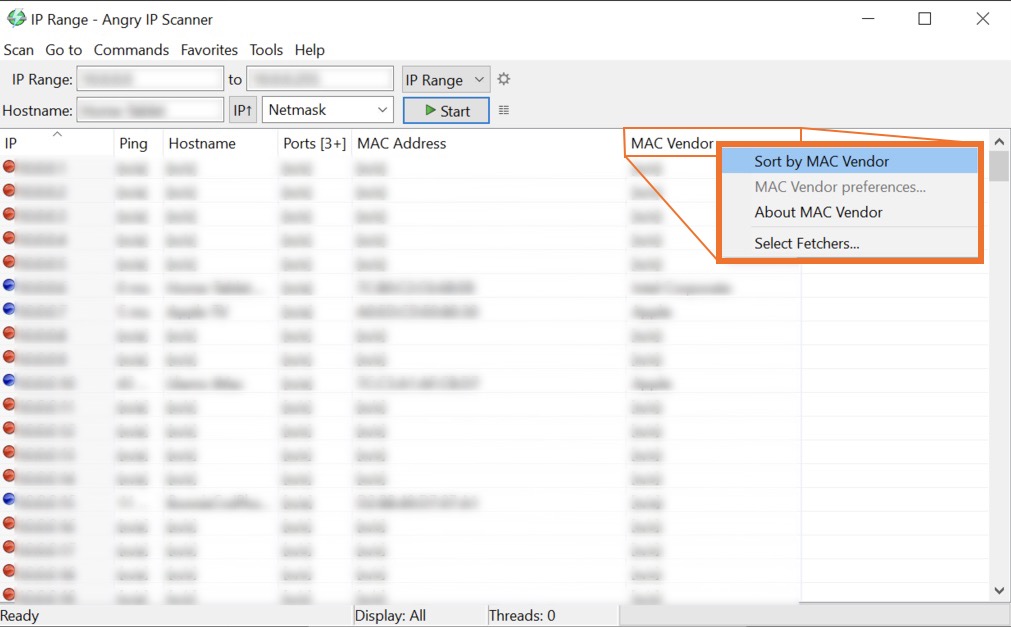
Step 5:
Look down the MAC Vendor column, the Emblaser will likely appear as one of the following:
- Emblaser
- espressif
Emblaser not found:
If you are unable to locate the Emblaser, please restart your router and Emblaser and rerun a search by clicking [Start].
If this also fails to locate the Emblaser, please send a screenshot of the search results as well as the WiFi menu on your computer (located in the Menu Bar at the top of the screen on a Mac, or the System Tray section of the Task Bar in Windows) to: support@darklylabs.com
Step 6 (Emblaser found):
If you are able to locate the Emblaser this indicates it is connected to your local network and should be visible from within LightBurn using the WiFi search.
If it is not visible the WiFi search – in the Laser tab click [Device] then in the Devices window, [Create Manually].
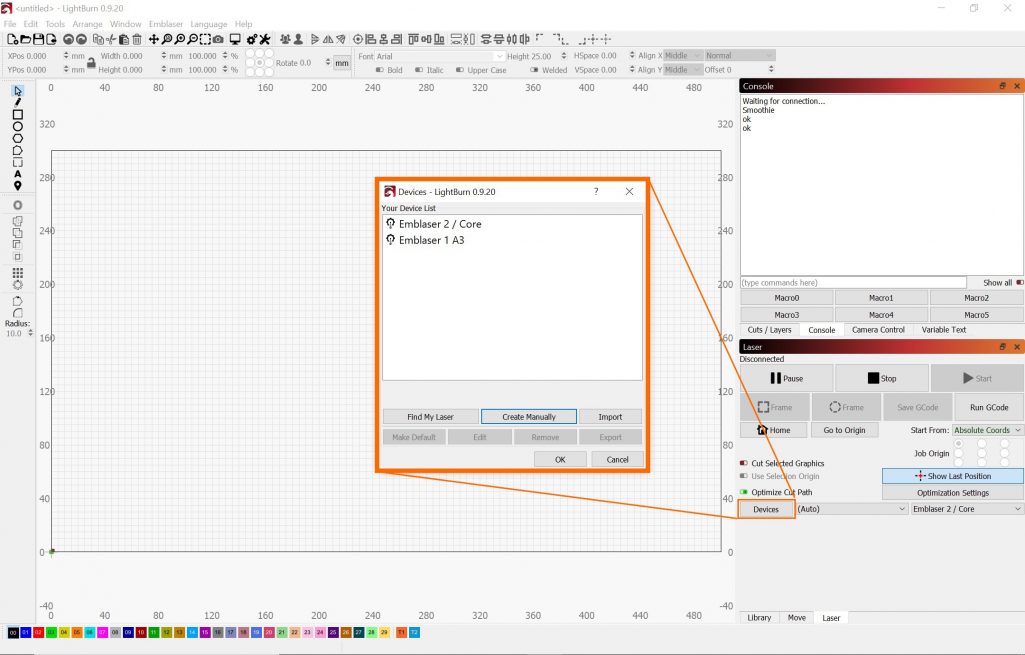
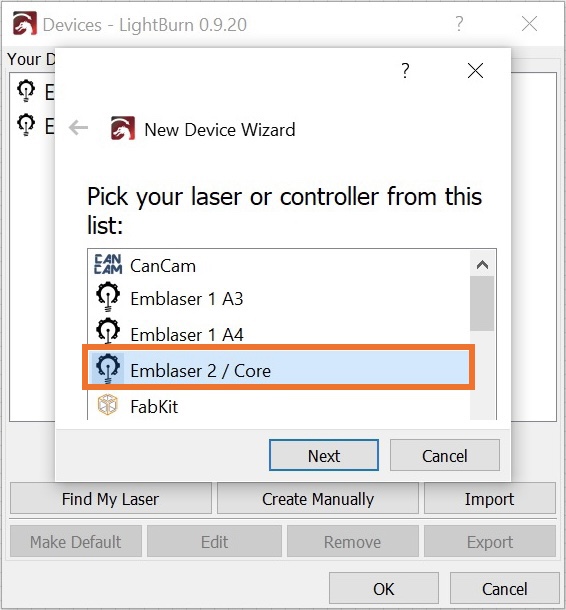
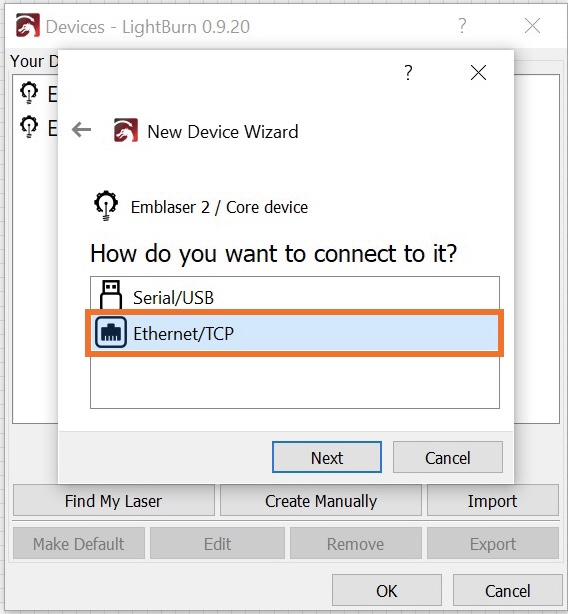
Step 7:
Next, select Emblaser 2 / Core, then Ethernet/TCP
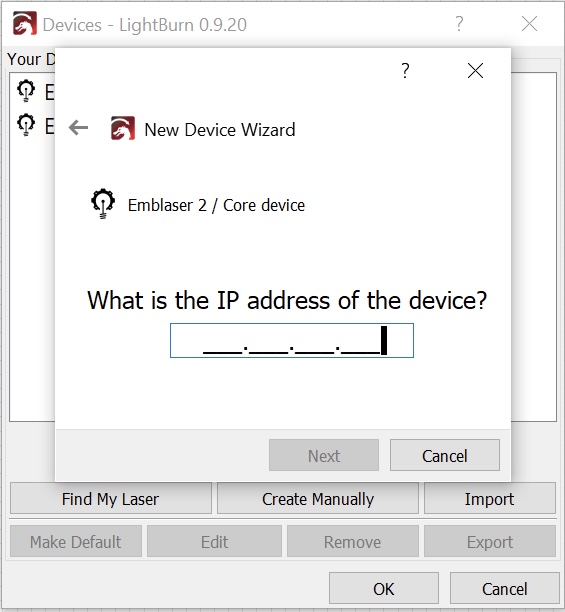
Step 8:
Following this, make a note of the IP address listed for the Emblaser in AngryIP, then enter it into LightBurn.
Step 9:
You should now be connected to the Emblaser via WiFi.
Note: The Workspace camera is not supported over WiFi
If you are still having trouble, please send a screenshot of the AngryIP search results as well as the WiFi menu on your computer (located in the Menu Bar at the top of the screen on a Mac, or the System Tray section of the Task Bar in Windows) to: support@darklylabs.com
