This article will explain the steps to replace your original v1 Air-Assist accessory with the new version.
v2 Air-Assist can be bought on the Darkly Labs store here.
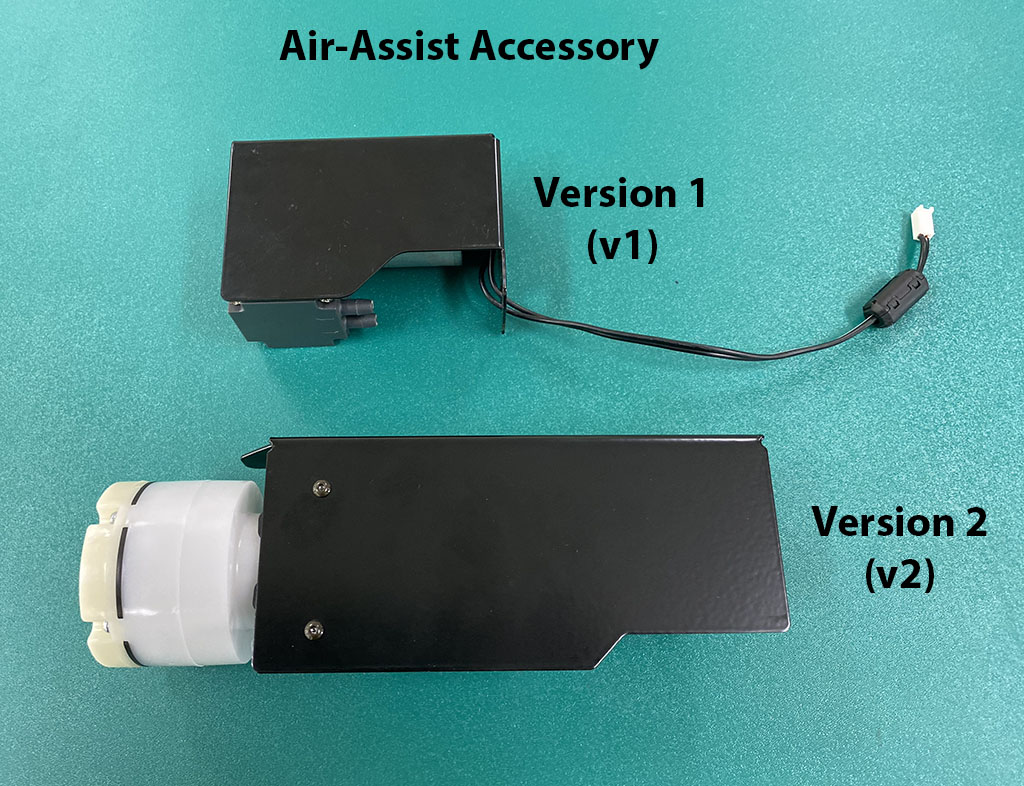
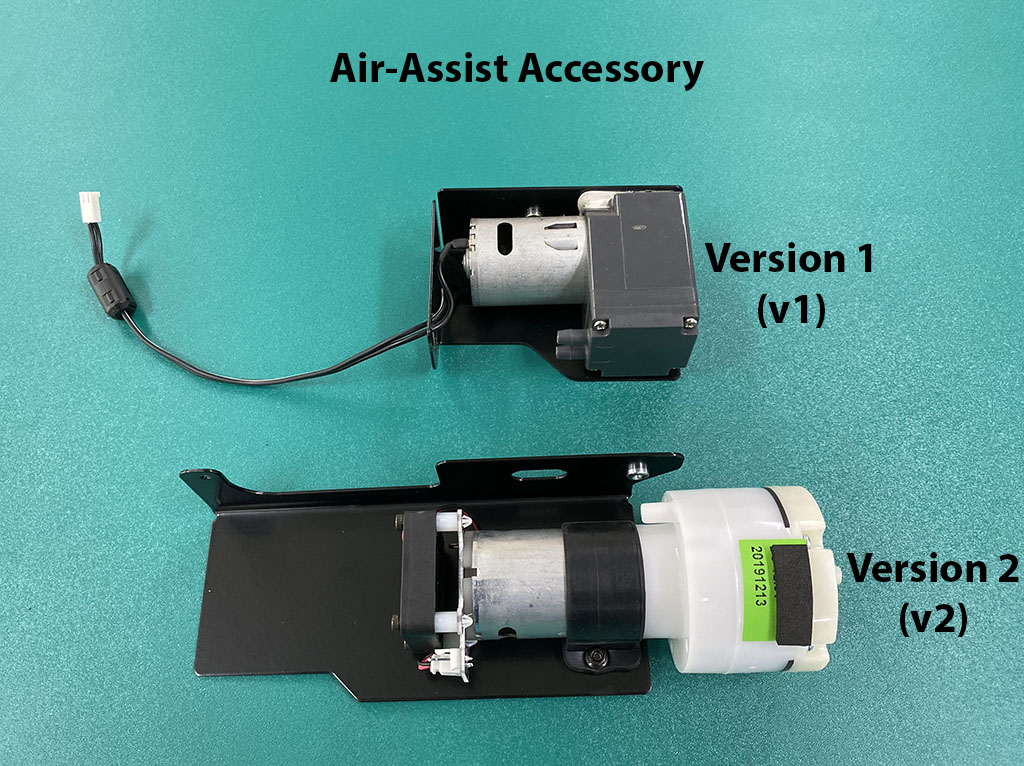
The two images below will help you identify the differences between the v1 & v2 Air-Assist accessories.
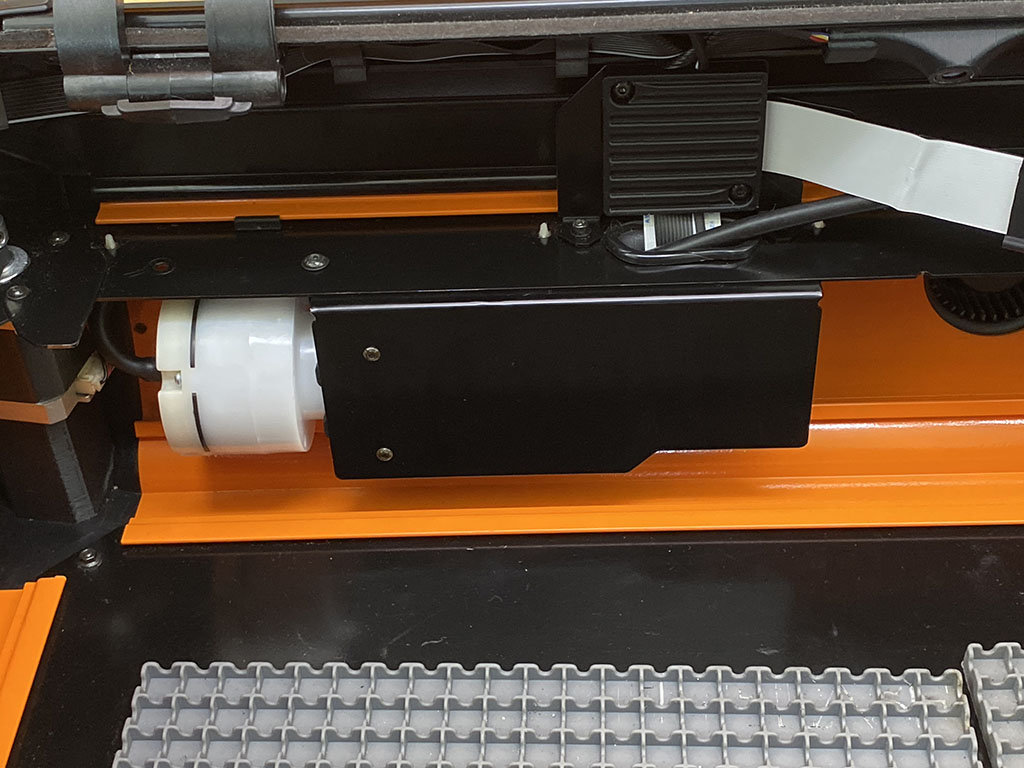
Step 1:
Identify that you have a v1 Air-Assist accessory installed in your Emblaser2.
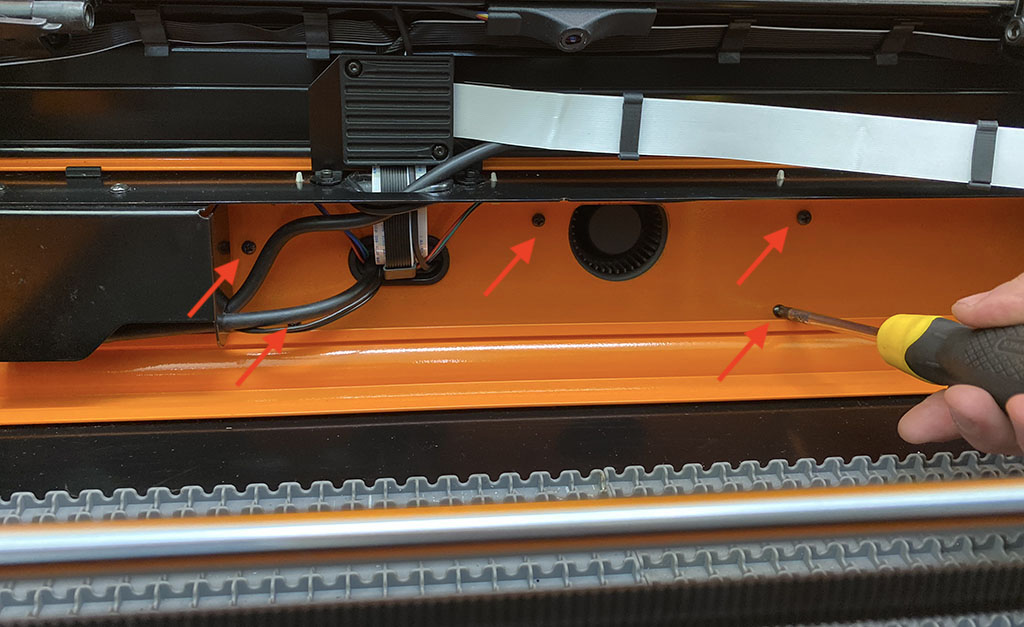
Step 2:
Remove the 5 screws holding the electronics compartment in place.
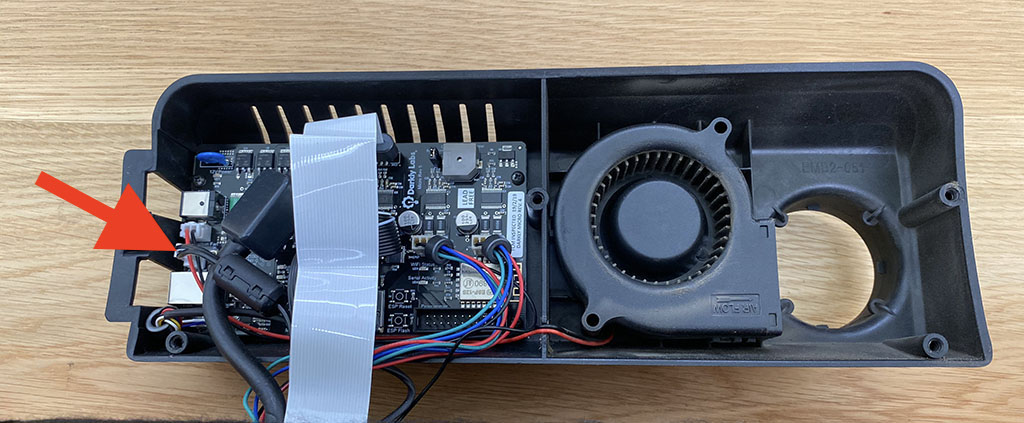
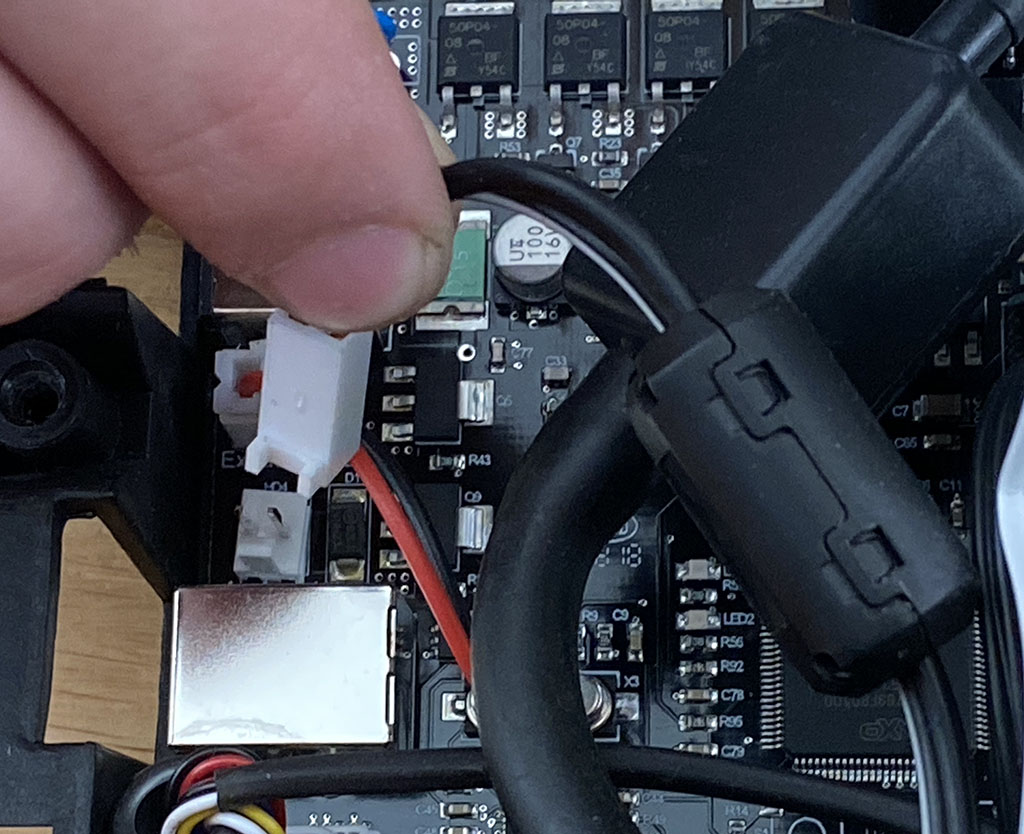
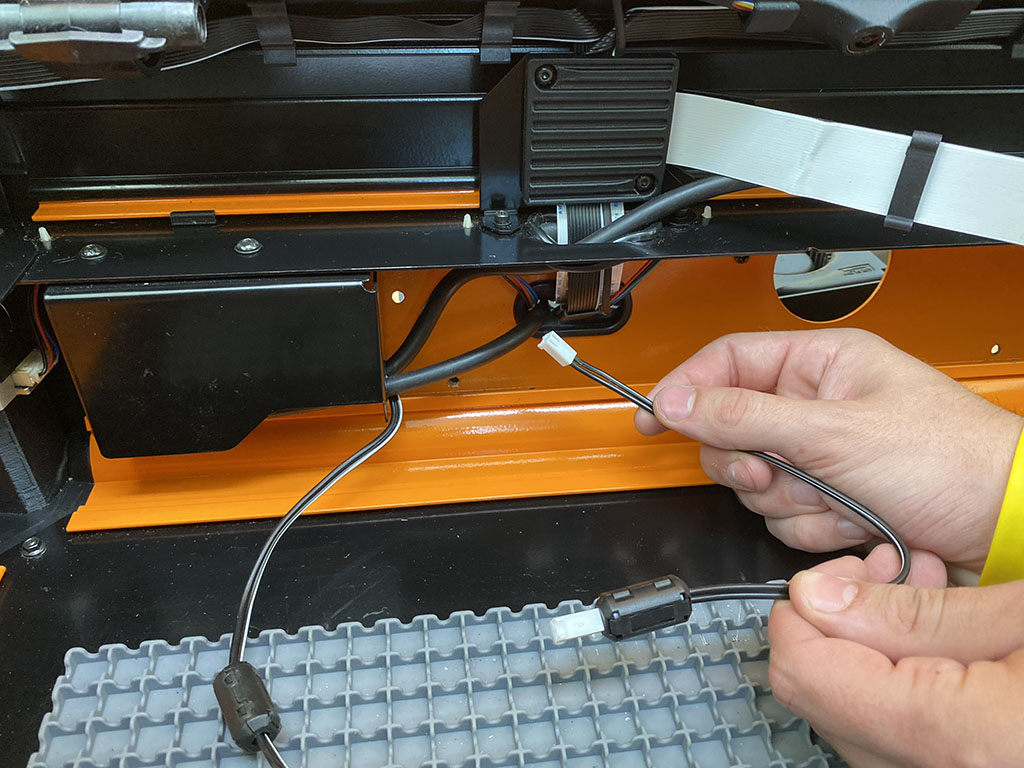
Step 3:
Locate and unplug the Air-Assist cable from the Controller board.
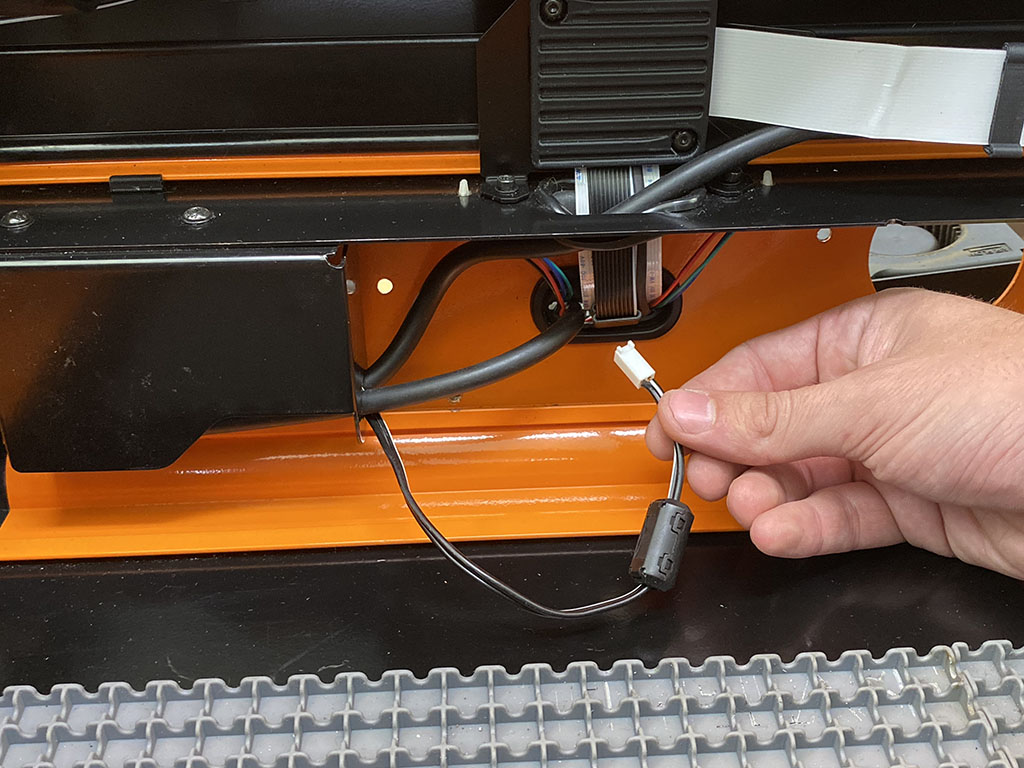
Step 4:
Pull the v1 air-assist cable through the rear opening into the workspace area.
Step 5:
Locate the new v2 air assist cable and feed it through the rear opening.
Make sure you feed the end without the ferrite through the opening. The ferrite must remain inside the workspace area.
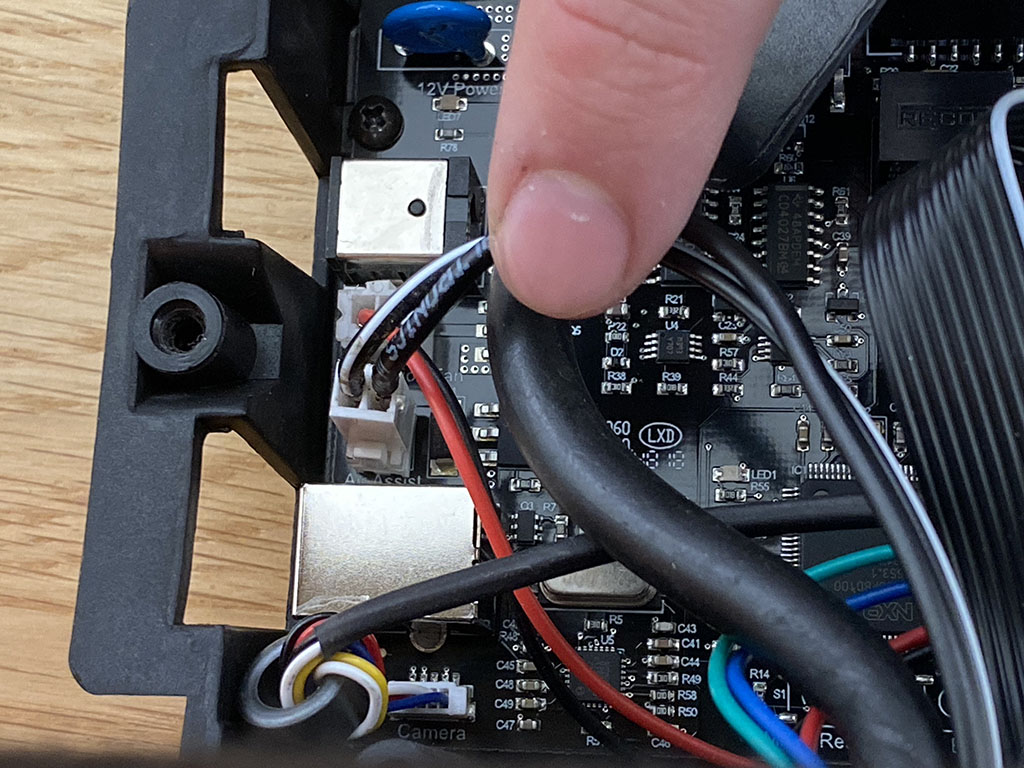
Step 6:
Plug the new air assist cable into the controller board.
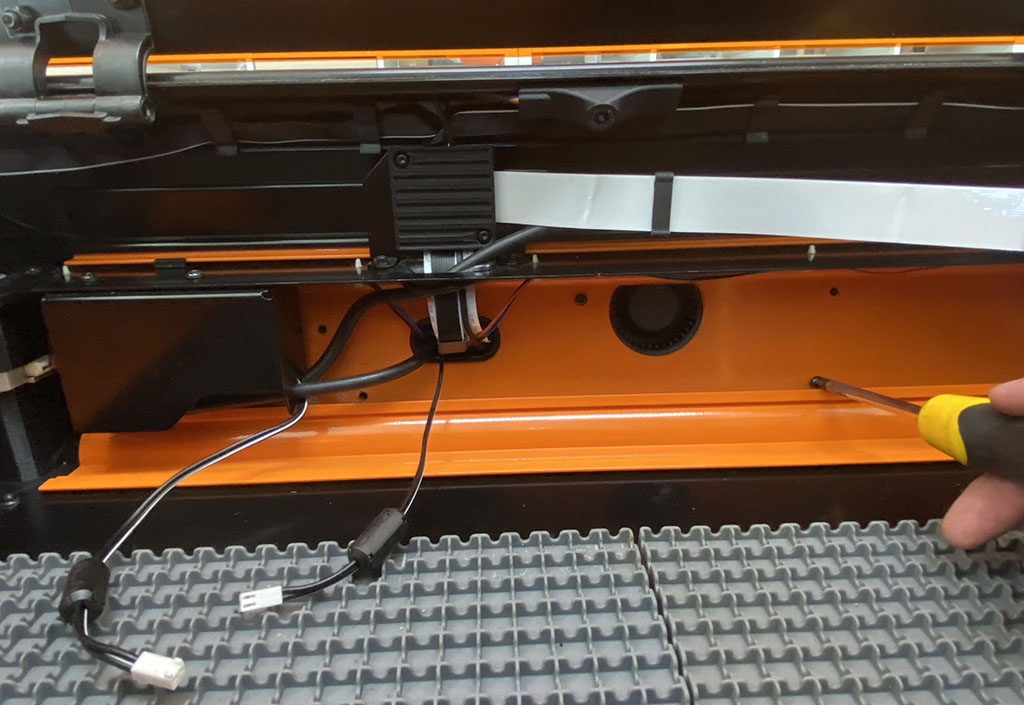
Step 7:
Re-attach the rear compartment to the back of the machine with the 5 screws from Step 2.
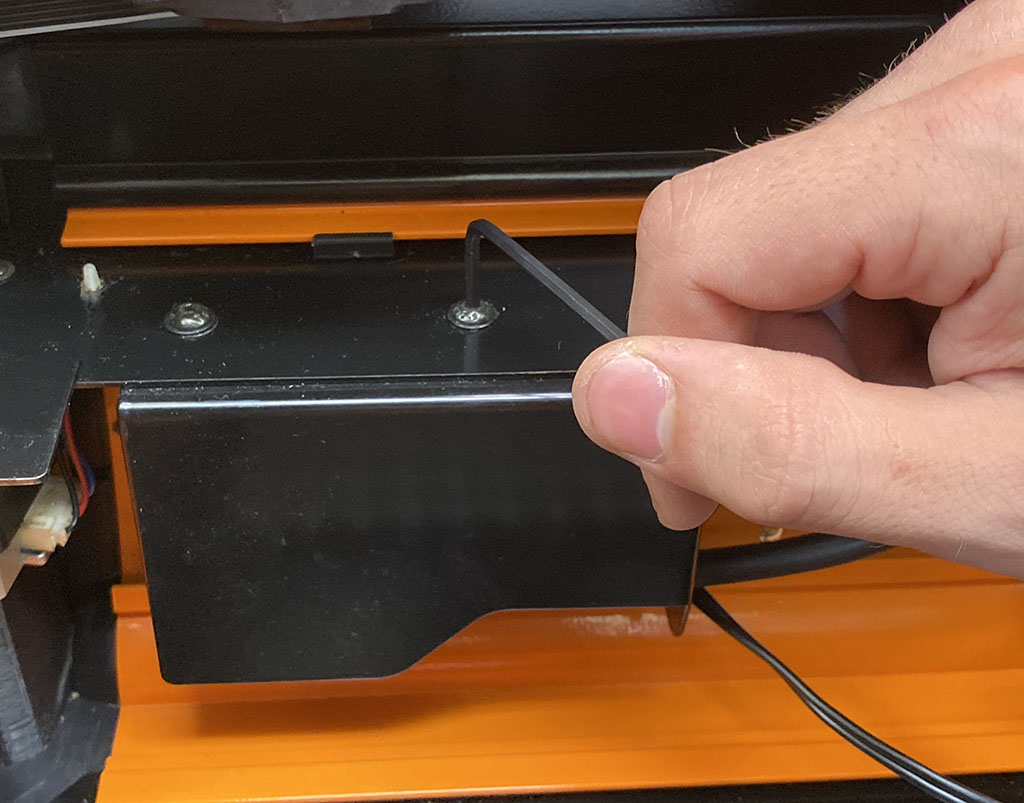
Step 8:
Detach the old air-assist.
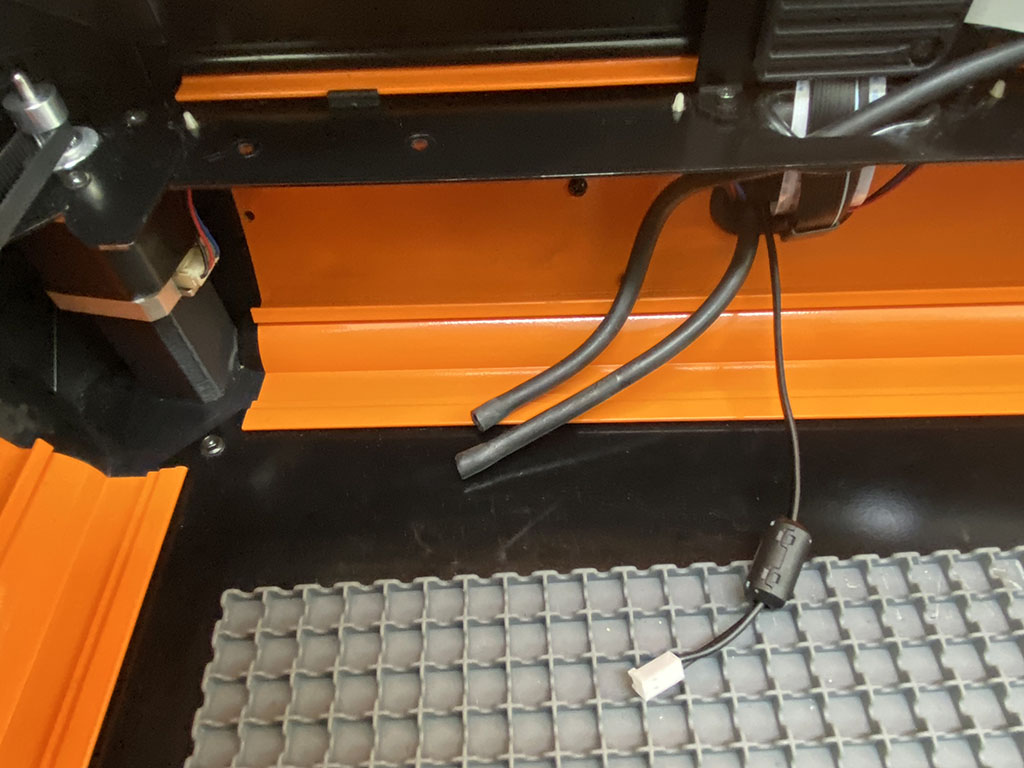
Step 9:
Unplug the hoses and completely remove the old air-assist accessory.
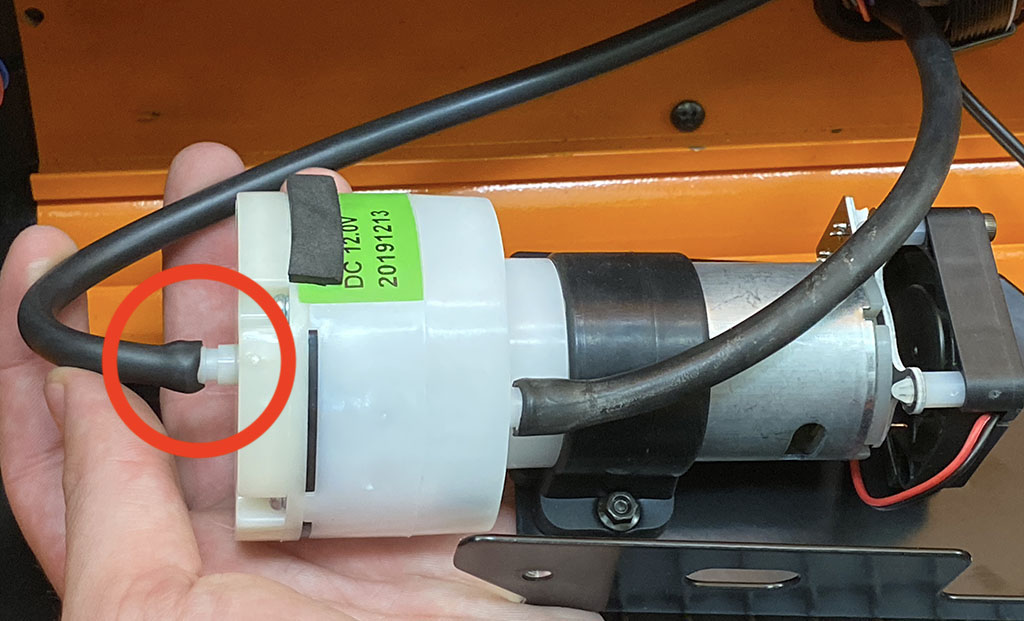
Step 10:
Attach the hose from the electronics compartment onto new air-assist port shown.
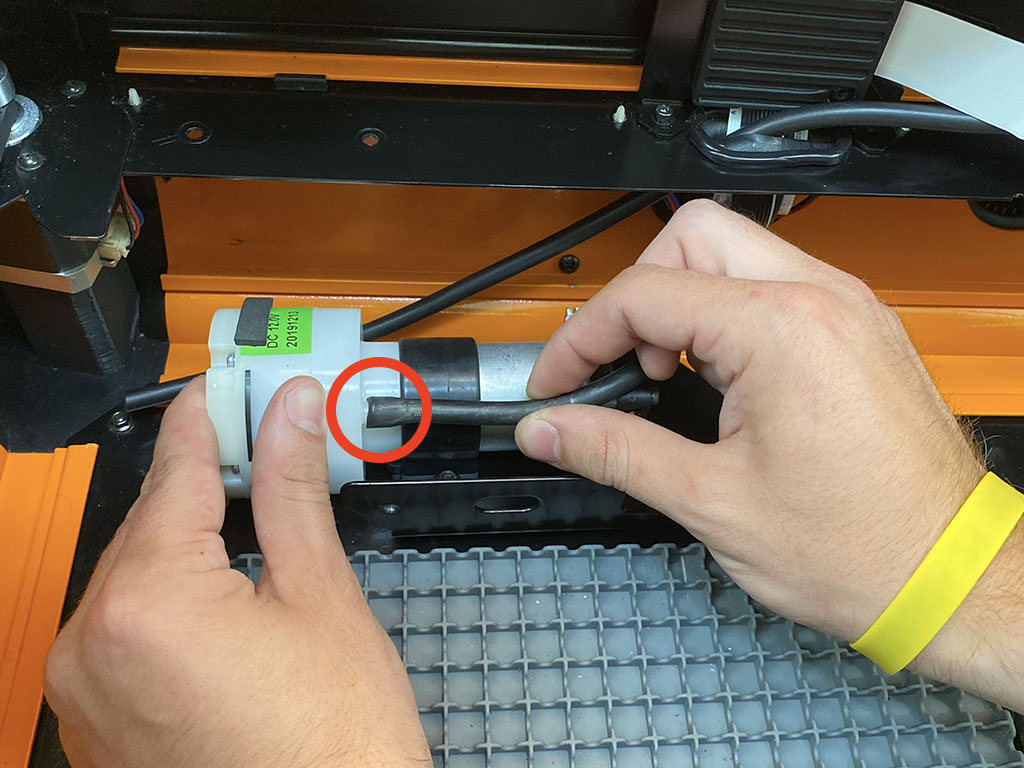
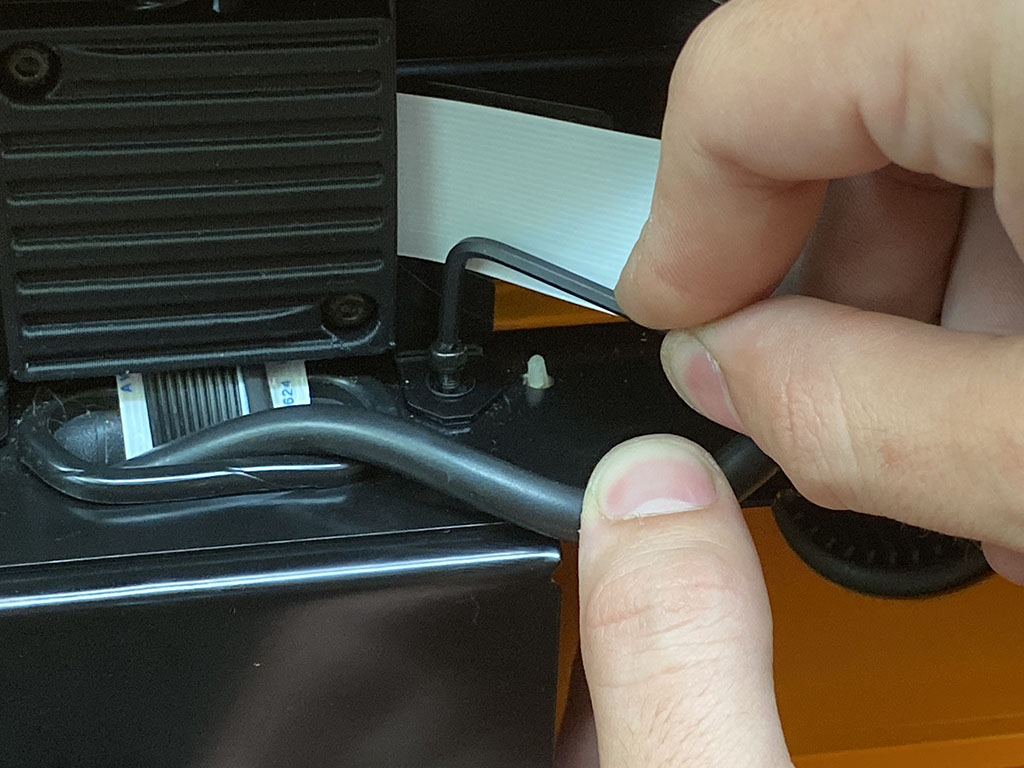
***Note: It is important that the hose going to the laser is routed as shown in this photo below. If it is routed behind the cable-hub, please adjust it at this time.
Step 11:
Attach the hose running to the laser head to the port shown on the air-assist.
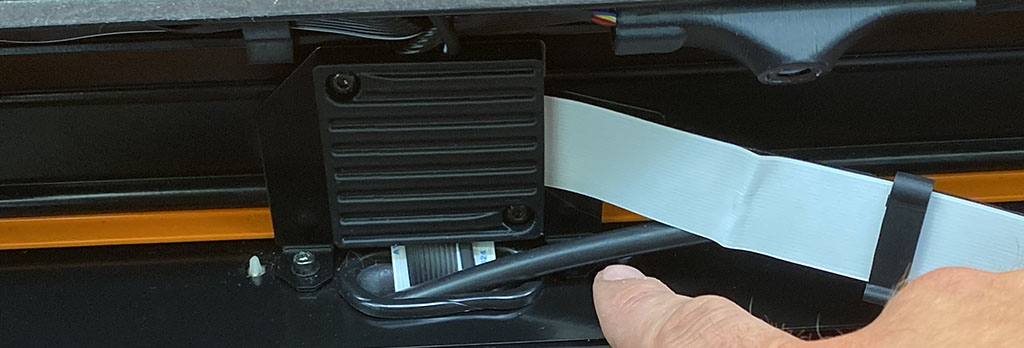
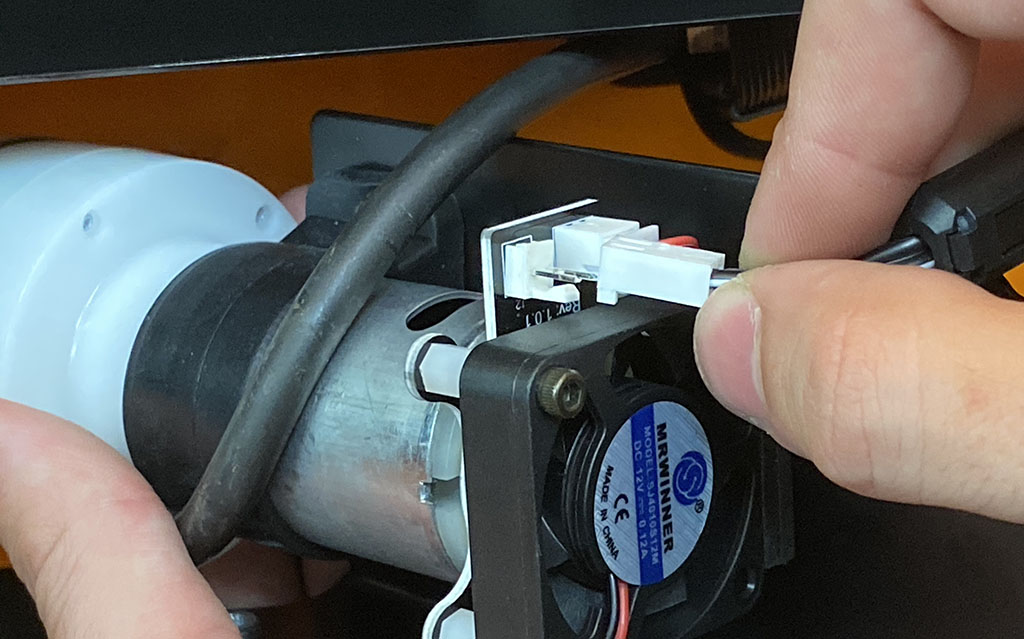
Step 12:
Connect the air-assist cable to the connector shown.
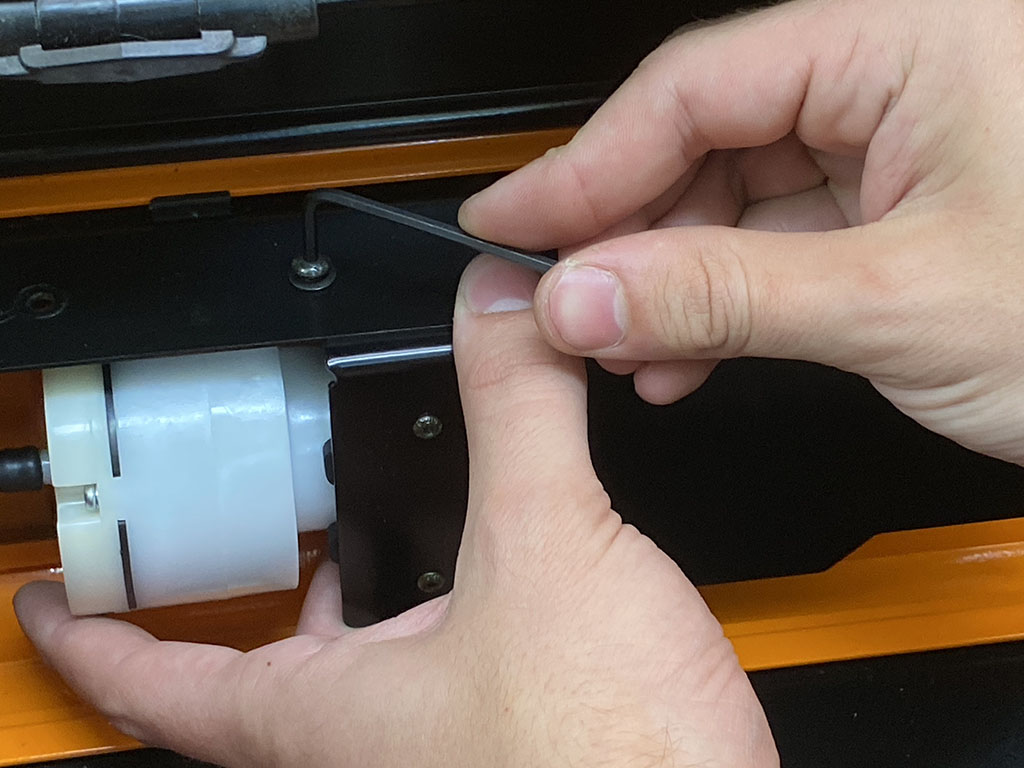
Step 13:
Attach the new air-assist using the screw holes shown in the image below.

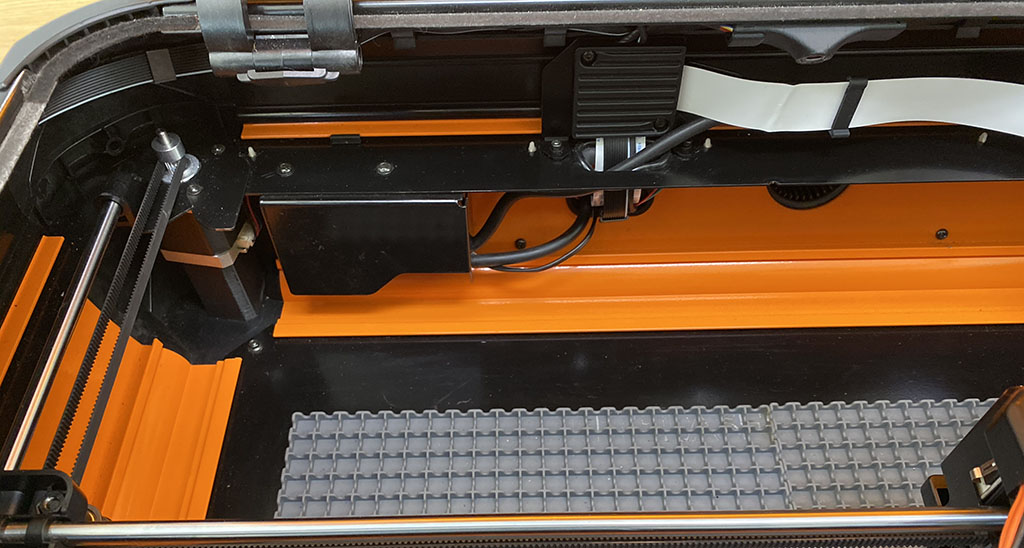
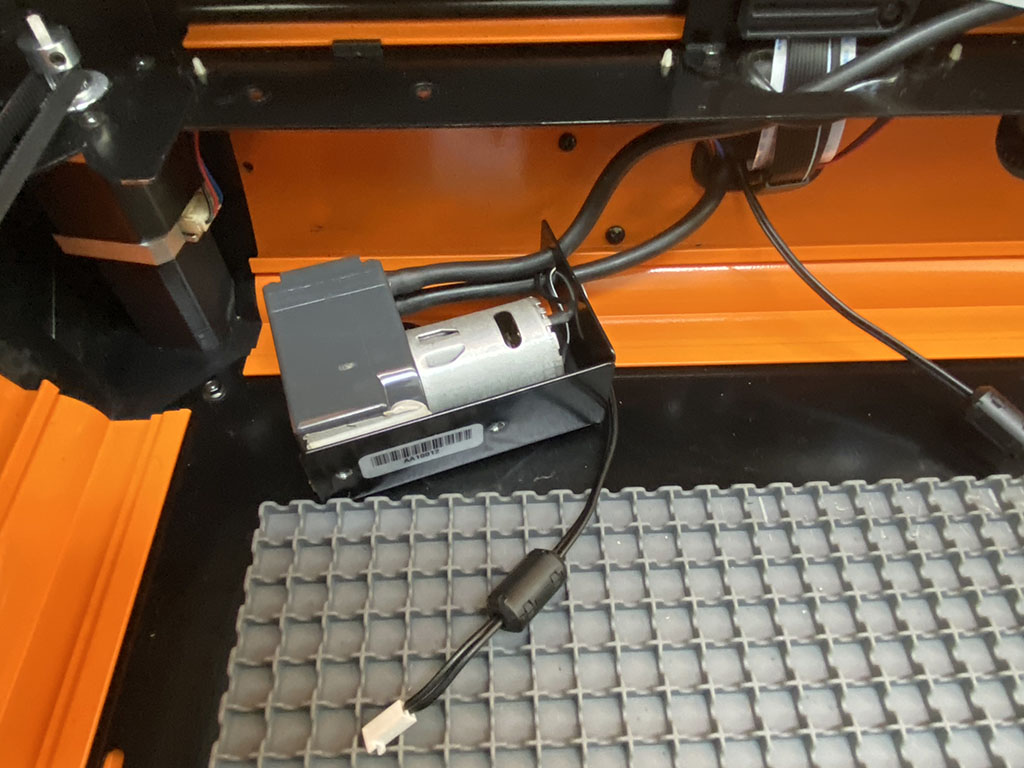
Step 14:
This is what the completed air-assist installation should look like.