This lesson will teach you how to create your own designs from within LightBurn itself, with this awesome stencil clock!
What you will learn:
- How to create and edit shapes.
- How to use arrays to copy shapes and align them.
- How to use the weld function to connect shapes together.
- How to group and ungroup objects together.
- How to insert fonts and letters.
- How to use the edit nodes function to edit an object.
Project Files:
Materials:
- 2mm Black Acrylic
- Clock mechanism
- Double sided tape
Step 1:
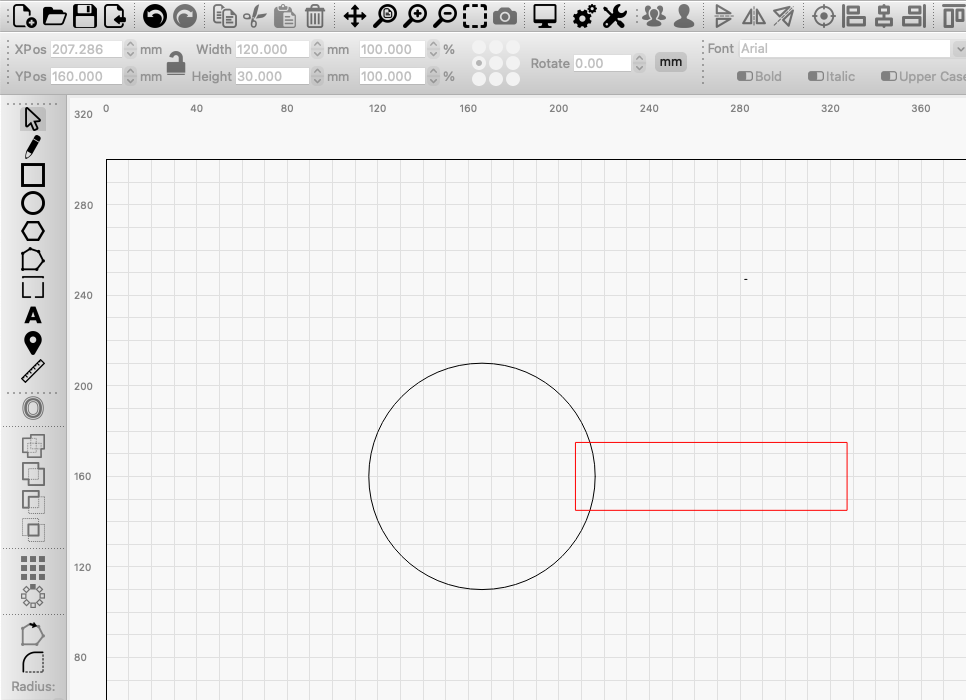
Open LightBurn, and insert a circle from the tools on the left side of the workspace. Set this circle to 100mm x 100mm, this will be the center of the clock face.

Next, on a separate layer, in this case red, add a rectangle from the left and set it to 30mm x 120mm.
Press escape to get back to the select tool, and move the rectangle to the 3 o’clock position, slightly overlapped like shown below.
Step 2:
Hold down the shift key and select the rectangle, then with shift still held down, select the circle. Use the ‘Copy Along Path’ tool, this can be found in the ‘Arrange’ tab at the top of the workspace.
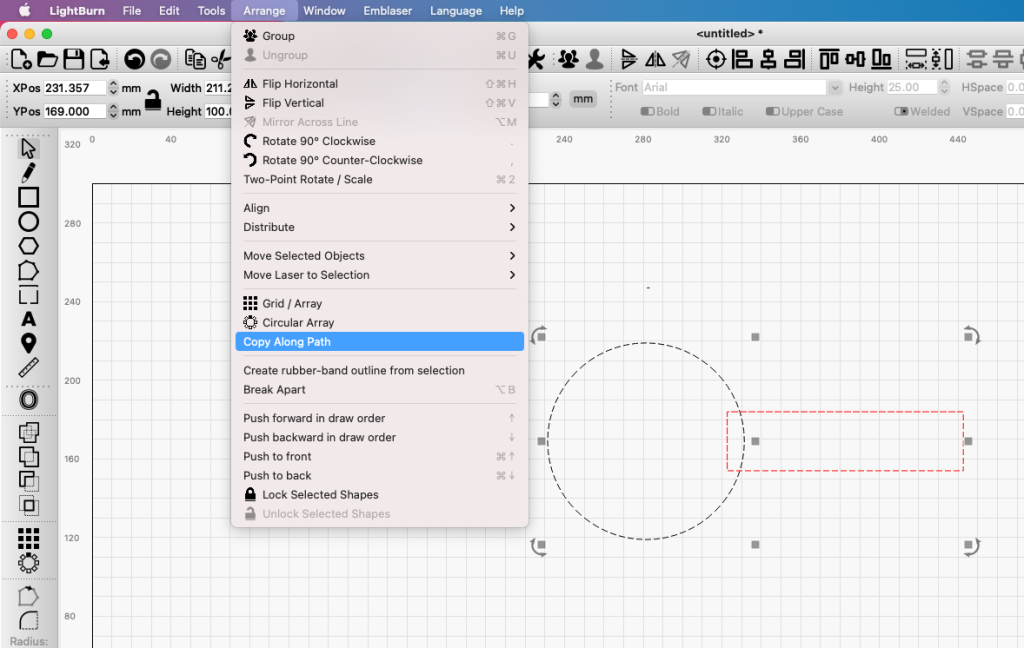
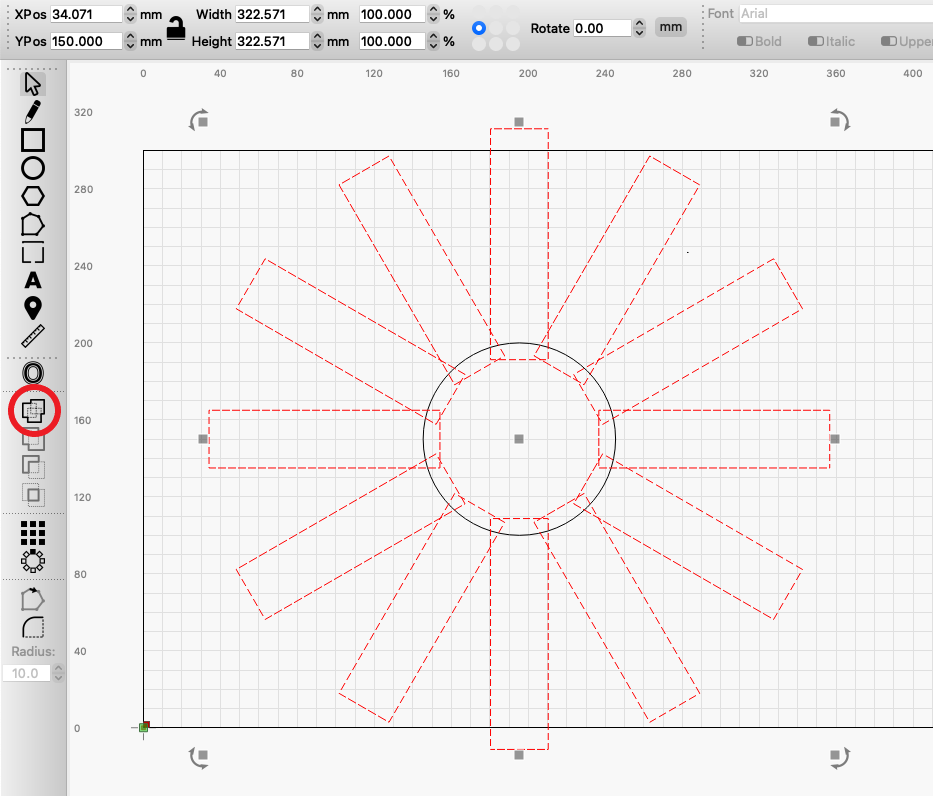
Turn ‘Rotate Copies’ on and set the number of copies to 12, you will see the shapes update live and it should look something like this. Once done, click OK

Step 3:
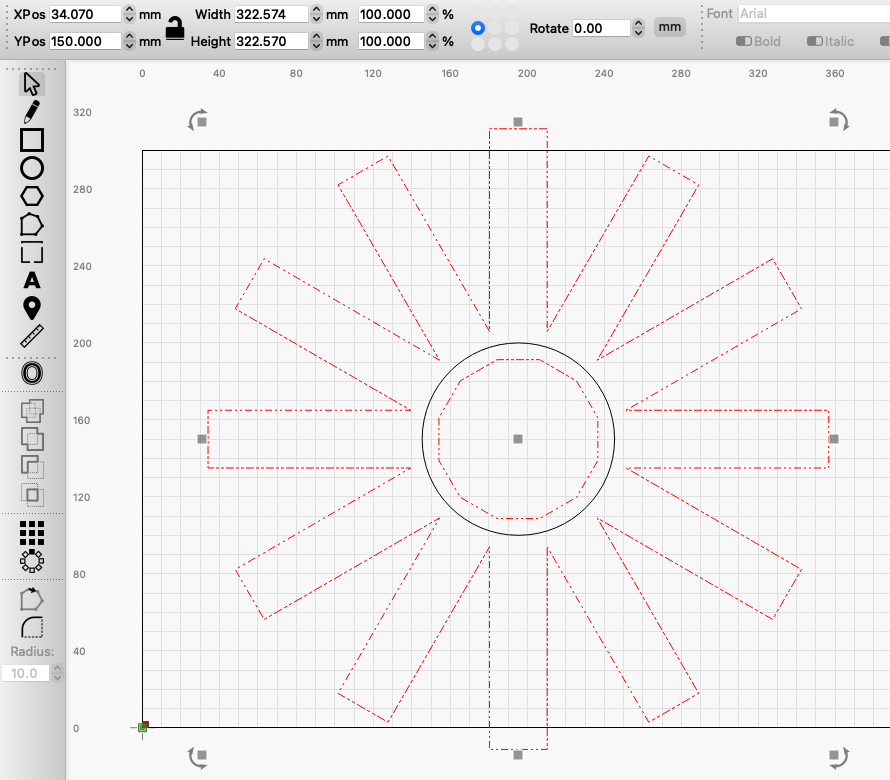
Select all of the shapes by highlighting over everything, or by pressing CTRL + A on windows, and CMD + A on Mac.
Deselect the black circle by clicking it while holding CTRL (Windows) or CMD (Mac), and then click the ‘Weld’ button on the left side of the workspace. This will join all of the rectangles together into 2 objects, the outer rectangles which we want and a leftover shape on the inside which we don’t want.
To delete the inner circle shape that we don’t want, we will need to ungroup it from the rectangles as when they were welded together it grouped them together, meaning they can be moved and edited together like they are just 1 object.
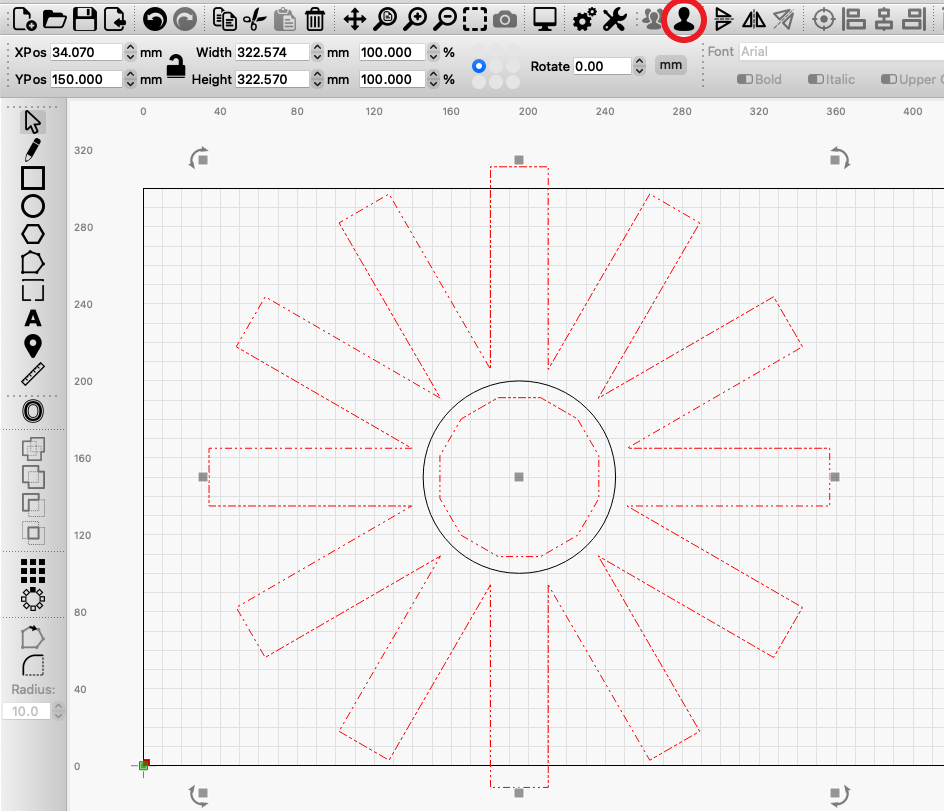
To ungroup them, select the red shape and click on the ‘Ungroup’ button at the top of the workspace (The singular person), the button depicting a group of people to the left is the group button which does the opposite.
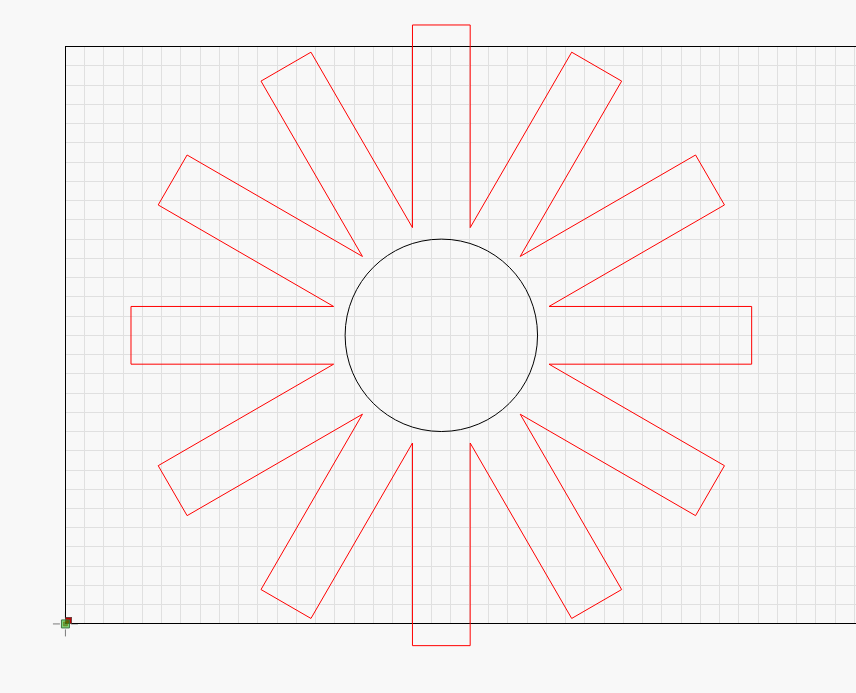
Once they are ungrouped we can now select the inner shape we don’t want and delete it.
Step 4:
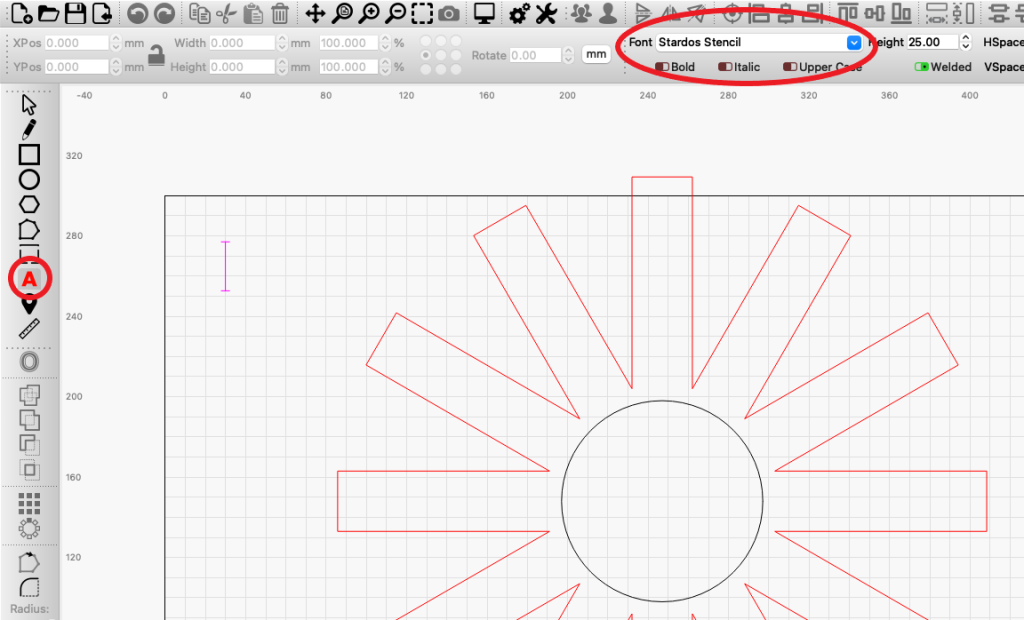
A ‘stencil’ type font was used for the wording. The beauty of ‘stencil’ fonts are that they can be laser cut and hold all of the inner and outer letter shapes together. LightBurn is able to recognise and work with any font installed on your computer, we will be using a font called ‘stardos stencil font’ (File provided in the download link) otherwise you can use a default font or install your own that you like.
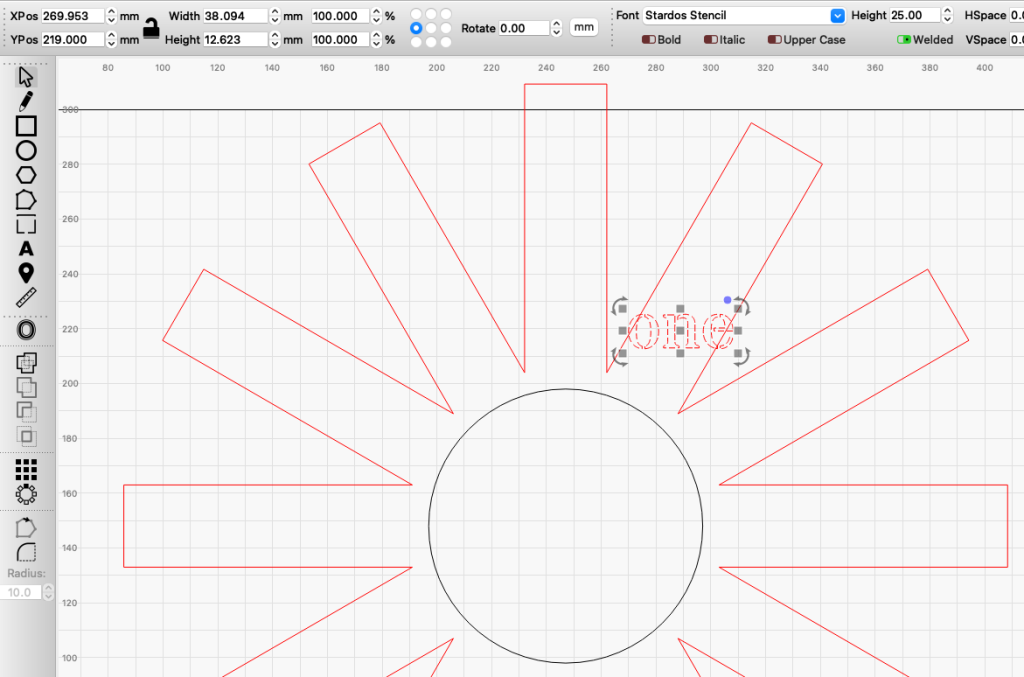
To begin entering our words, click on the ‘Create Text’ button on the left hand side of the workspace. With this selected we can then look at the top of our workspace and change the font to ‘Stardos Stencil’ or your own font of choice.
Click on the workspace to begin typing in your font, start by writing the word ‘one’ and then going to the selection tool.
Move the word into the one position on the clock.
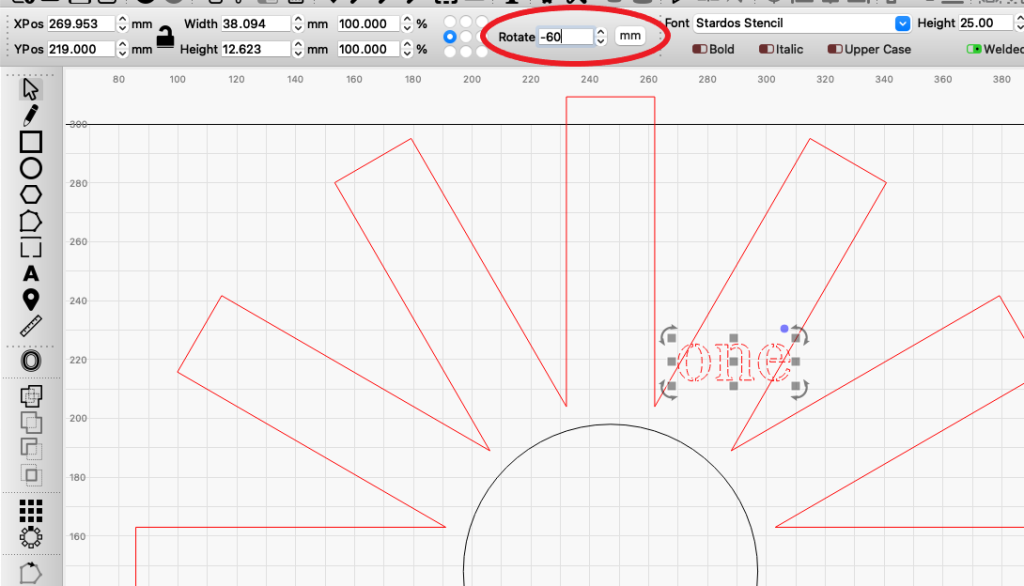
Now we are going to rotate it to fit into the clock. Because we have 12 rectangles they are all going to be 30 degrees apart, so we will need to rotate the words either 0, 30, 60 or 90 degrees to get where we want.
For the one, we will need to rotate it -60 to fit in perfectly. To do this, select the word and then at the top of the workspace there is a ‘rotate’ field, type ‘-60’ into there and hit enter. The word should now be in the correct rotation.
Step 5:
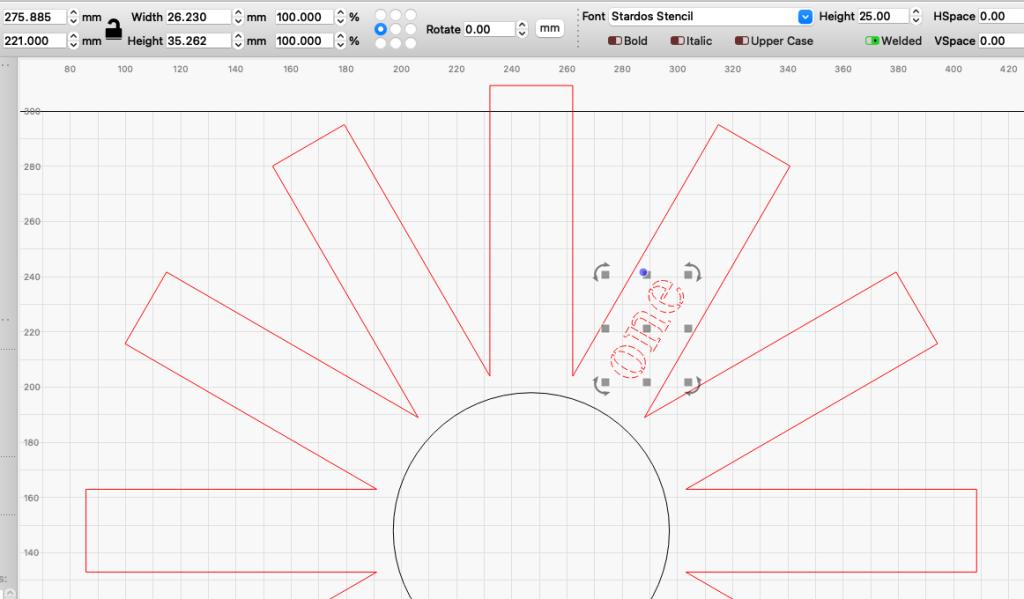
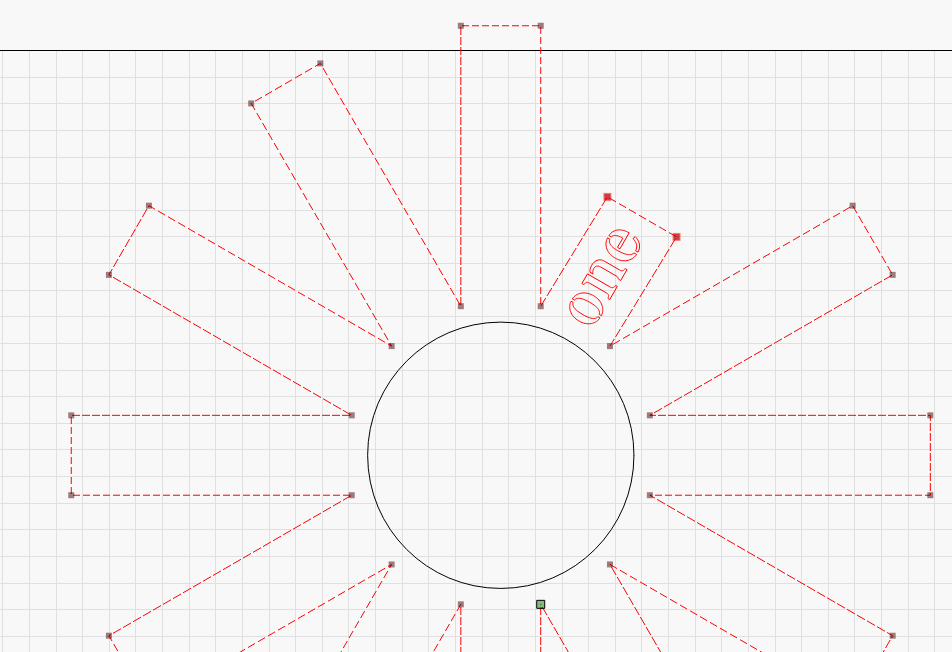
To neaten this up, we are going to move the word as close as we can to where the rectangle ends in the centre, and once it is there, click on the red shape and open the ‘edit nodes’ tool on the left side of the workspace.
Then, we are going to select the 2 points on the end of the rectangle by highlighting them, and drag that line down to the word by dragging one of the points like below
Step 6:
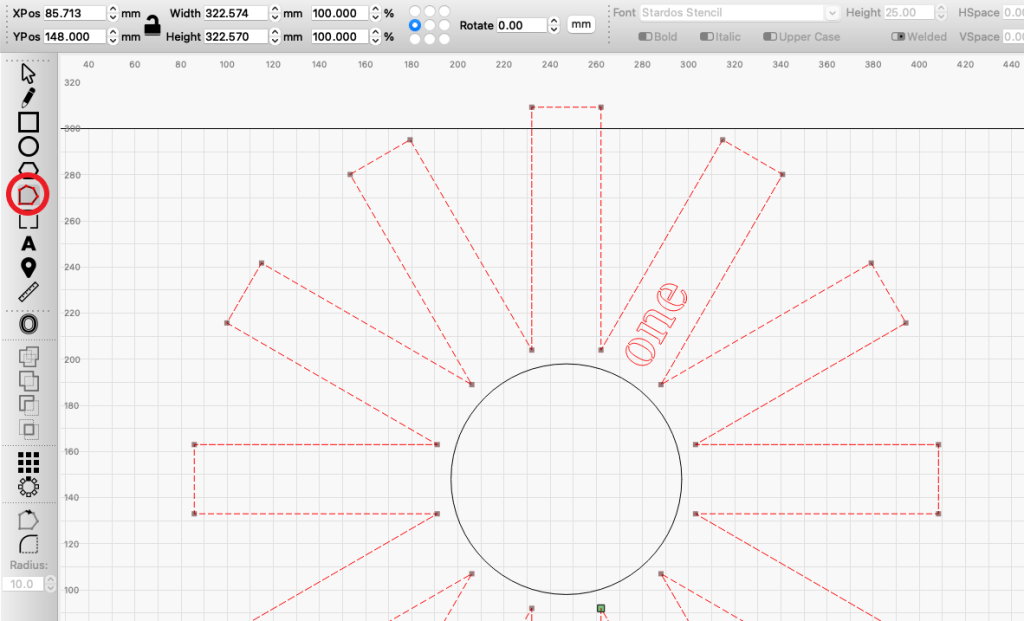
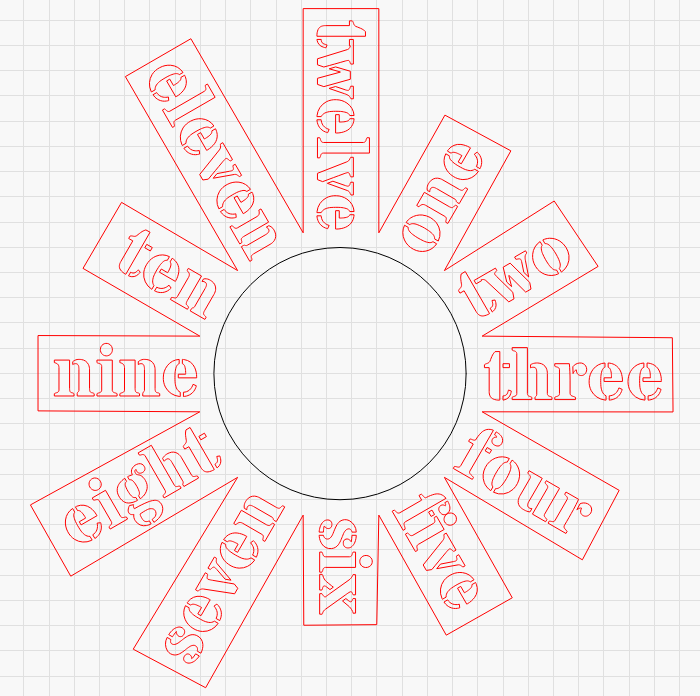
Repeat steps 4 and 5 for the remaining 11 numbers on the clock, until you end up with a clock that looks like this:
To make this a functioning clock, we need to cut out a small circle in the centre for the clock hands to go through. Add a 7mm x 7mm circle into the centre of the clock, it should snap into the centre. One way to check if it is in the middle is to make that circle 100mm x 100mm and if it aligns perfectly with the existing circle then you know it is in the right spot, and you can set it back to 7mm x 7mm.
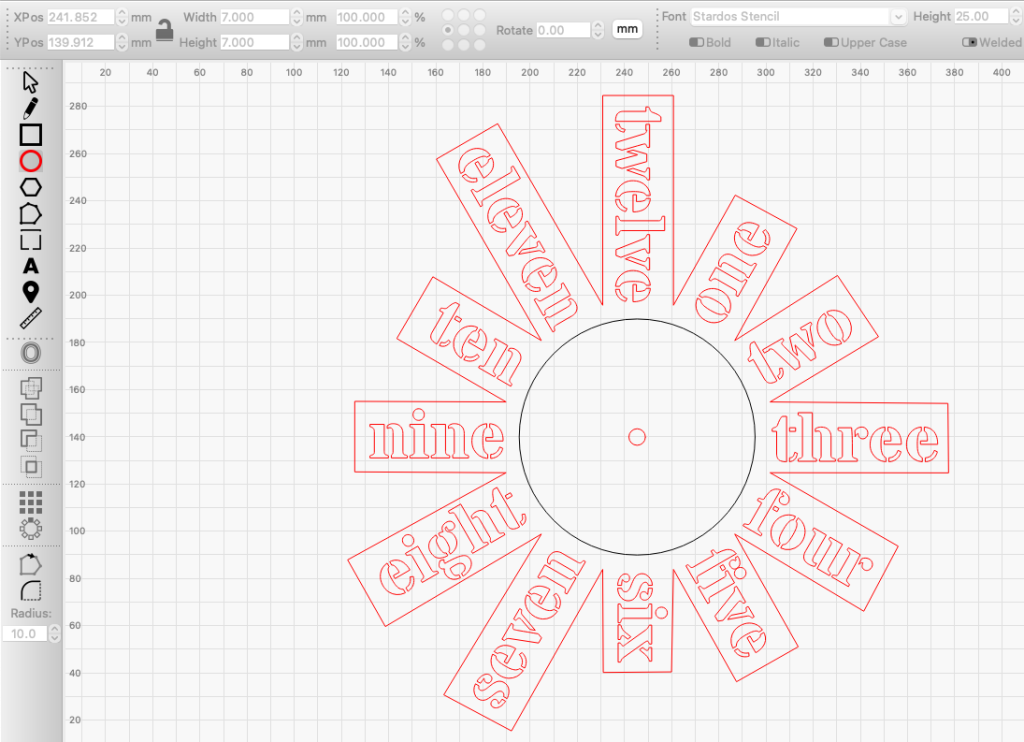
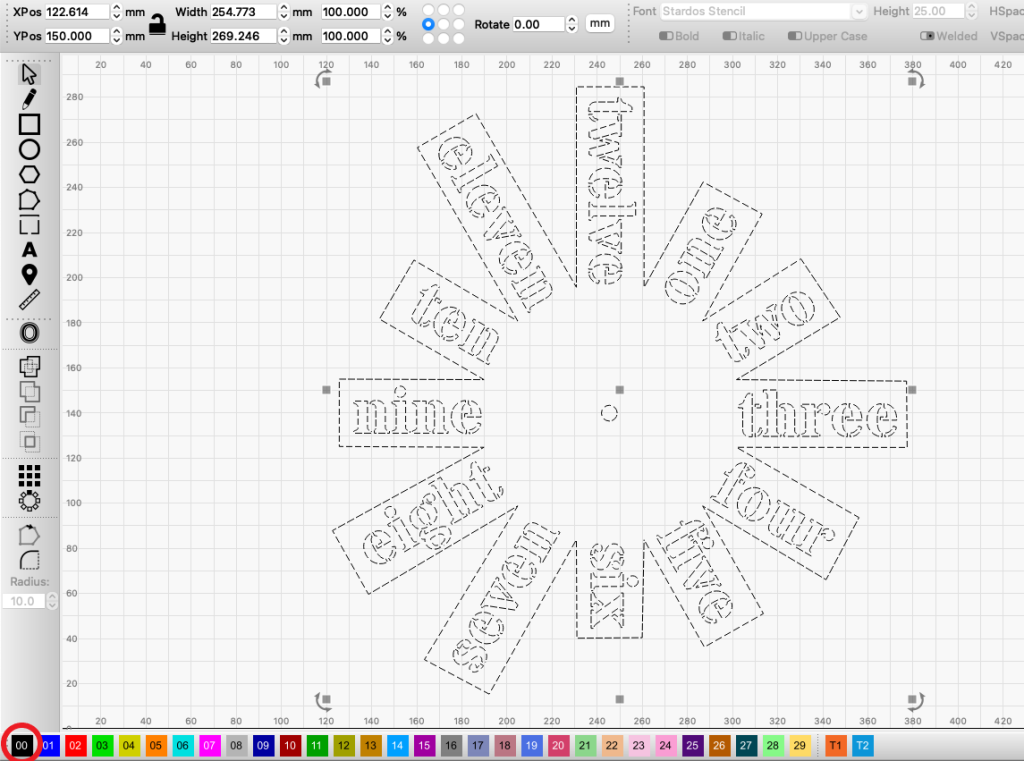
After this, highlight all of the shapes and make them all black by clicking the colour in the bottom of the workspace. This will make our cut layer a lot more neat and simple.
Important: We also need to delete the 100mm x 100mm circle now as we don’t want this to be cut.
Step 7:
Now we are going to set up the settings to cut our clock face out of the 2mm acrylic. We are going to need to manually edit the cut settings to work with our 2mm acrylic.
If you are using a different material for this you can open up the Library, find your material listed in it and the hit assign to layer button.
Note: If you do not have the library installed yet you can click here and follow the steps.
On the right side of the workspace you will see your ‘Cuts / Layers’ tab, and at the bottom of it you will see all of the settings for that cut layer.
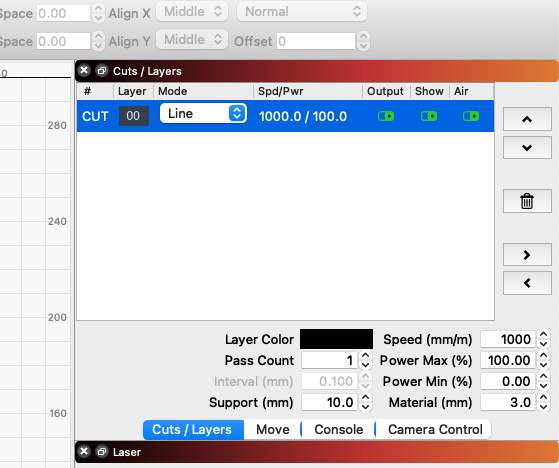
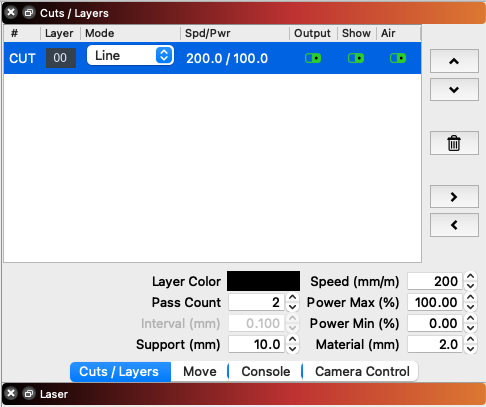
For our 2mm Acrylic the default is too fast and will not cut through. These are the setting you will want to use:
Speed: 200
Power: 100
Pass count: 2
Material: 2.0mm
Also ensure that the Air Assist is on as shown below:
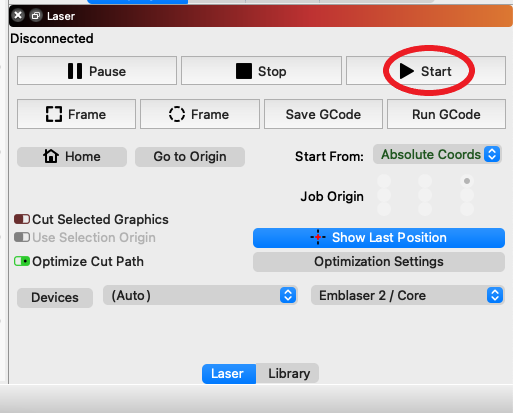
Step 8:
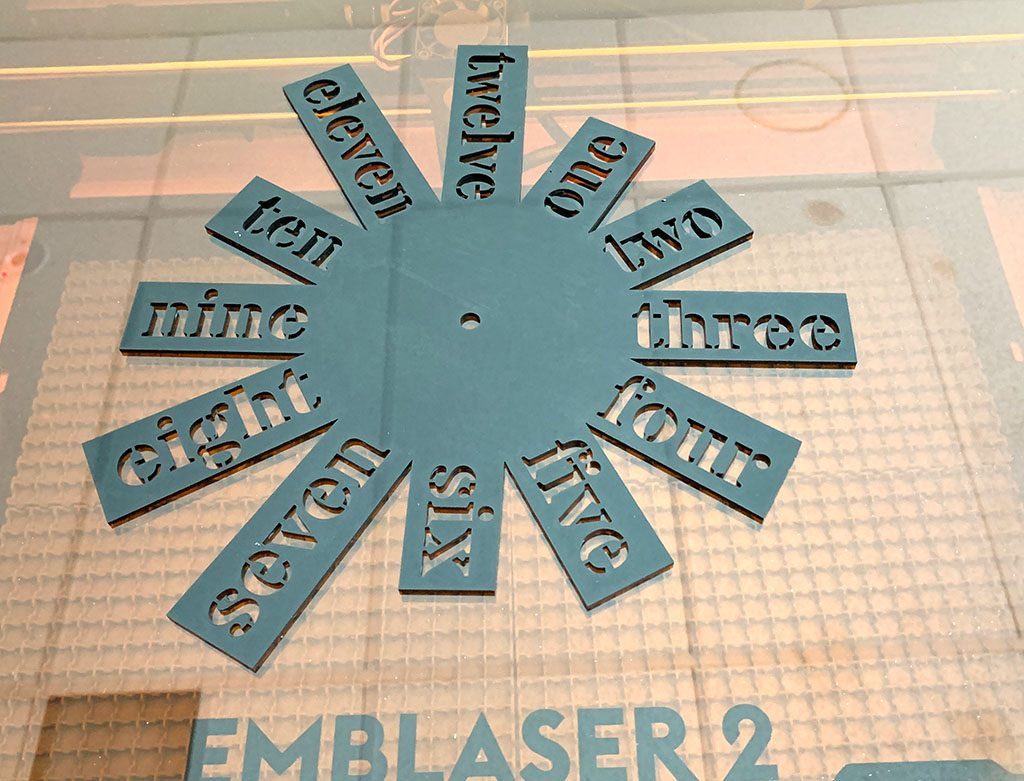
Now, we are ready to cut out our clock face. Place your material into the centre of the Emblaser, close the lid and press the enable button. In LightBurn ensure your settings are correct and that the clock face is in the middle of the workspace. Once you are ready, hit start.
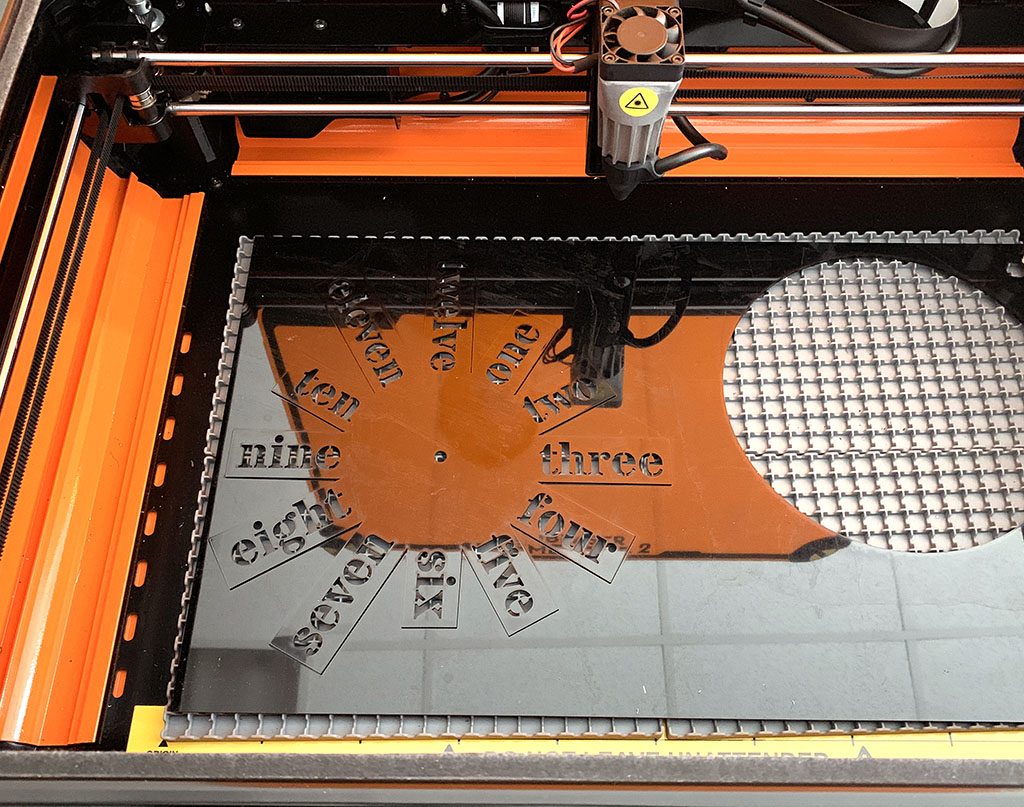
Step 9:
Once the acrylic has finished being cut, open the lid and take it out of the machine.
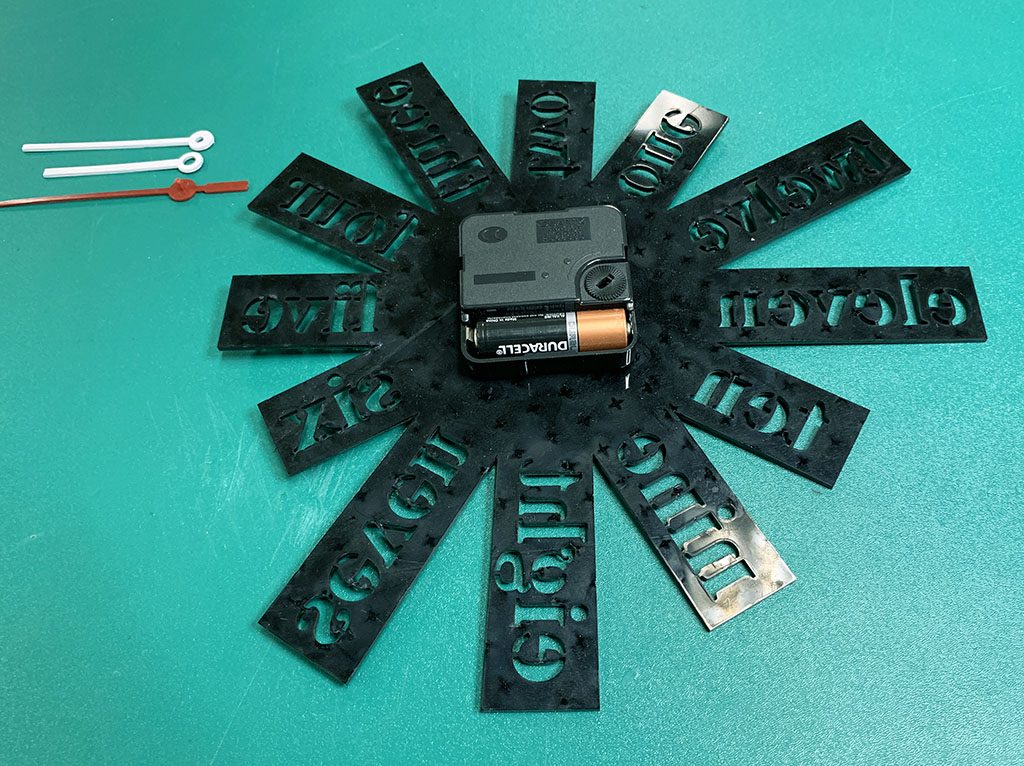
The final assembly is straight forward. Take your clock mechanism and the double sided tape and lay them out on the table with the clock face.
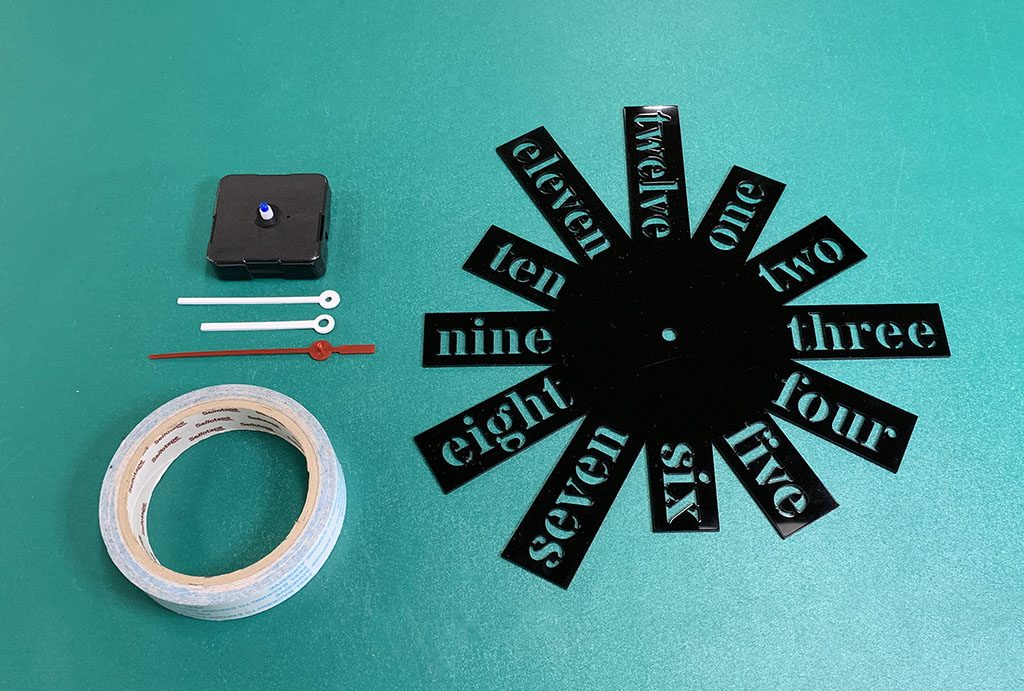
Cut small strips out of the double sided tape and use it to attach the clock mechanism to the back of the acrylic.
Once the clock mechanism is in, attach the hands on the other side and you are finished!
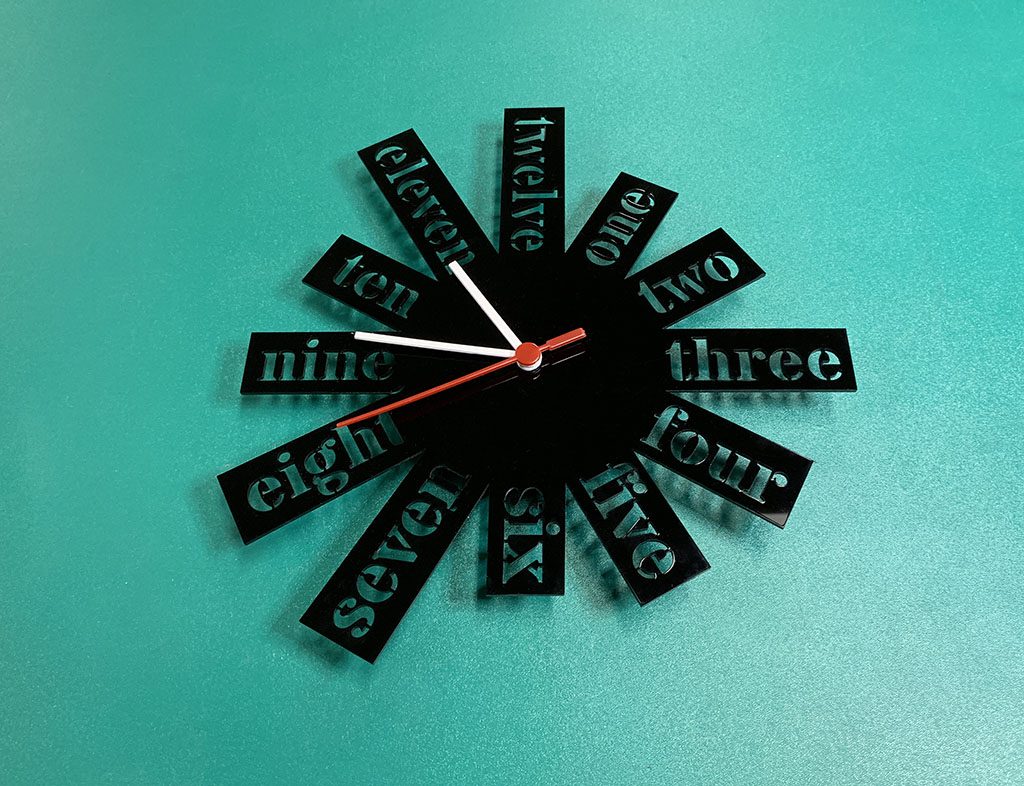
Done!
I hope you enjoyed designing and building this clock from scratch and learnt more about how to use LightBurn and your Emblaser machine in the process. We look forward to seeing what you will create next!