
This article contains the following sections:
Default Current Settings:
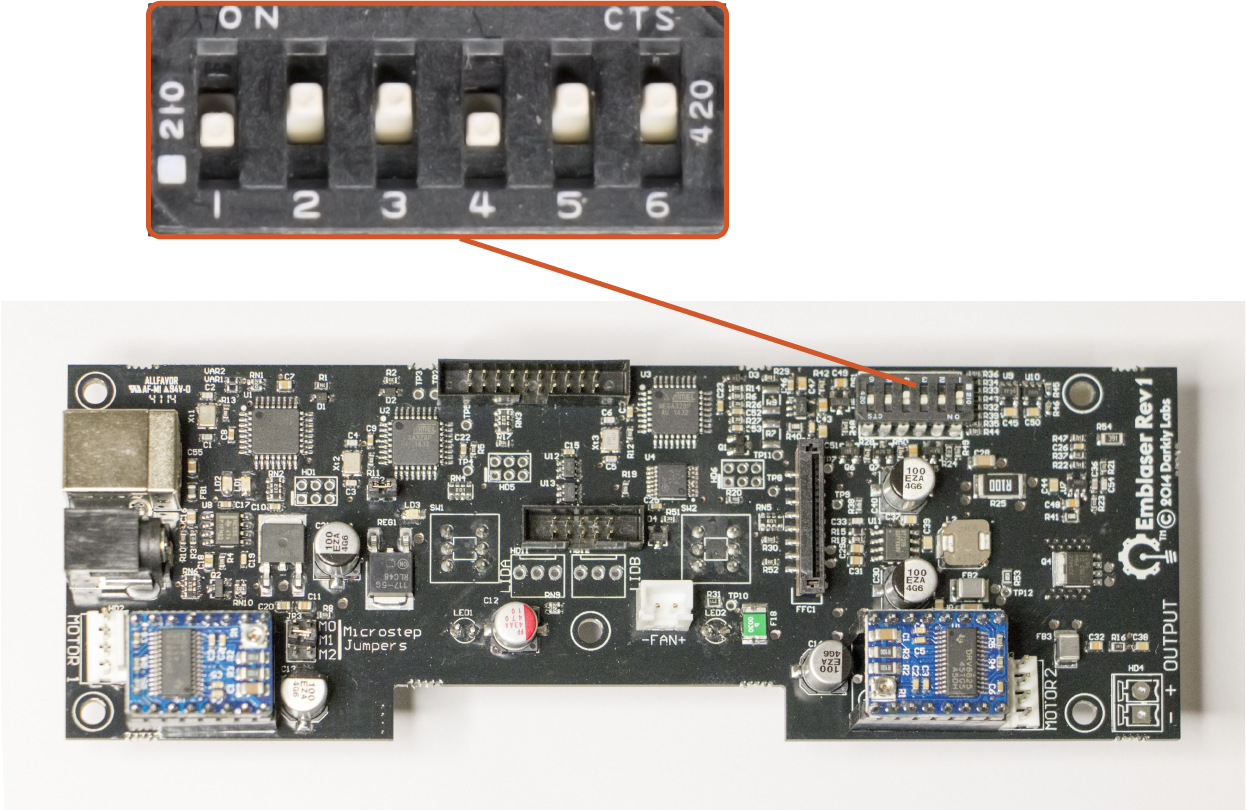
The Emblaser ships with the following factory settings for the maximum laser power.
Factory default setting is 1800mA
0 1 1 0 1 1
(off-on-on-off-on-on)
( 1 2 3 4 5 6 )
These settings are suitable for both the 3 watt & 4 watt Laser Units.
Note: For lower watt Laser Units, please see below.
See the latest User Manual for details before making changes to these micro-switches. Incorrectly setting these switches could permanently damage your Laser Diode.
Maximum Current Settings:
The maximum power depends on the type of Laser Units you are using:
405nm Laser Unit:
Manufacturer datasheet maximum current: 600ma
Tested maximum current = 600mA
2 Watt Laser Unit: M140, 445nm, 5.6mm diode
Manufacturer datasheet maximum current: 1200ma
Tested maximum current = 1800mA
3 Watt Laser Unit: NDB7875, 445nm, 9mm diode
Manufacturer datasheet maximum current: 1800ma
Tested maximum current = 2200mA
4 Watt Laser Unit: NDB7A75, 445nm, 9mm diode
Manufacturer datasheet maximum current: 3000ma
Tested maximum current = 3600mA
IMPORTANT: Exceeding the recommended current setting will cause rapid degradation and/or irreparable damage to your Laser Unit.
Extreme care must be taken when altering the Emblaser maximum current settings.
Diode Failure From Exceeding the Maximum Current:
Problem:
The laser was run at a higher current than recommended by making changes to the Emblaser board dip switches.
It ran for a little bit and then stopped working or only turns on at very weak power.
Cause:
Running the laser at a higher current level than recommended will cause the Laser Diode to be permanently damaged.
See above for the recommended settings for your Laser Unit type.
Solution:
Replace the Laser Unit.
