

What’s in the box
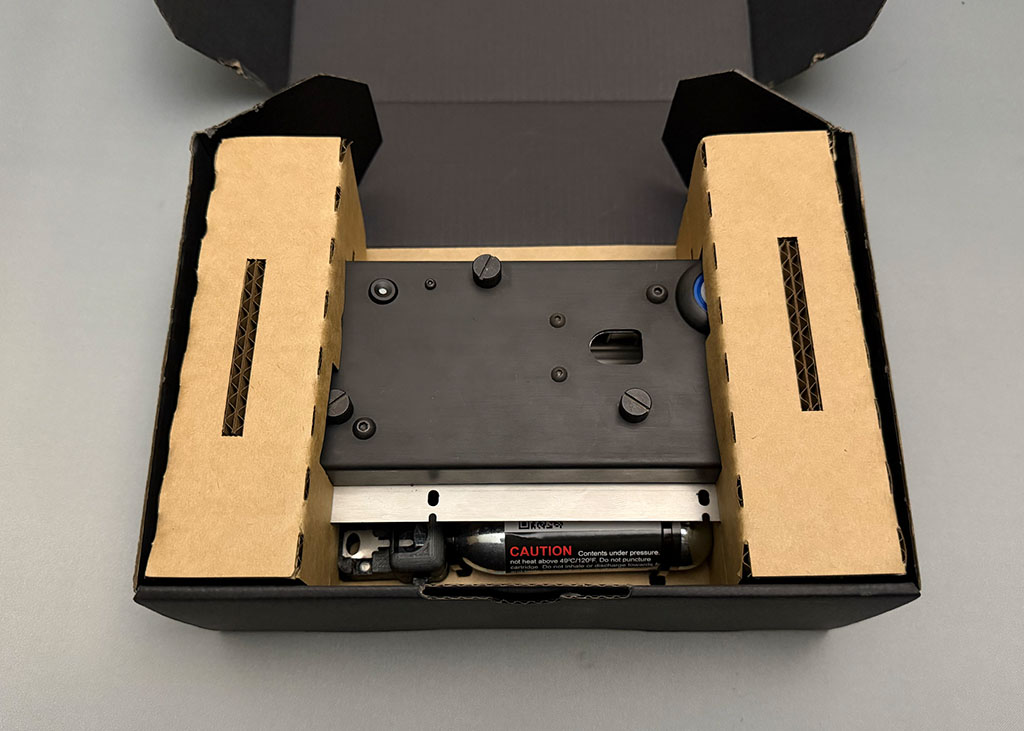
- WatchDog Accessory & Rear Bracket (connected together).
- CO2 Cartridge.
- Torx T10 Tool.
- 4x Screws.
- Installation Card.
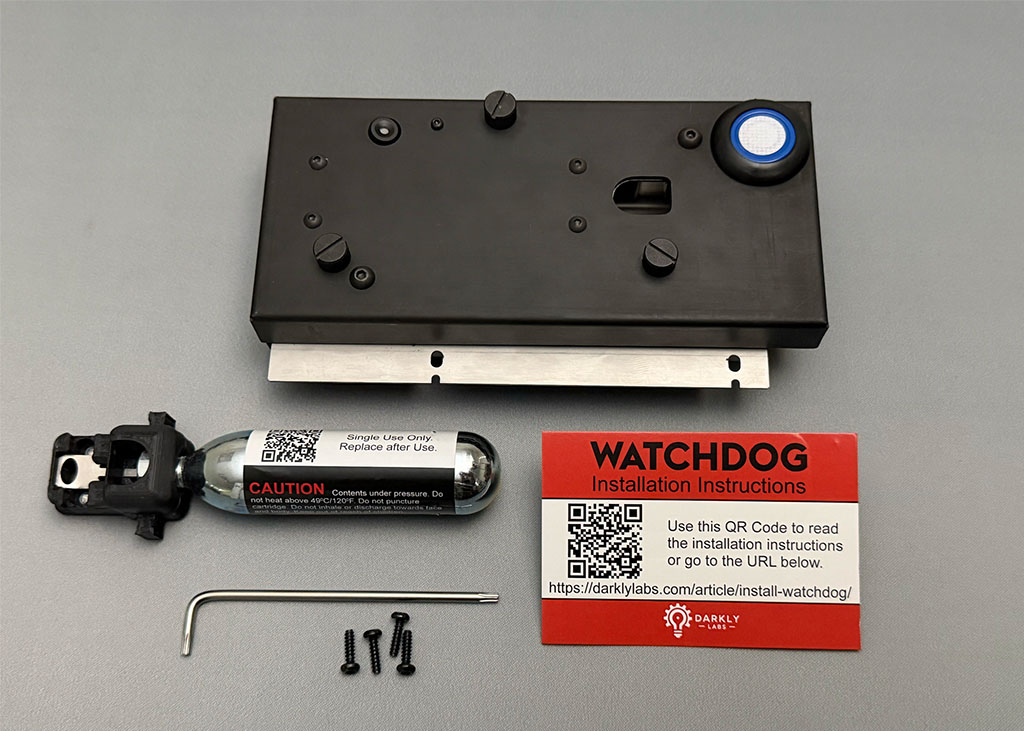
IMPORTANT
The following areas are delicate and should not be touched. When cleaning, avoid contact with these areas.
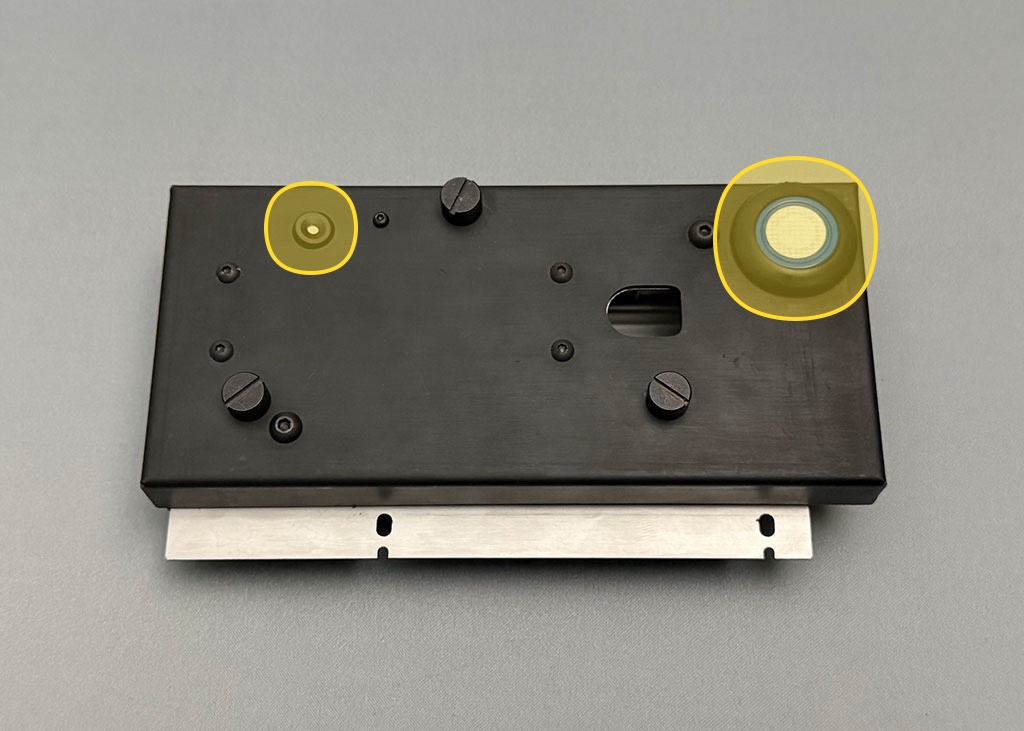
Install CO2 Cartridge
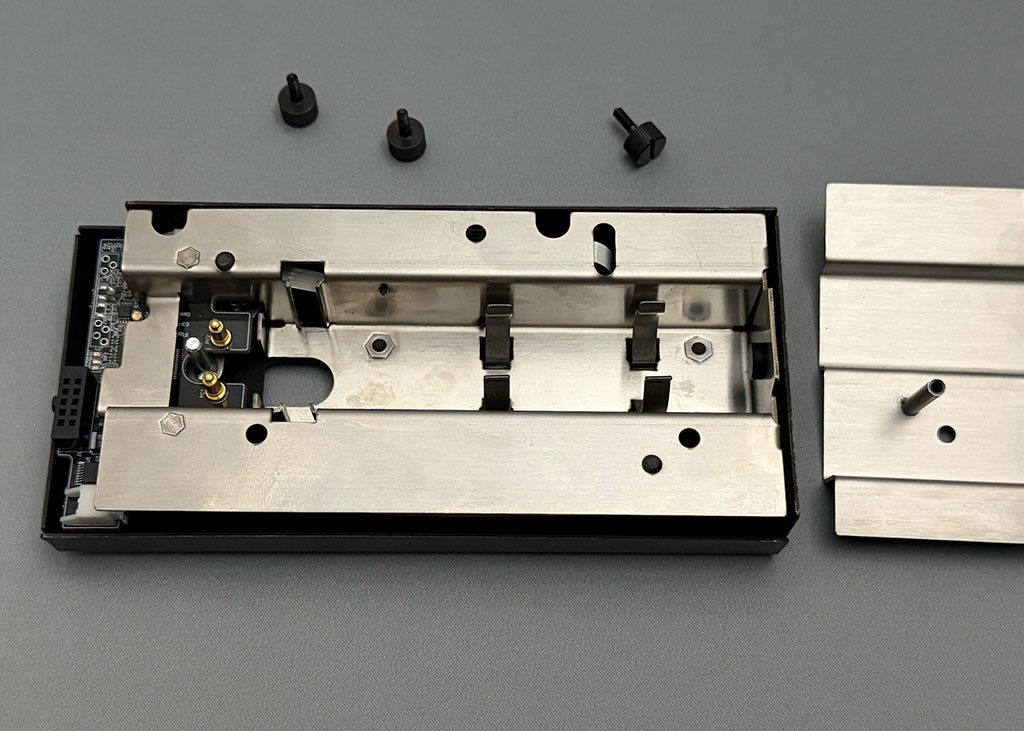
Remove 3 thumb screws from the front of the WatchDog. These are used to hold the WatchDog and rear bracket together.
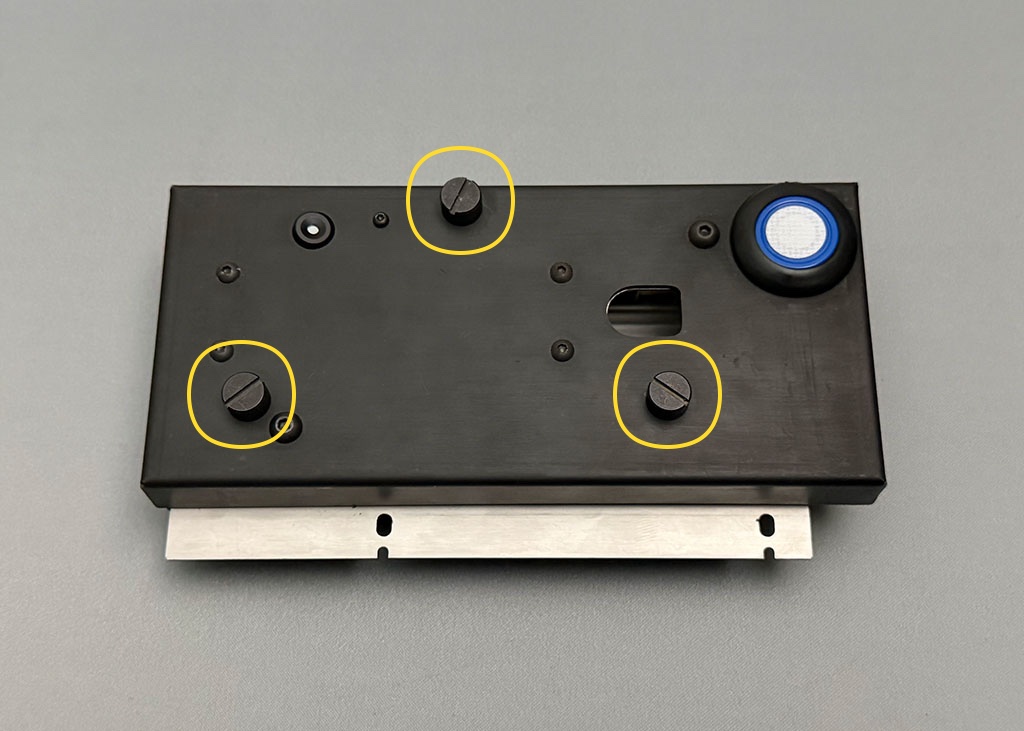
Turn the WatchDog over and carefully separate it from rear bracket.
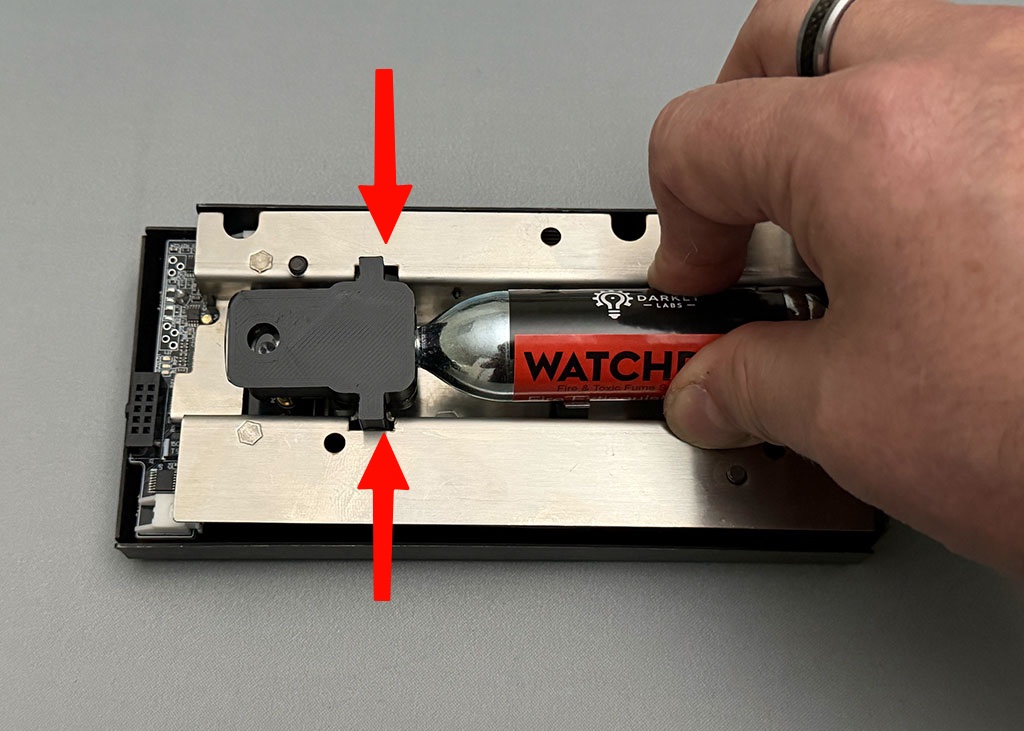
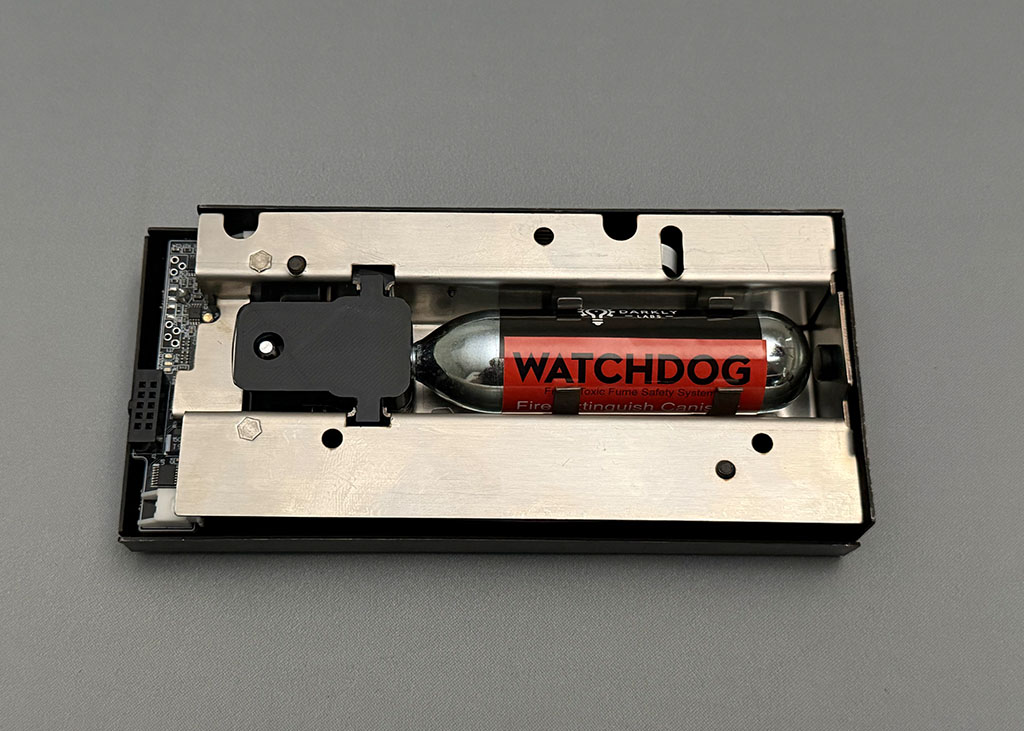
Align cartridge with notches on the WatchDog and press into place.
Attach Rear Bracket
The WatchDog is installed in the rear of the Emblaser Pro.
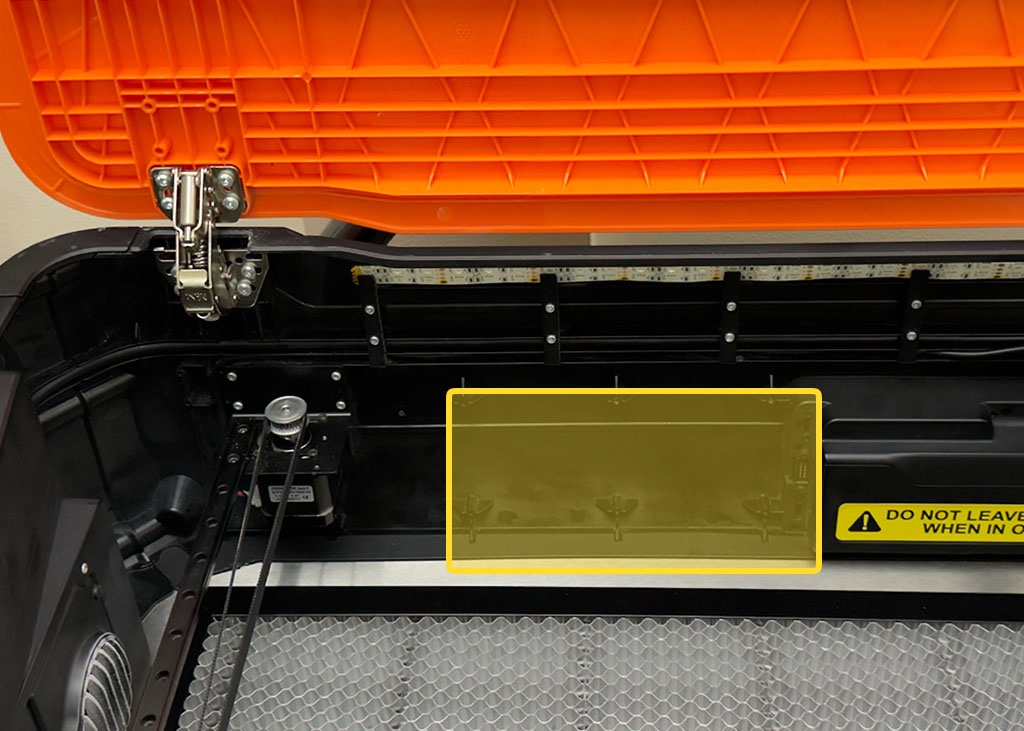
The bracket is screwed onto the 4 connections shown in the image below.
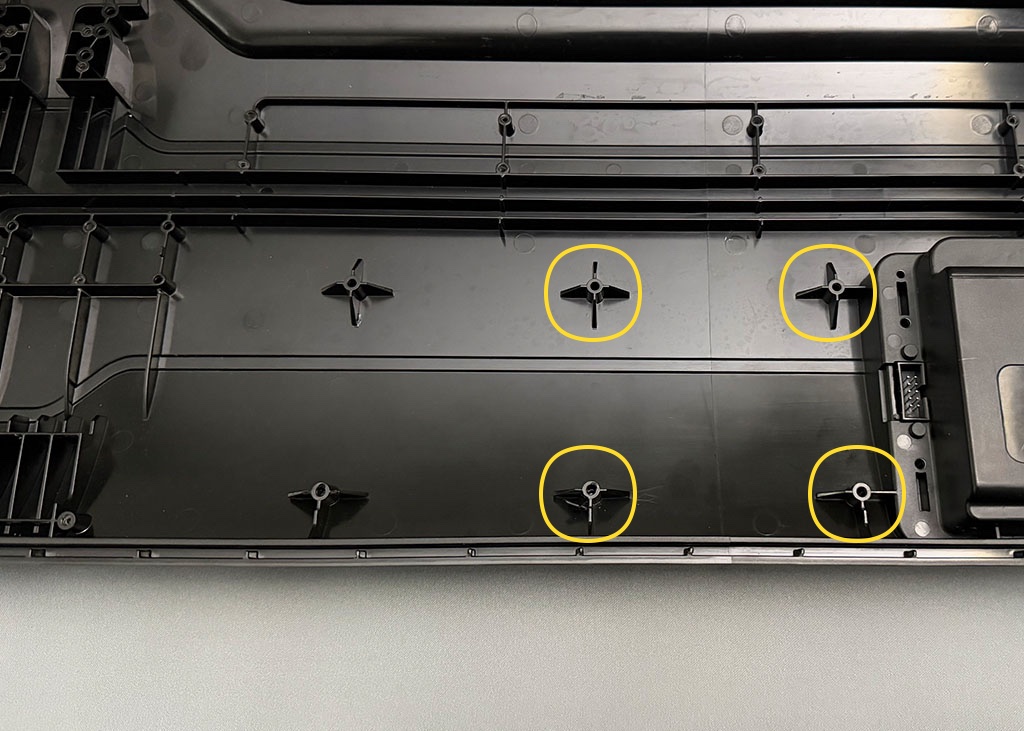
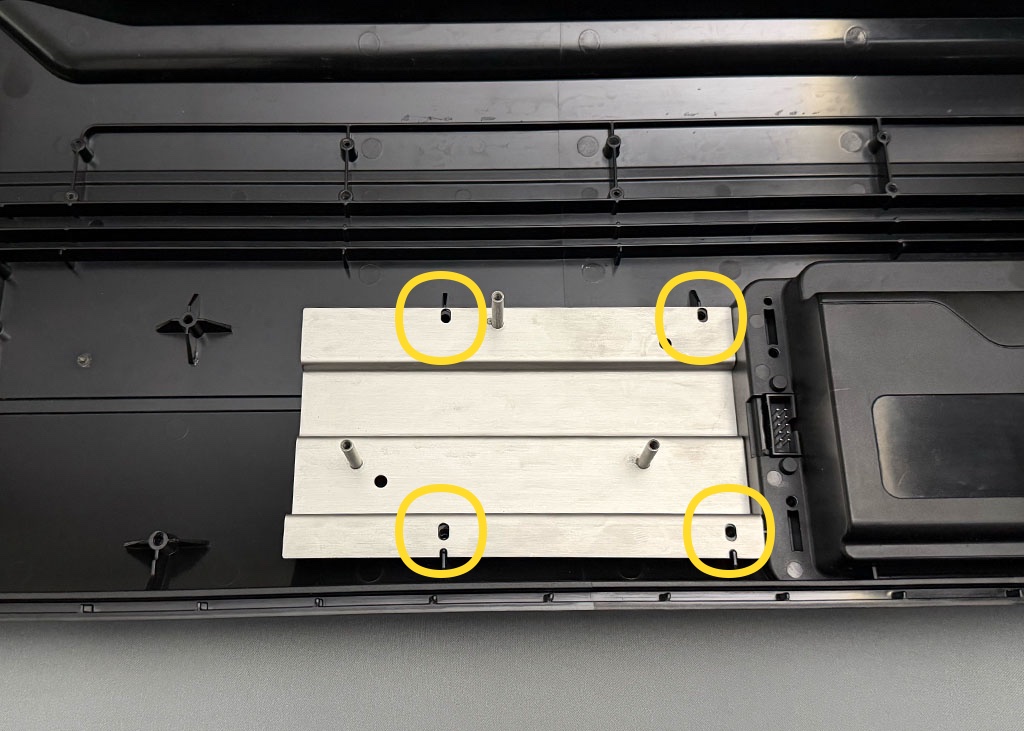
Using the included Torx T10 tool, screw the bracket onto the rear panel.
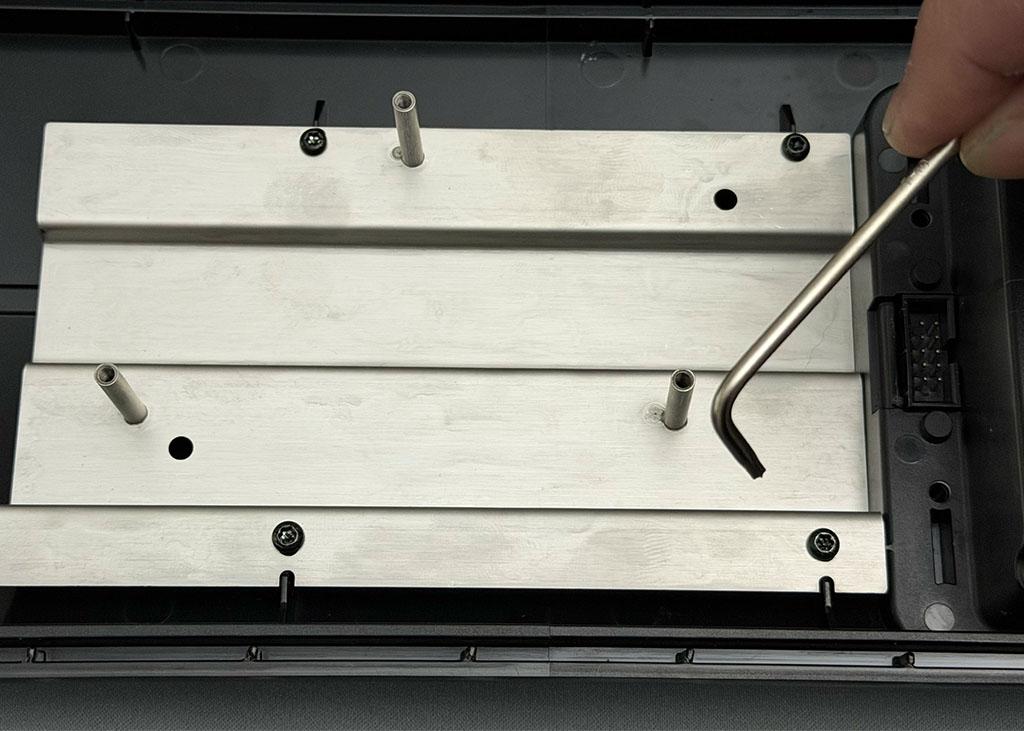
Install WatchDog
The WatchDog plugs into the rear accessory port on your Emblaser Pro. It aligns with the 3 prongs protruding from the bracket.
Check they are aligned when attaching.
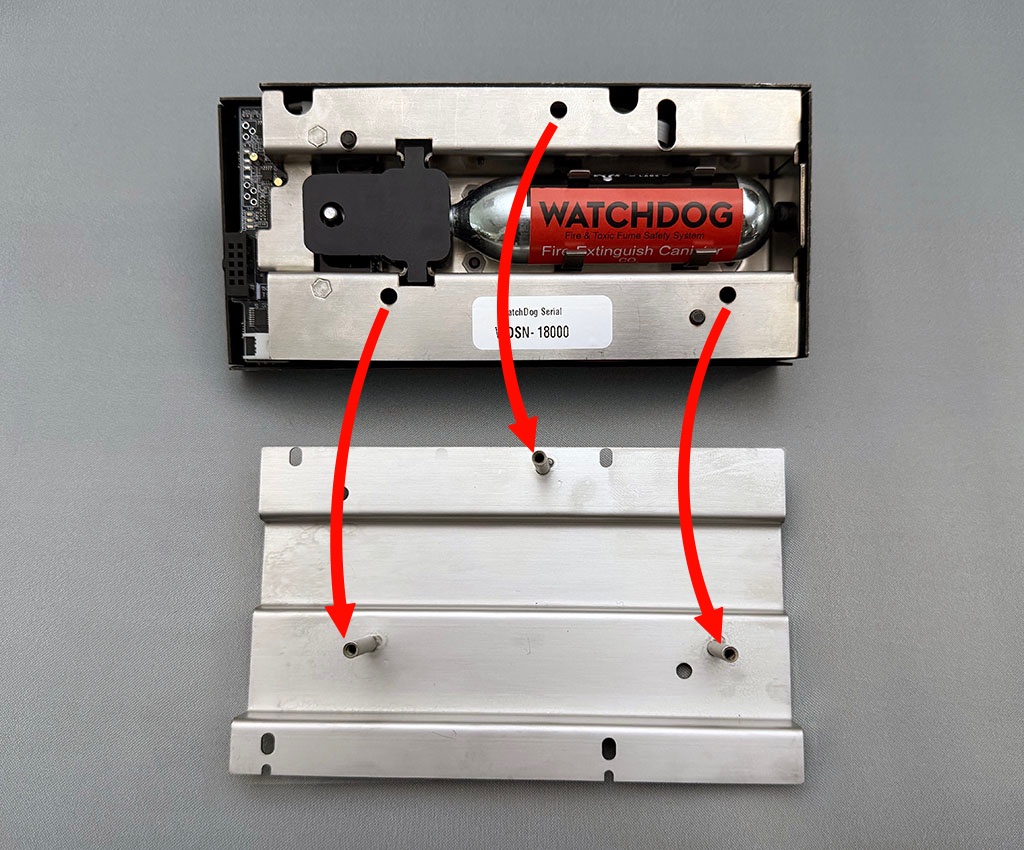
Press the WatchDog in place against the rear bracket.
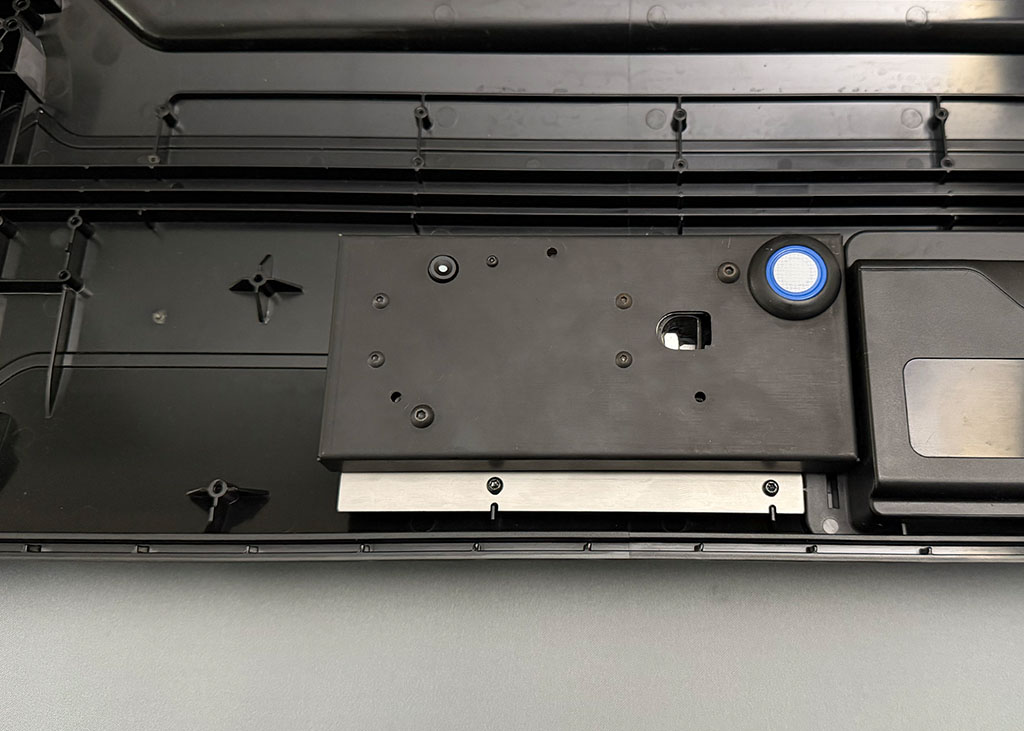
Finally, use the 3 thumb screws to hold it in place on the bracket.
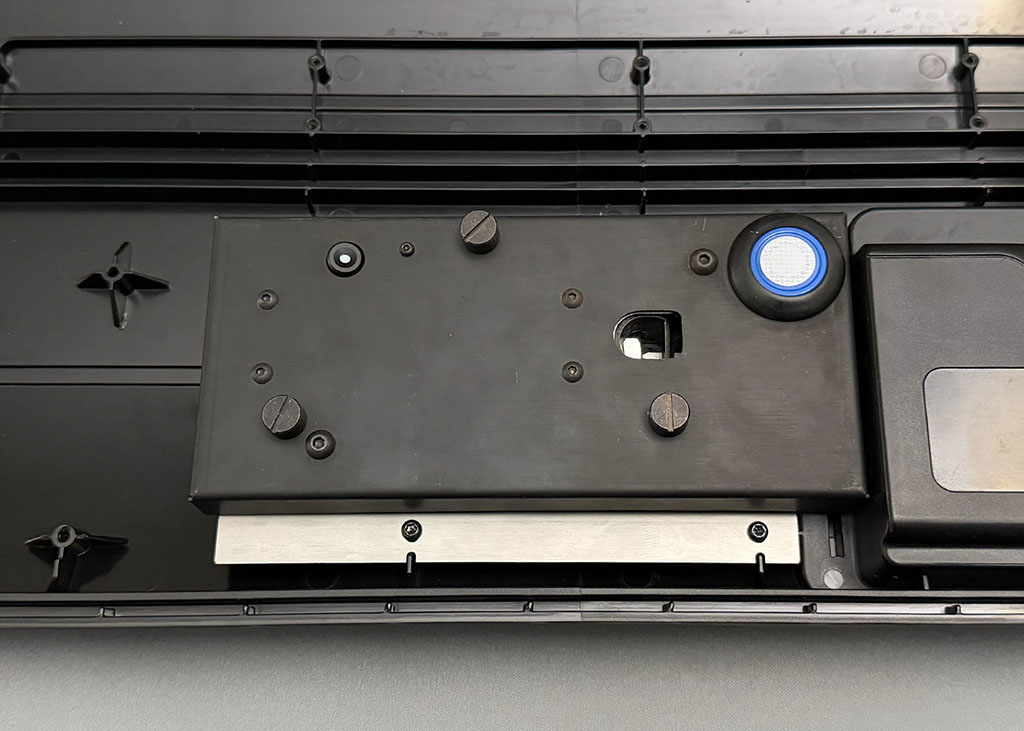
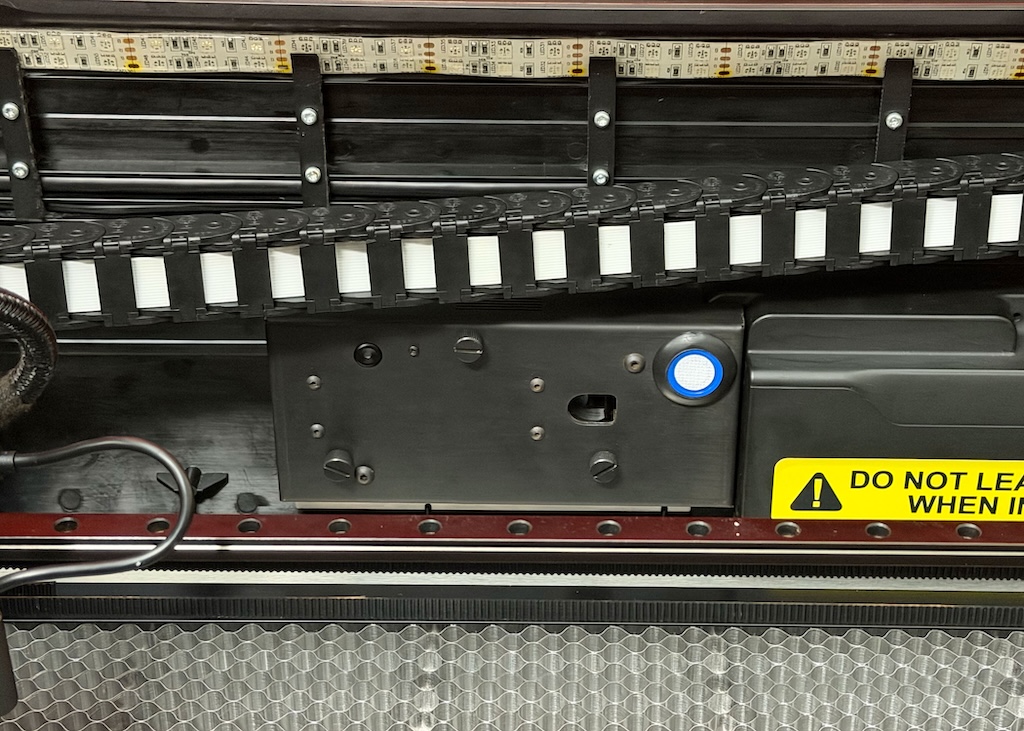
This is how it looks installed in the Emblaser Pro.
Update Firmware
The WatchDog requires the latest version of Emblaser Pro firmware to work.
Controller Firmware Version: FWCON:2.2.1710 or later.
Please install the latest firmware. Check your user manual if you need information on how to do this.
Check WatchDog Status
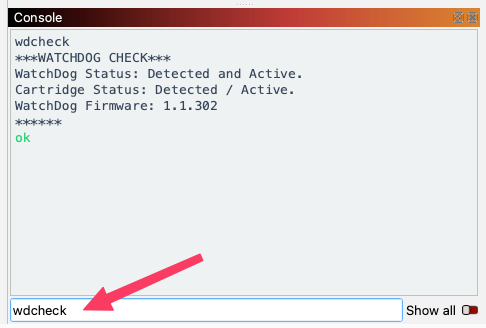
With your Emblaser Pro turned on and connected to LightBurn, type ‘wdcheck’ into the Console window to check the status of the WatchDog.
Download and Read User Manual
The WatchDog is designed to improve safety during laser cutting.
It is important to read the User Manual to understand how it works and needs to be used / maintained.
