
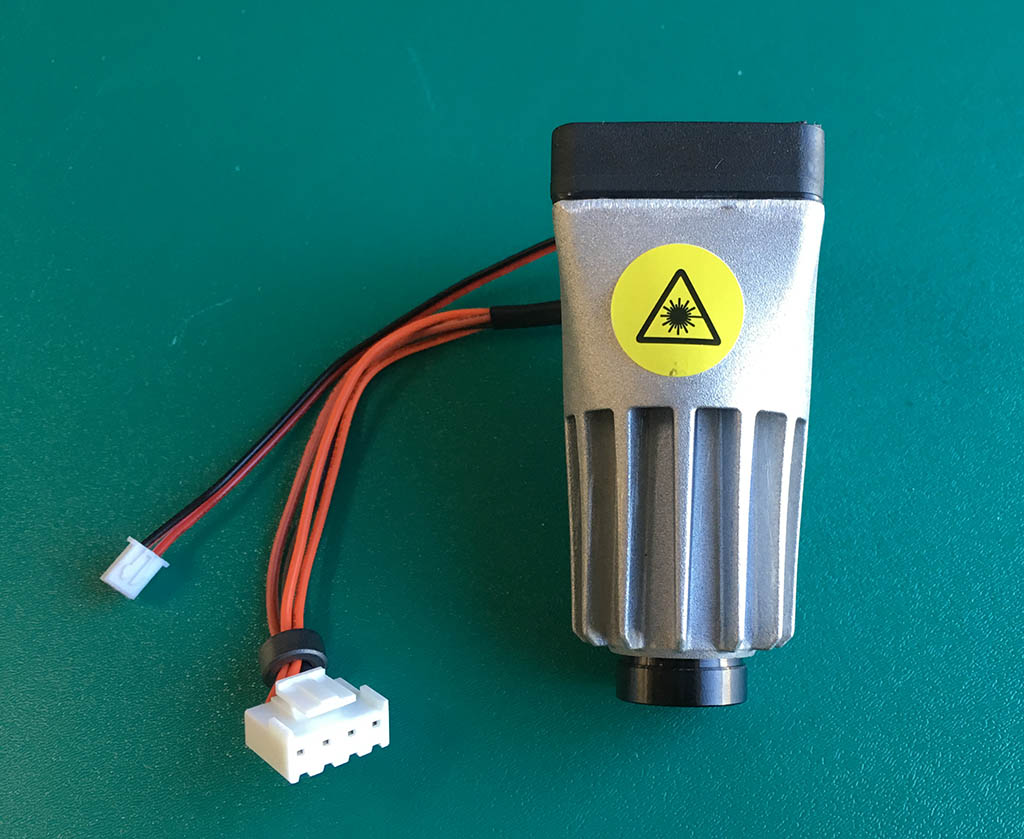
The Laser Unit is the aluminium assembly attached the to front of the Laser Carriage Assembly. It houses the Laser Diode and Lens Housing.
Replacement Laser units can be bought from the Darkly Labs store here if needed.
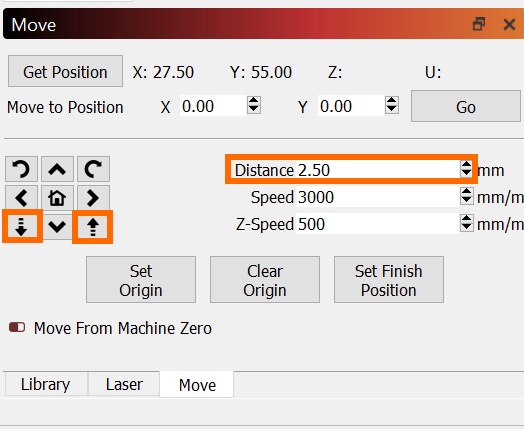
Step 1:
Turn on your Emblaser 2 and use the LightBurn ‘Move’ menu to lower the Laser Unit to its lowest position.
Turn off your Emblaser2 and unplug the power cable.
Step 2:
Use a Philips head screw driver to remove the two indicated screws.
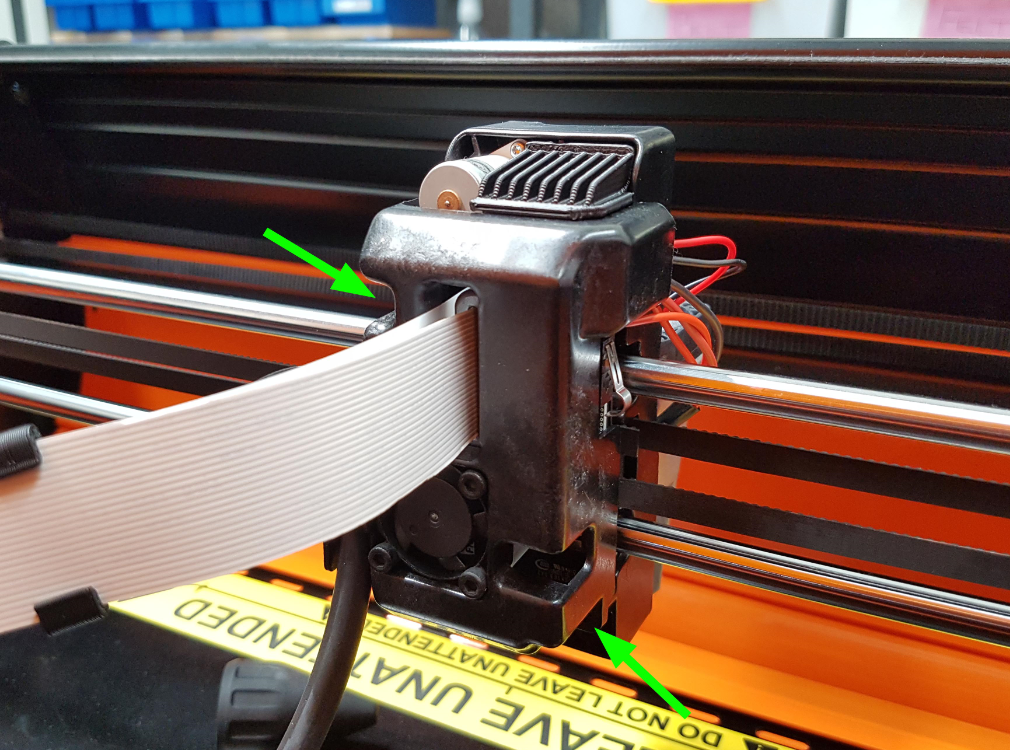
Remove the Laser Carriage Cover. Take note of where the cables and interior components sit, these will need to be returned to their positions when the Laser Carriage Cover is reattached.
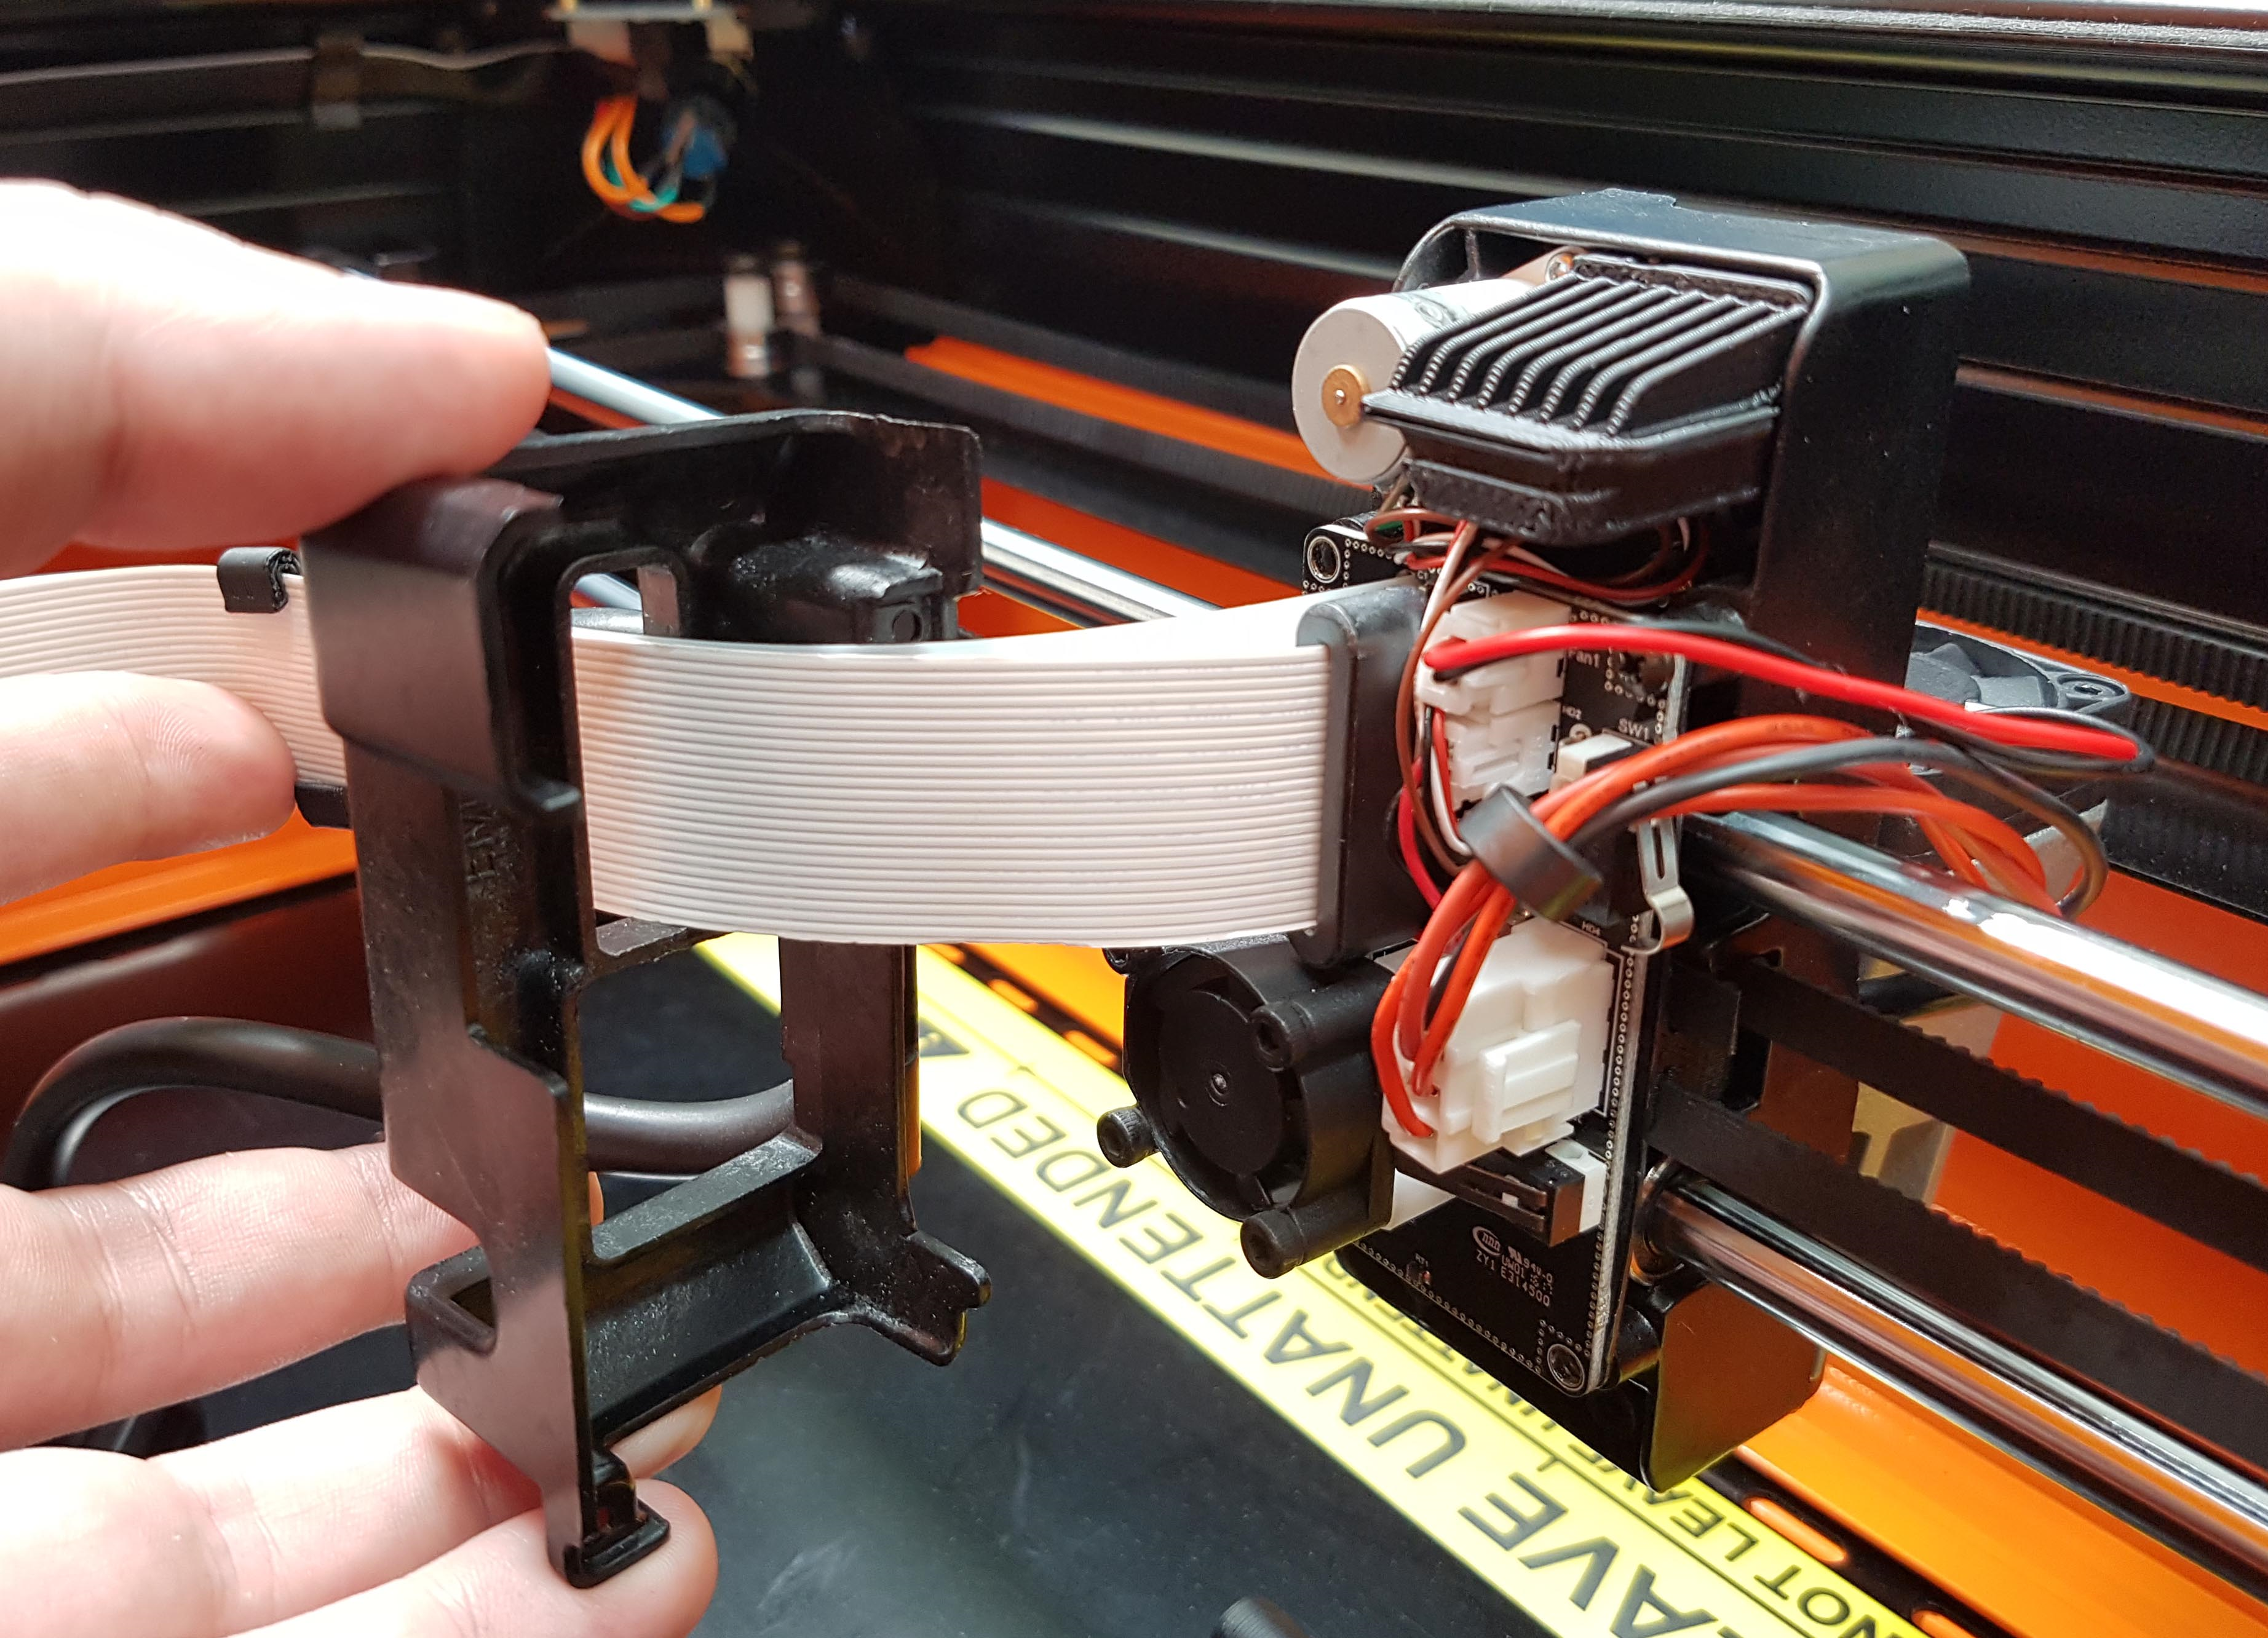
Step 3:
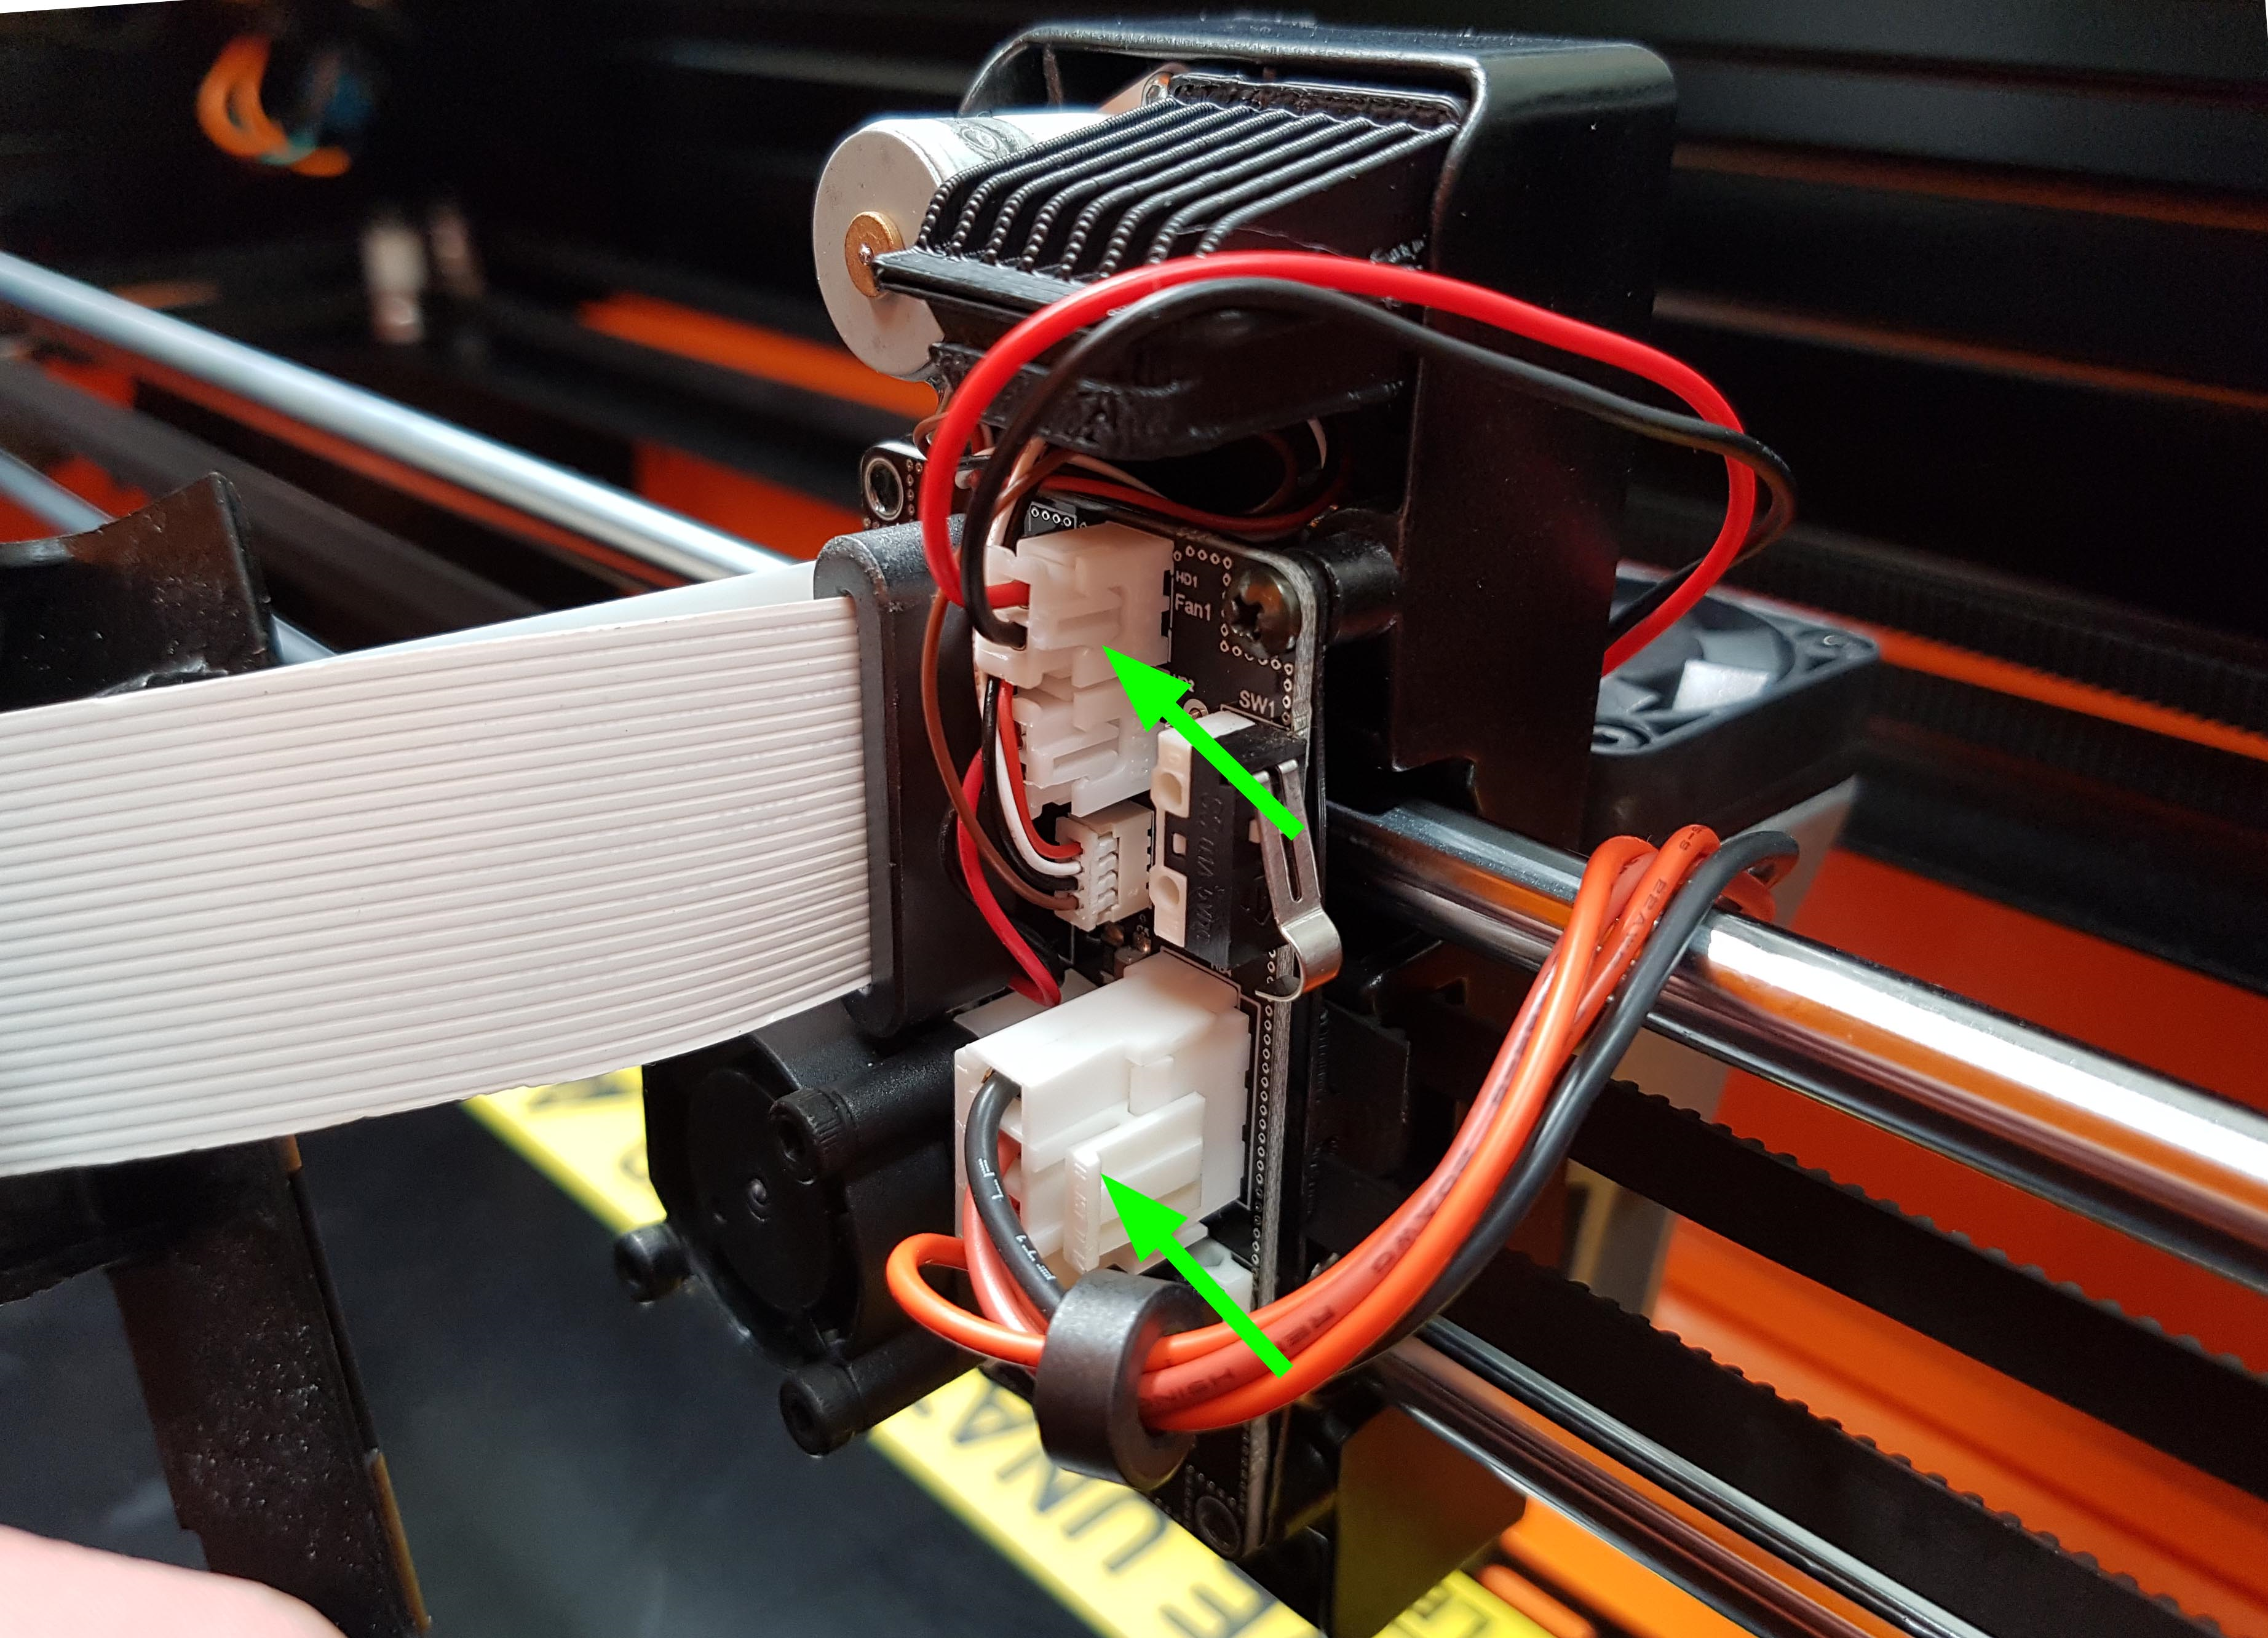
Unplug the Laser Diode and the Laser Unit Fan connectors from the Laser Driver PCB.
Step 4:
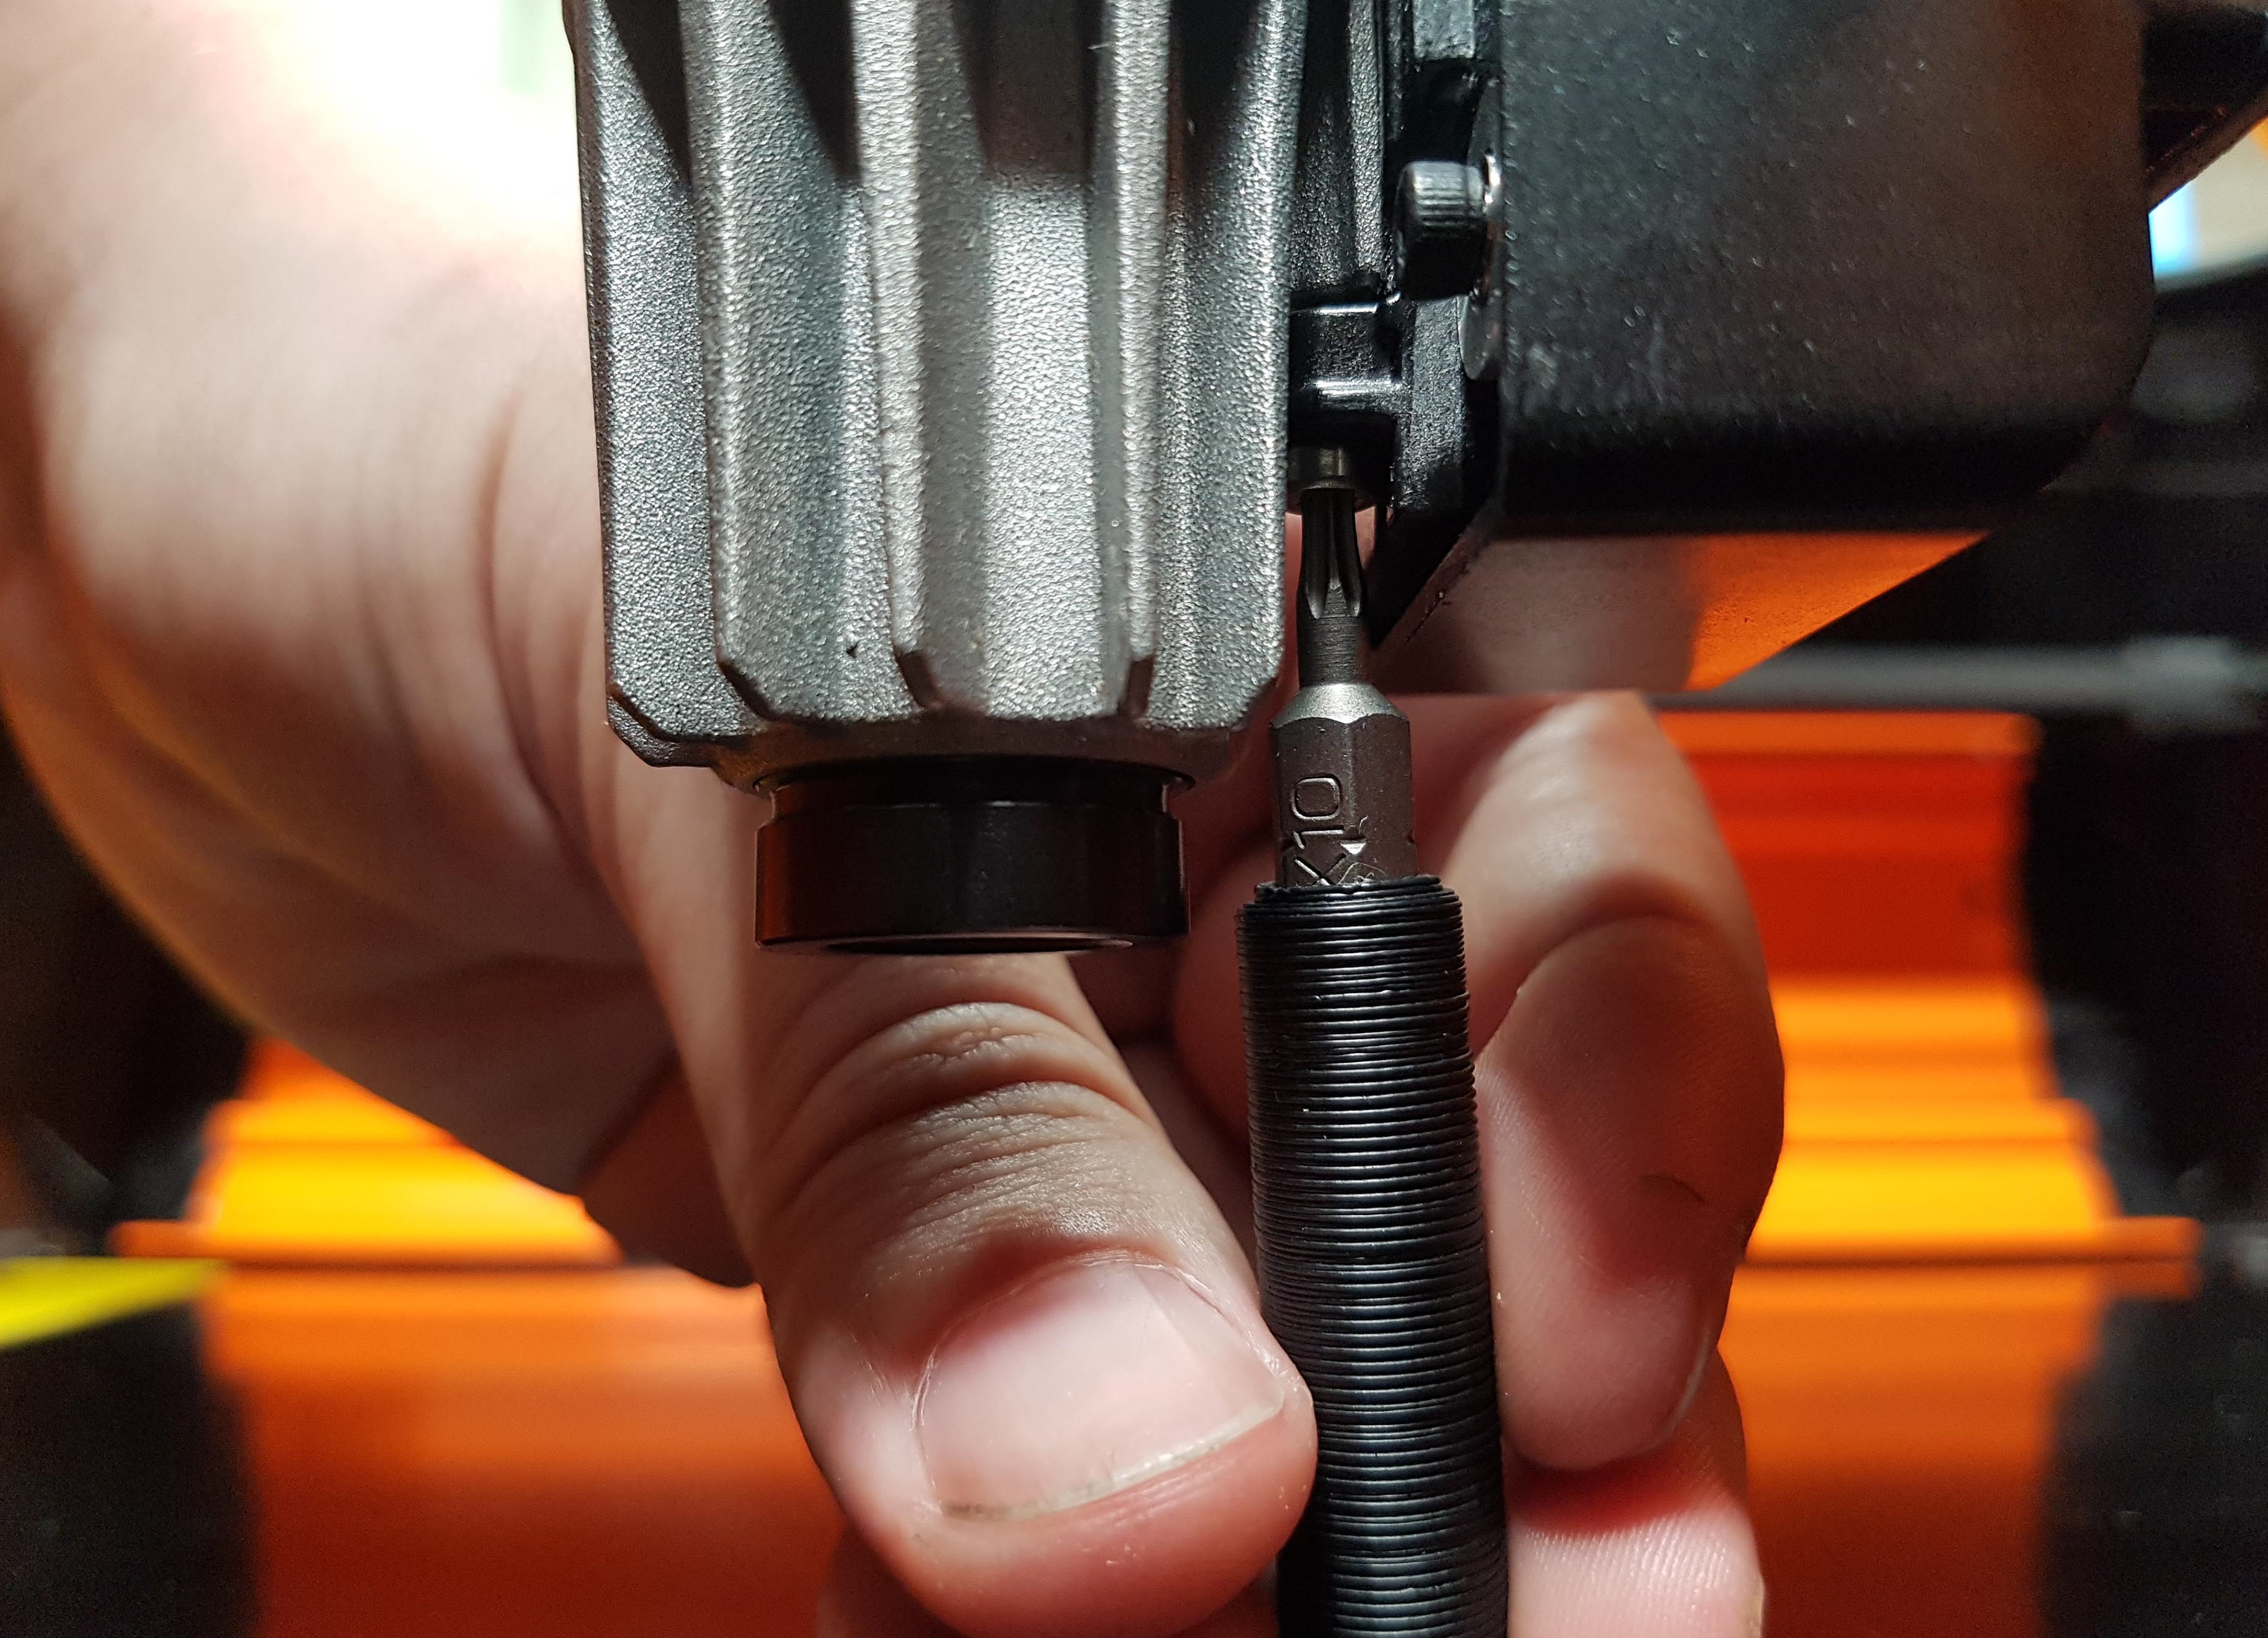
With the Laser Unit moved to the lowest position, use either a TORX T10 bit, or 2mm Hex key (supplied with your Emblaser tool kit) to unscrew the fastener retaining the Laser Unit to the Laser Carriage.
Step 4:
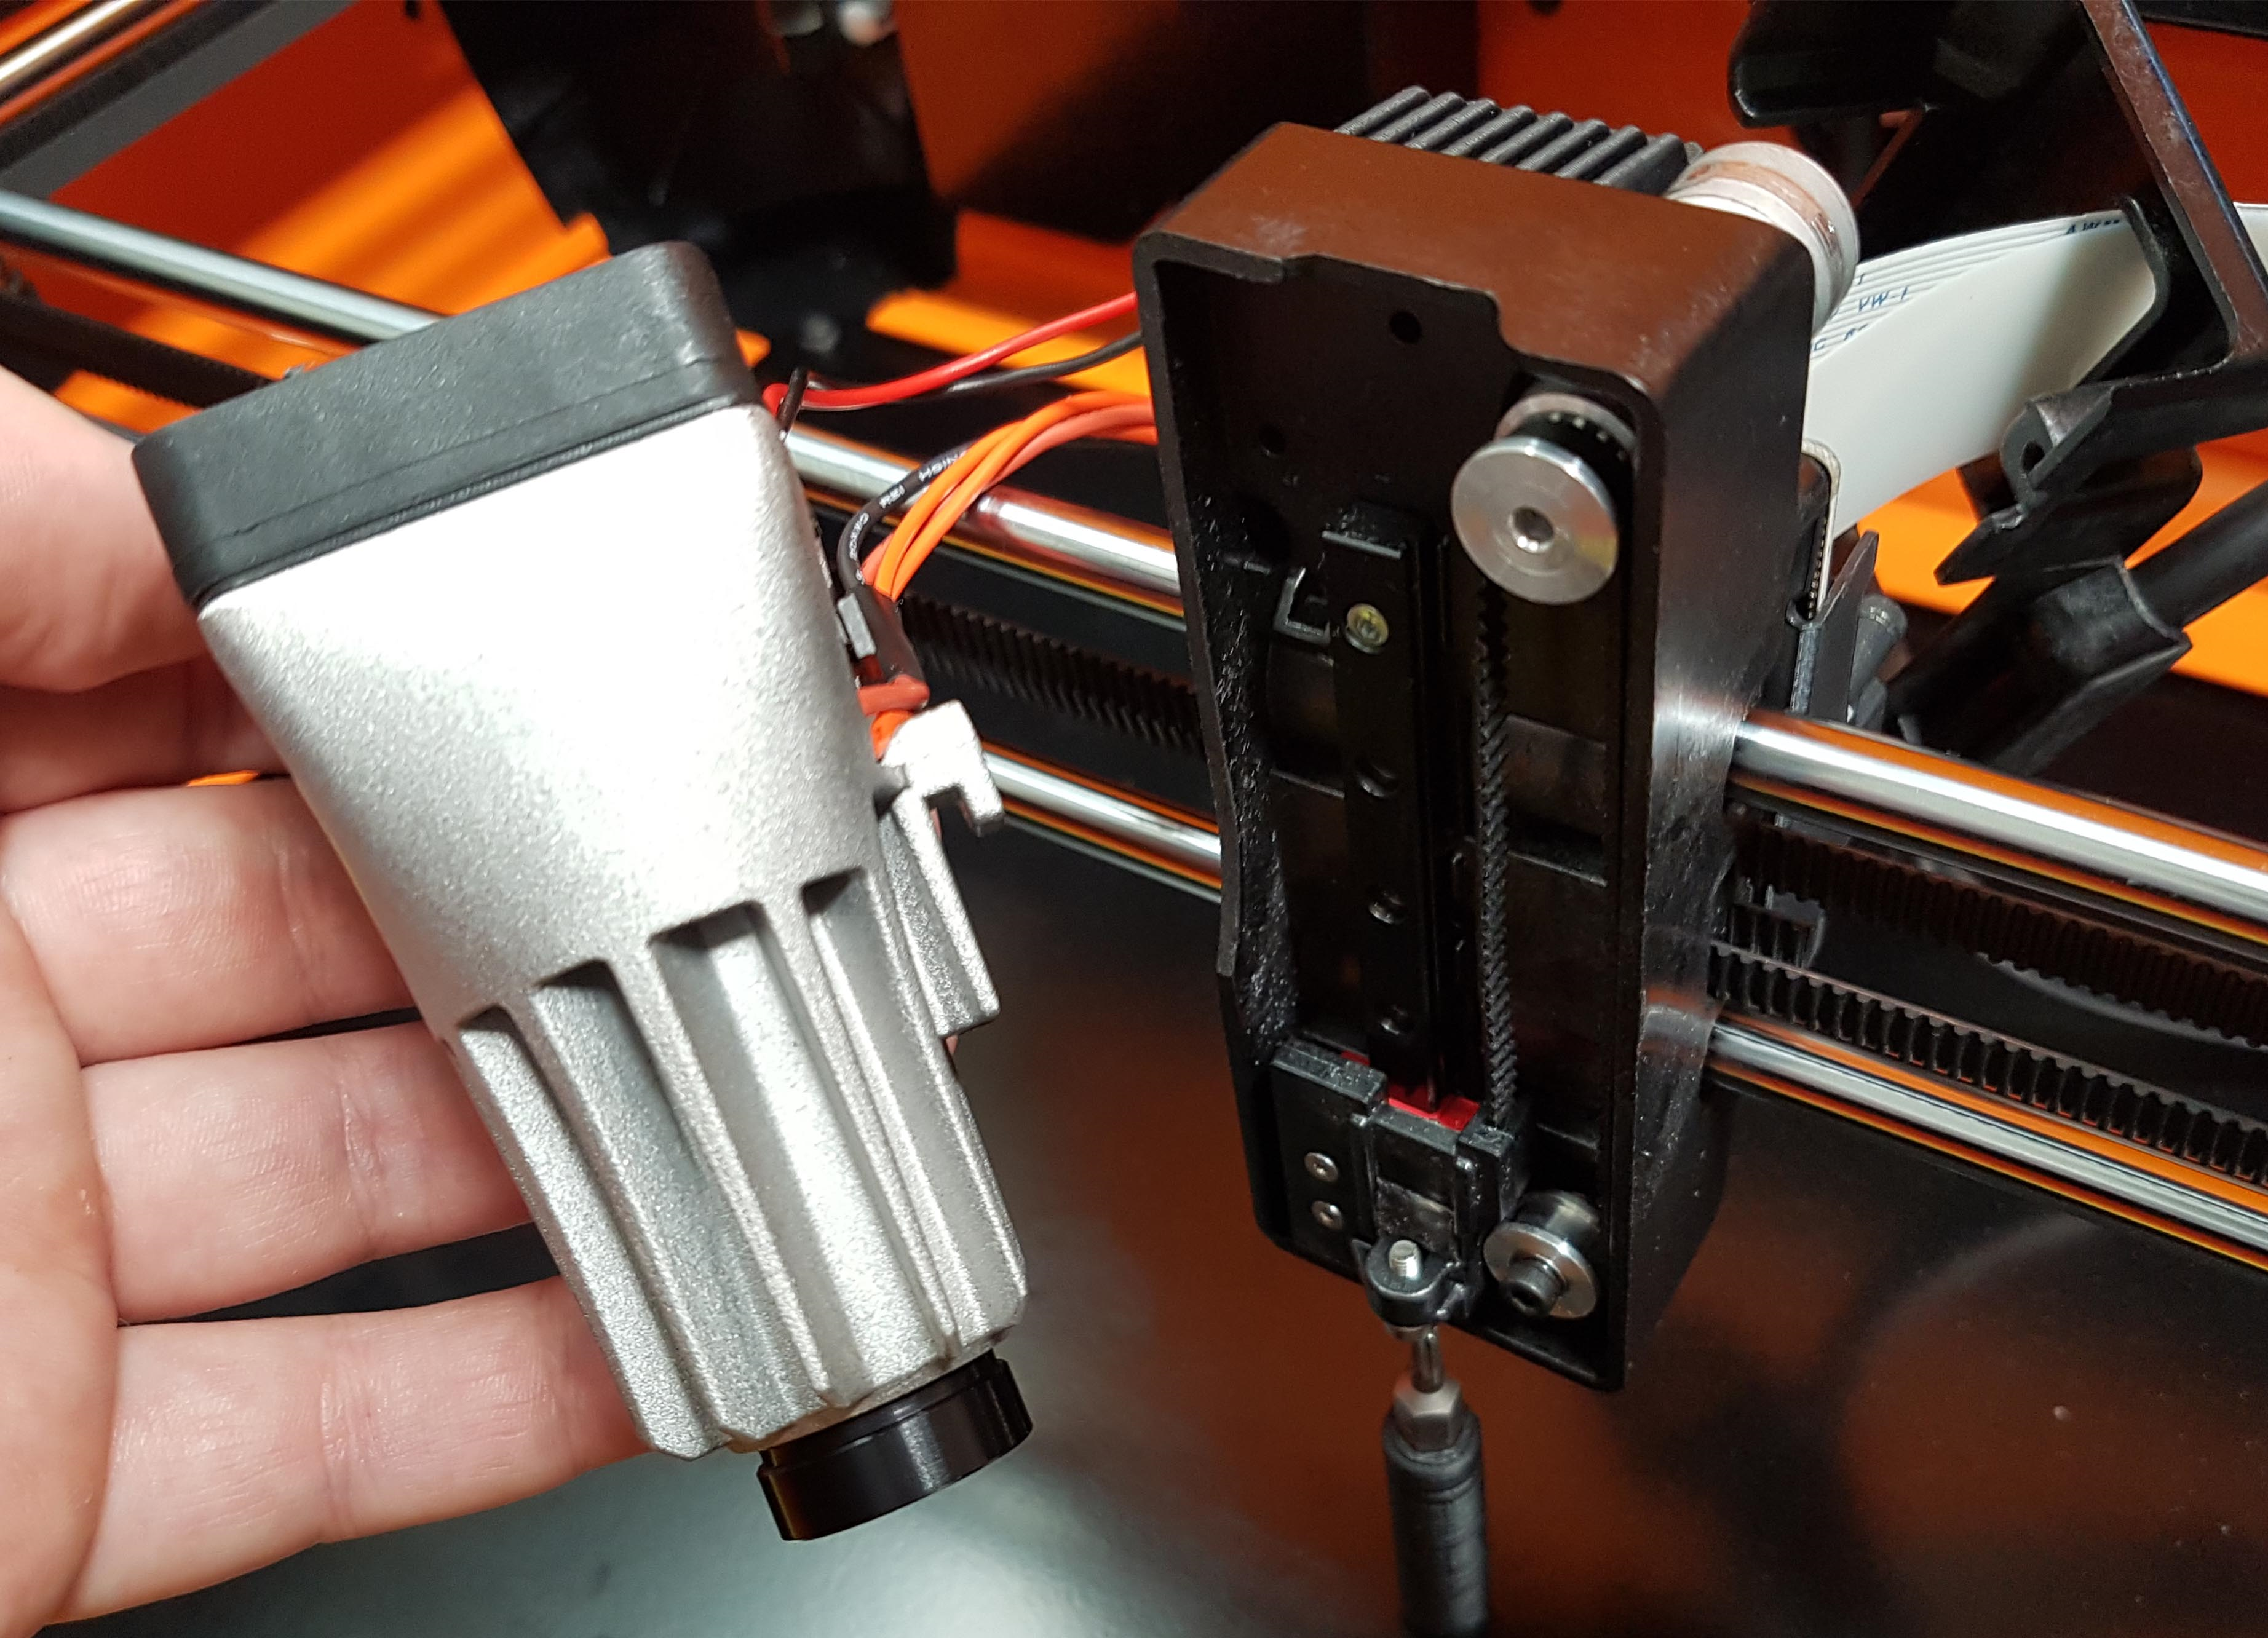
Remove the Laser Unit, take care to keep exposed lenses free of finger prints.
To reattach the Laser Unit, or to attach a new Laser Unit simply perform these steps in reverse.
