
One of the trickiest parts of laser cutting is determining the best laser settings for your material. This tutorial will show you how we do this at Darkly Labs.
We will be testing a piece of 3mm MDF to find the best settings for engraving.
What you will need:
- Scrap piece of 3mm MDF. Preferably from the same batch as you plan to use for your project.
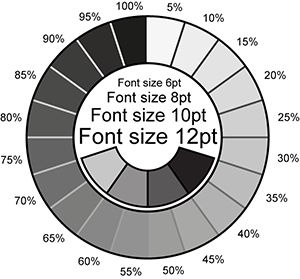
- E2 Engraving Test.png attached to this article.
Step 1: Decide on initial parameters
There are a number of parameters which affect how your material will engrave.
Deciding on two of these values up front will make the testing process a lot easier.
#1 Laser Diameter (resolution)
Recommended settings for the Emblaser 2 & Core:
Low Quality (>0.2mm): Values higher than 0.2mm will engrave very quickly but there will be spaces between engraving lines and resolution will be low.
Normal Quality (0.2mm): This is the normal quality setting and allows the best balance between detail and engraving time.
High Quality (0.1-0.15mm): With these values you will be able to achieve finer detail but at the cost of longer engraving times. Please note that values <0.1mm will not improve quality but will significantly increase engraving time.
#2 Cut Rate (speed)
The ‘Cut Rate’ is the speed at which the laser is moved over the material.
When moving slowly the laser has more time to engrave the material, producing darker results.
The goal of this test is to find the settings which produce the desired result in the least amount of time.
As each material is different, this ‘cut rate’ will need to be guessed initially. You will eventually get a good sense of where to start from.
- Too fast and your material will not show enough darkness variations.
- Too slow and your material will burn or even catch fire.
Our chosen starting values for this tutorial are:
Laser Diameter = 0.15
Cut Rate = 1500mm/min
Step 2: Run a test
This process involves some trial and error. Run the test on your material with the chosen starting values.
Step 3: Check your results
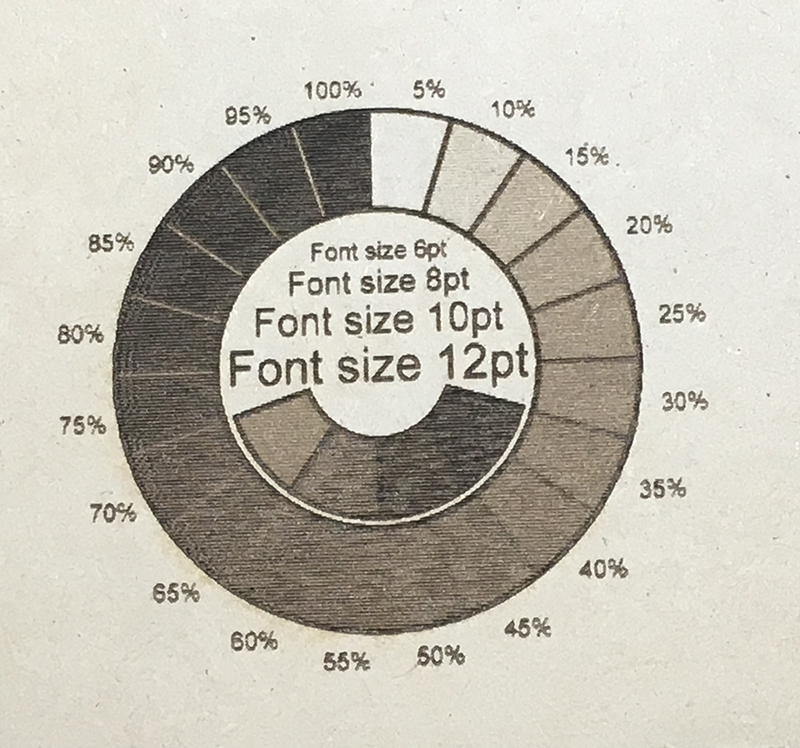
The first test looks good but upon close inspection we can see that the engraving becomes dark very quickly and there is little graduation within the lighter tones. For the best image engraving, it is better to have an even distribution of tone throughout the power range.
Step 4: Tweak and test again
For the second test we decided to increase the Cut Rate to 3500mm/min.
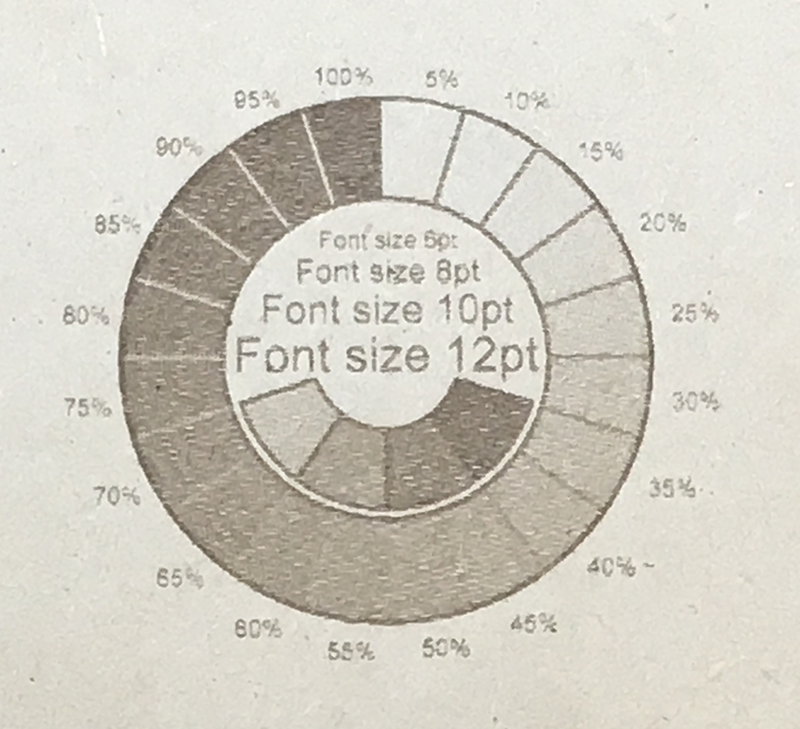
This has helped with our lighter areas but our darks are now not dark enough. We can also see that the text is not fully engraved.
Lastly, we set the Cut Rate to 2500mm/min.
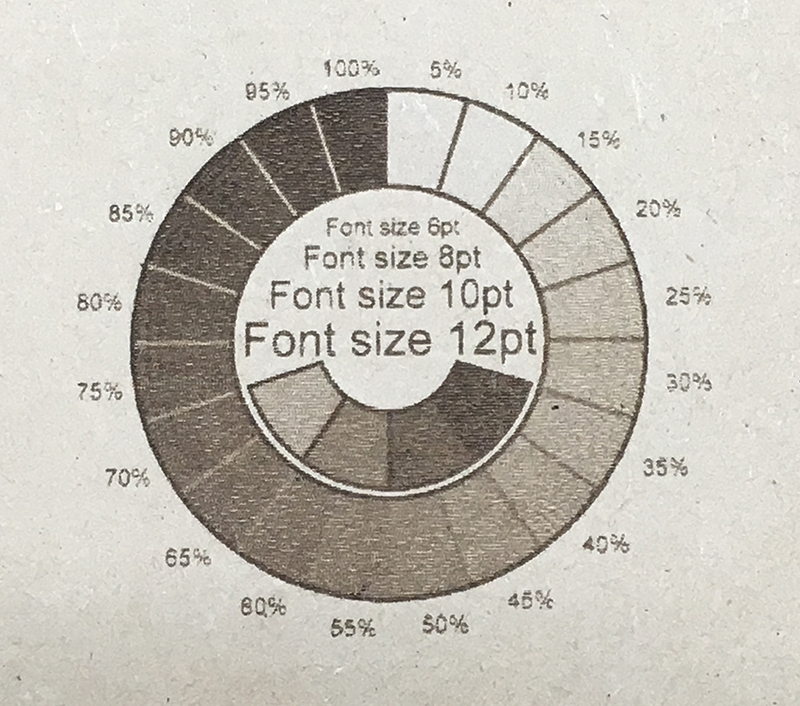

From this result we can see a nice linear distribution of tone. At 5% power we can see that there is no darkening and full darkening is achieved at 100%. Perfect!
