
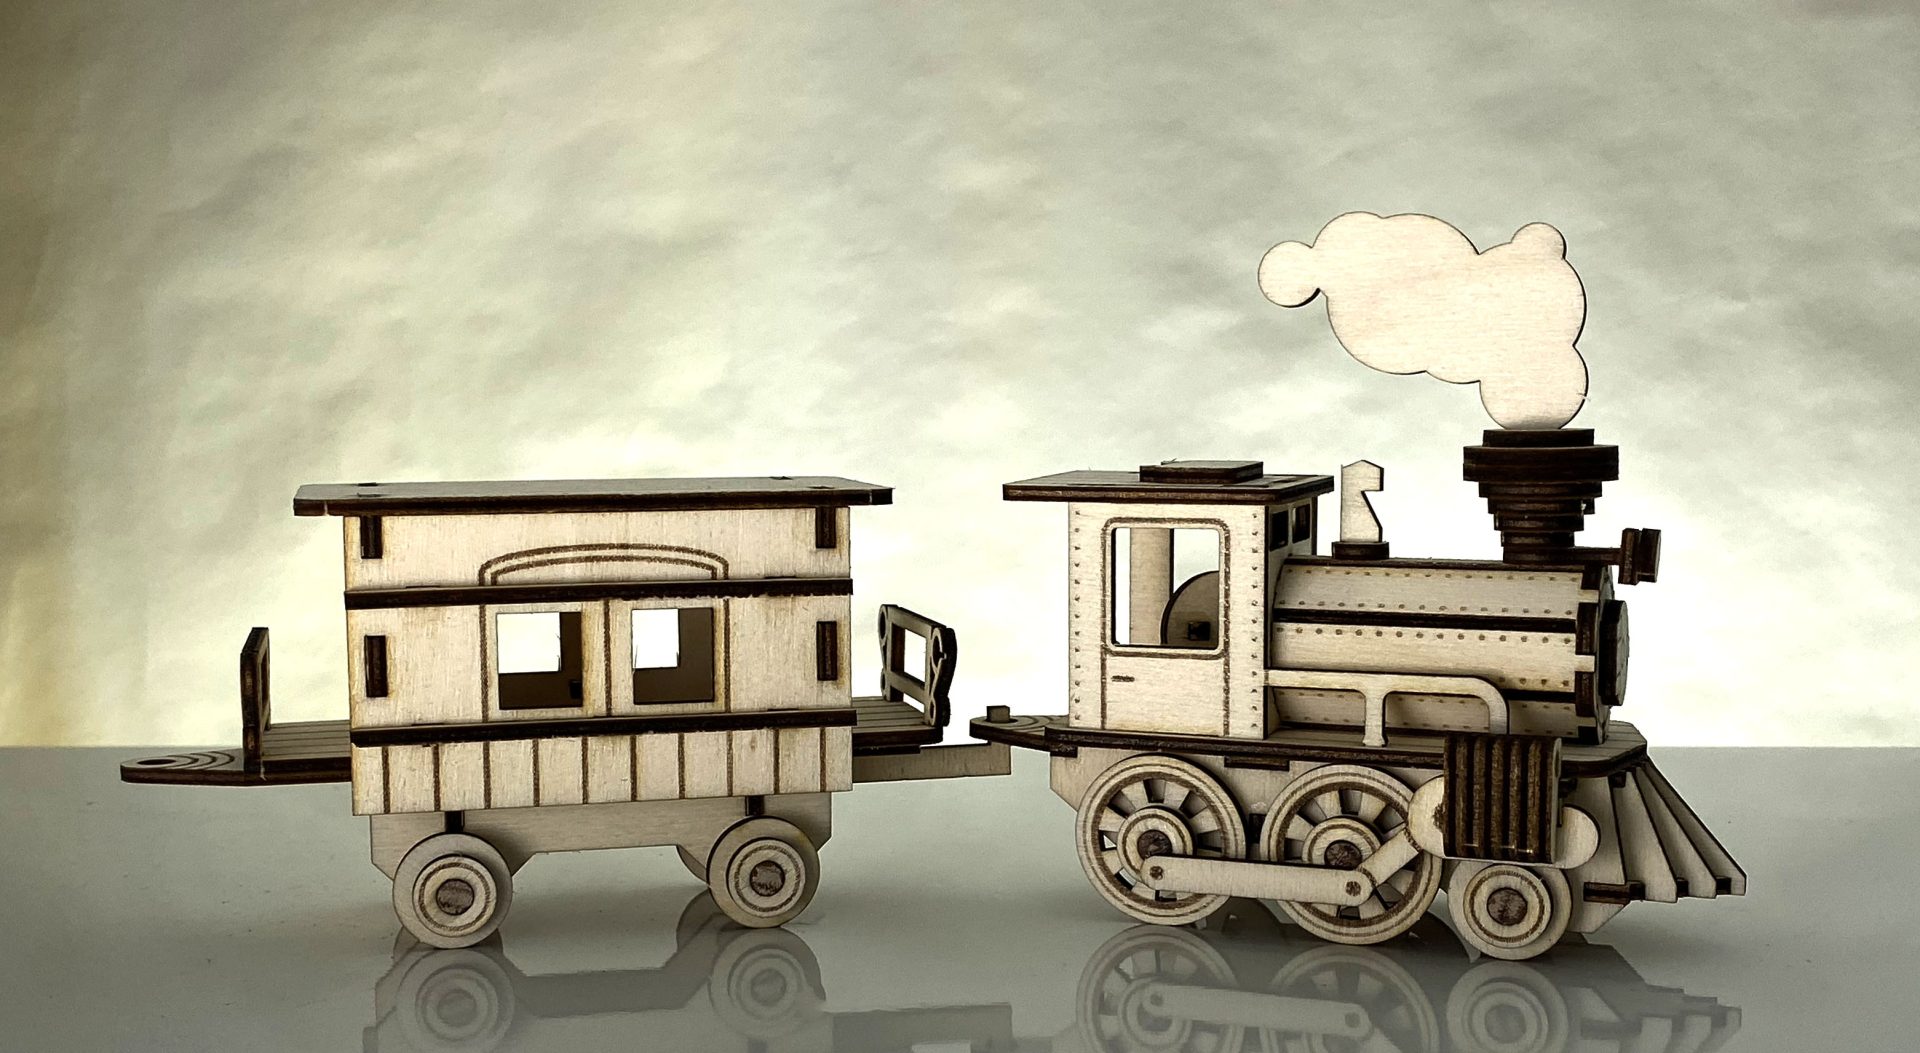
Here we have a train created by our lead designer, Chris. We called it the ‘ChooChoo’ train because that’s the sound he was making while playing with it.
Don’t believe me? Watch the video at the end of this post.
Project Files
Materials:
- 3.0mm Poplar Plywood
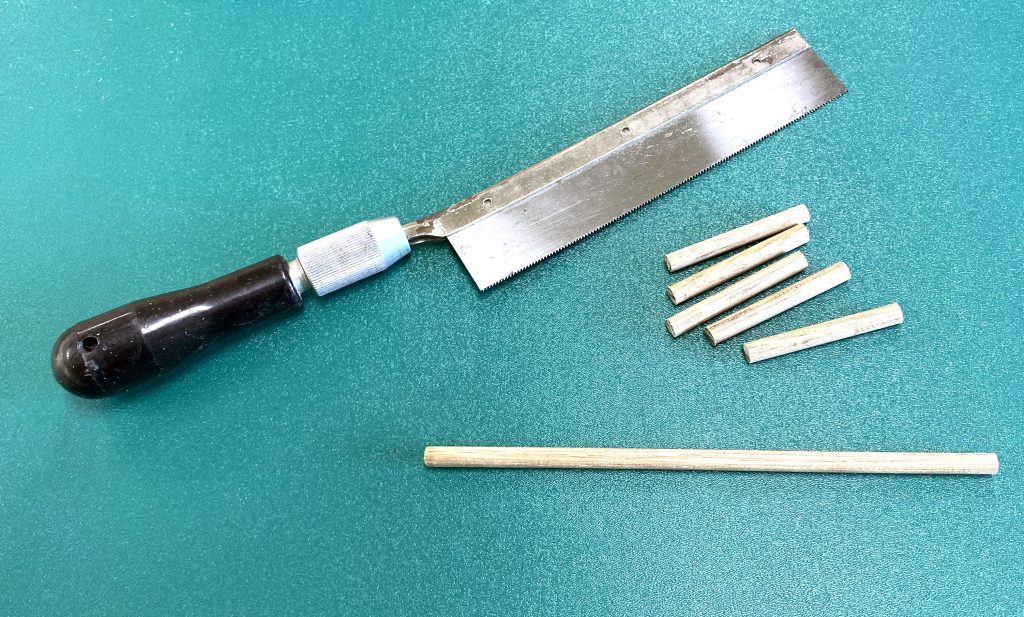
- 6.0mm Dowel
Other Items Needed:
- Wood glue
The Build
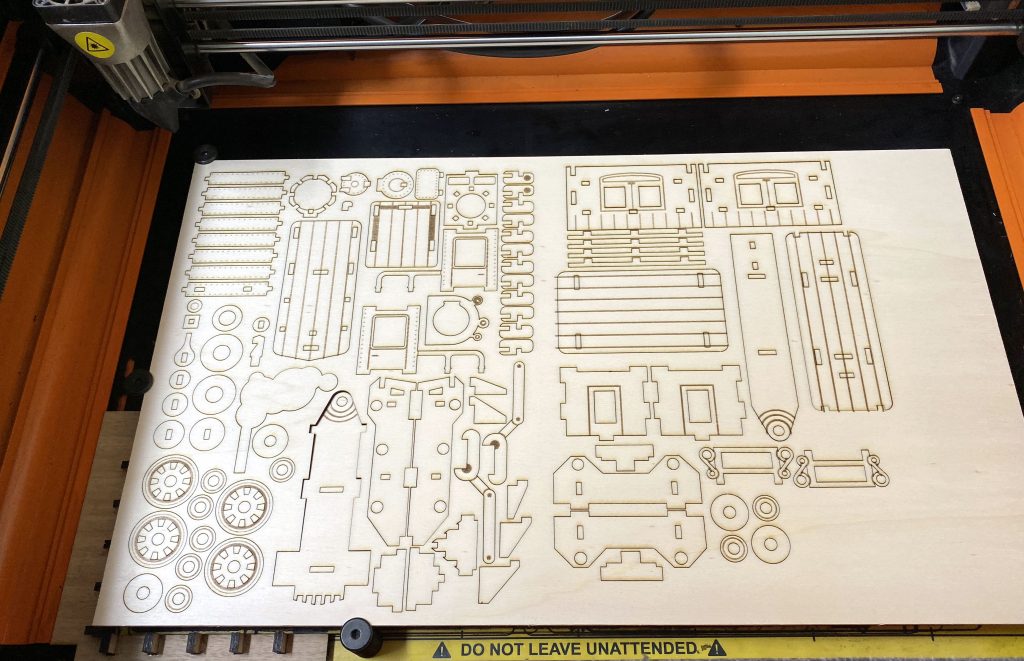
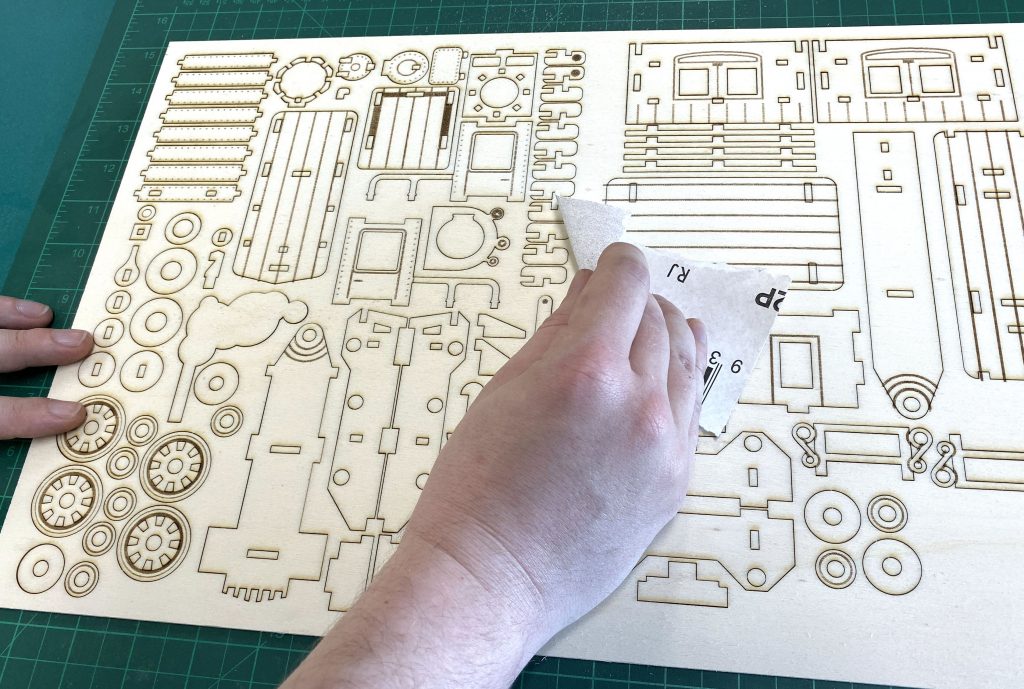
Since we designed this project ourselves, it’s perfectly setup for the Emblaser and easily fits on one 300x500mm sheet of 3mm plywood.
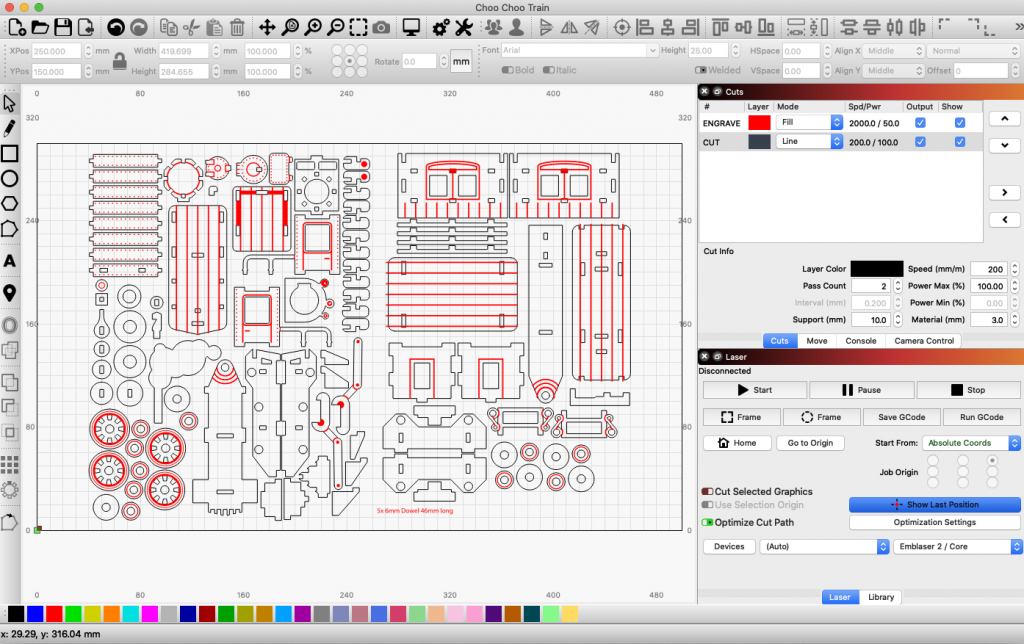
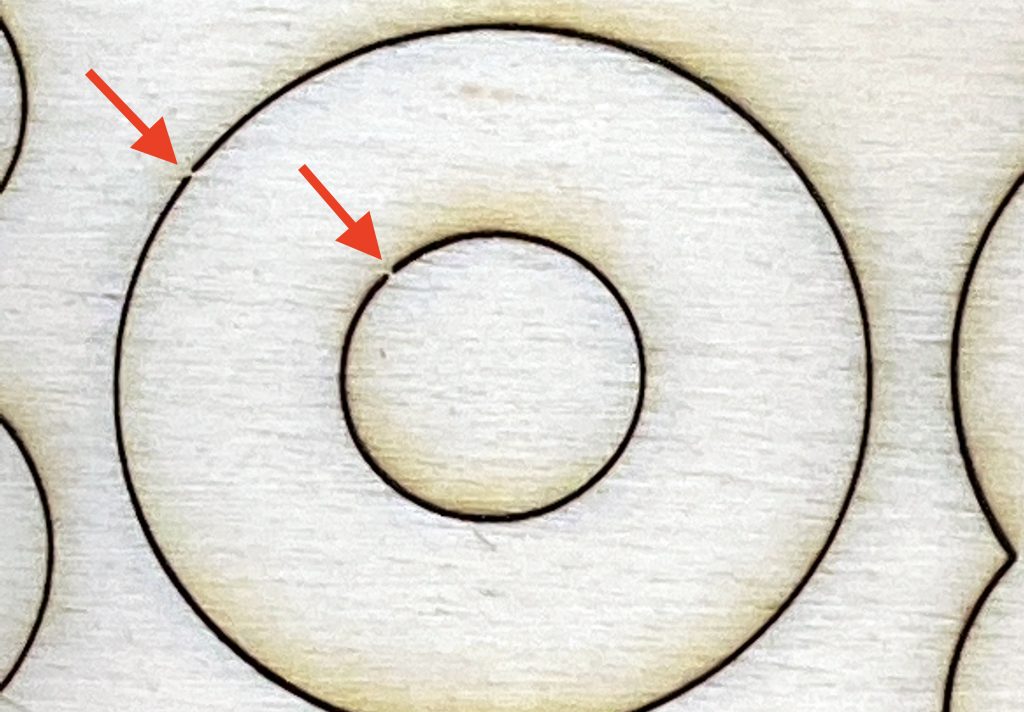
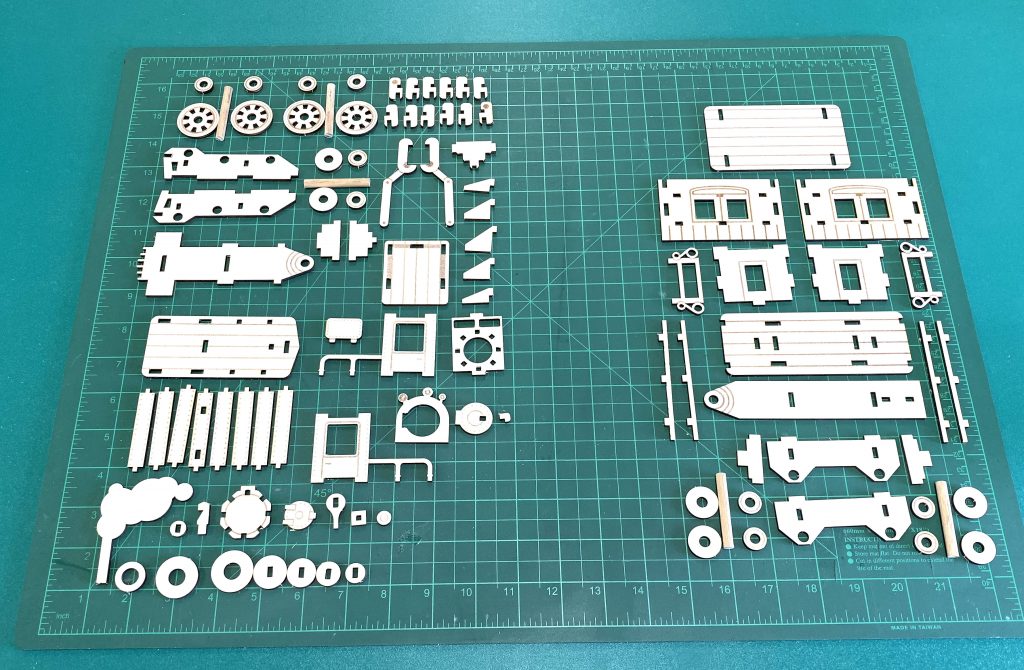
A very cool feature Chris included in this project were support tabs that prevent the parts falling out after cutting.
For a project with so many pieces, creating support tabs in LightBurn is normally very time consuming, unless you use this process.
To explain the process, we will use a simple circle, but this will work with any shape.
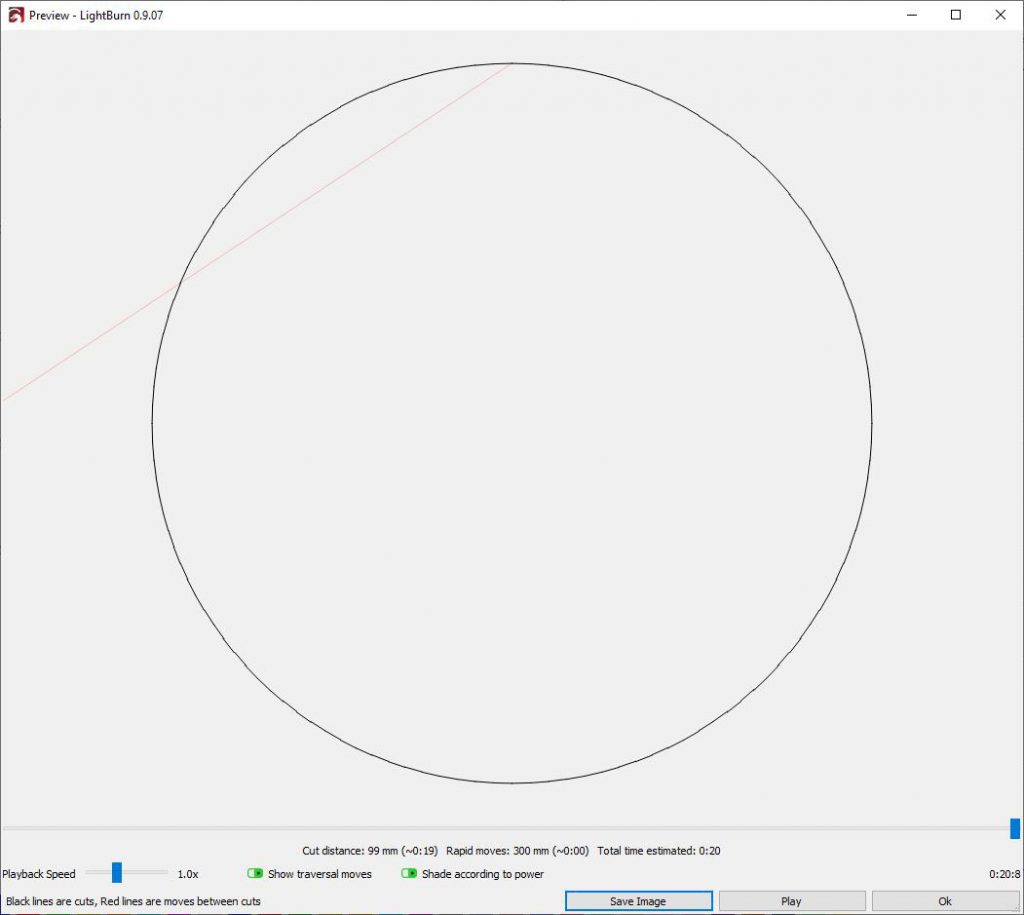
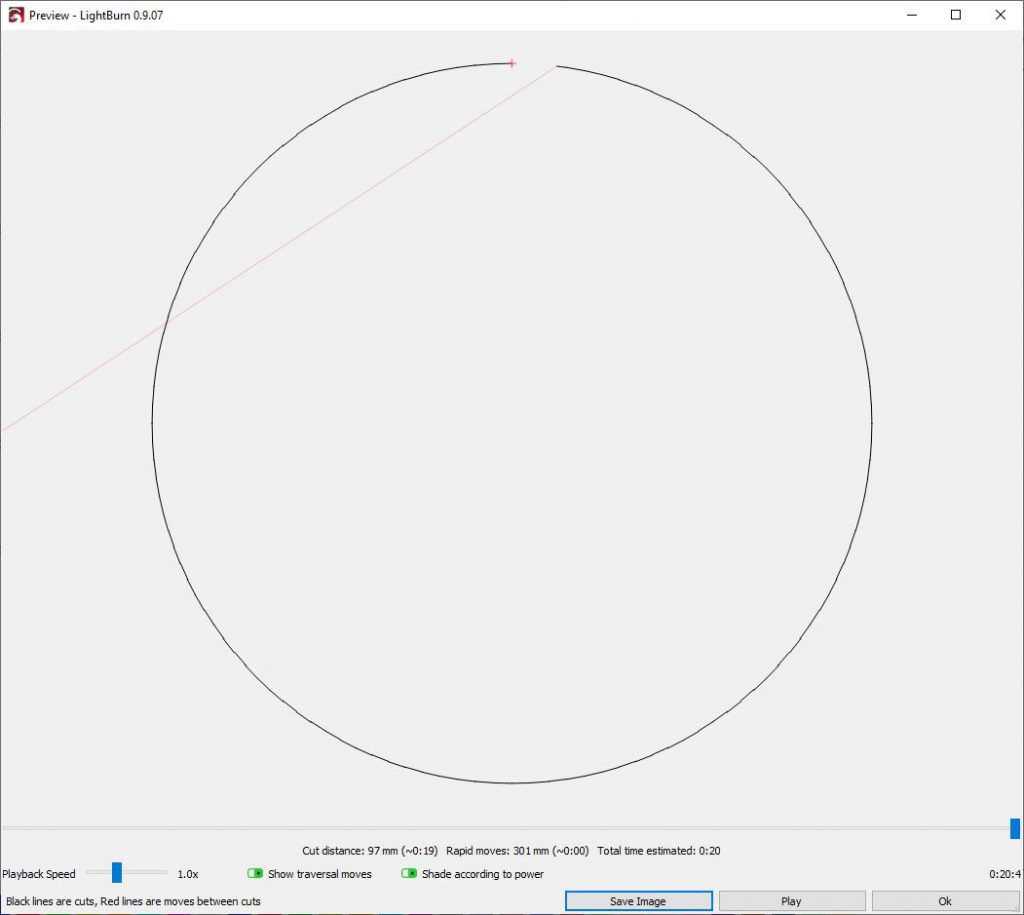
In the Cut settings, we enable ‘perforations’. By default, perforation mode would create a set of dashes as shown in the image below.
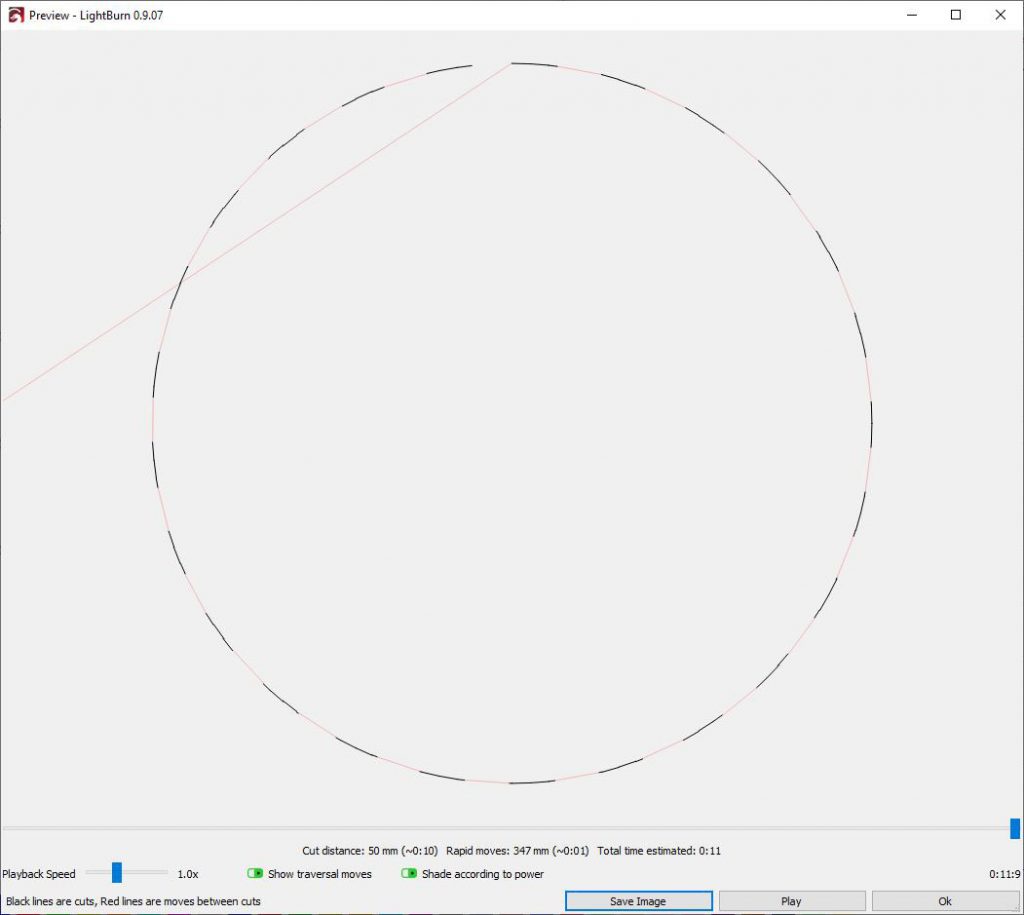
By adjusting the perforation ‘cut’ and skip values, we can force LightBurn to create a single tab for each part. The key is to set a large perforation ‘cut’ value. In our case we used 500. Since none of our parts had an outer edge longer than this, only one perforation will be created. The width of the tab was set to be 0.35mm. This was just enough to hold the piece in place.

I used our 3mm Poplar plywood for this project because it cuts so nicely.
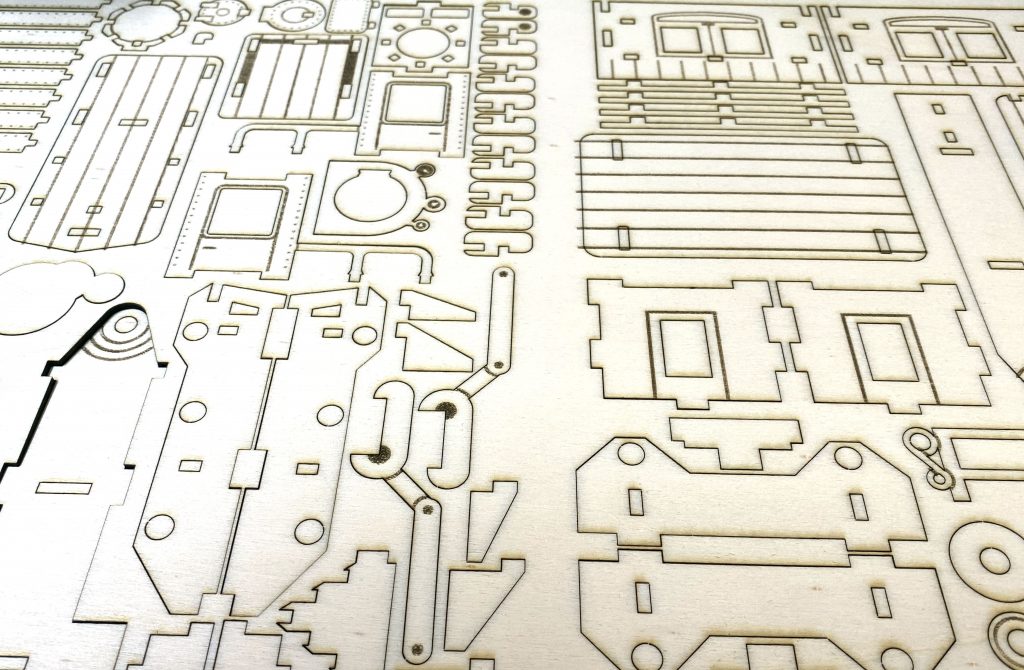
Even though the cut pieces were very clean, I gave them a quick sanding with 240 grit sandpaper. This wasn’t entirely necessary, but was easy since the tabs held all the pieces in place.
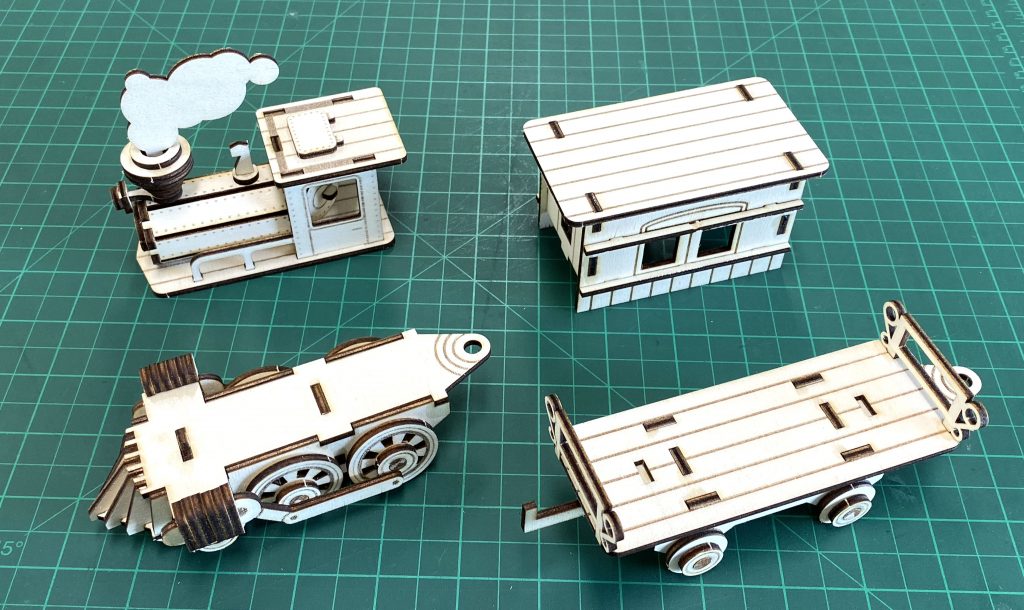
The only other parts needed before assembly were some axels cut out of dowel.
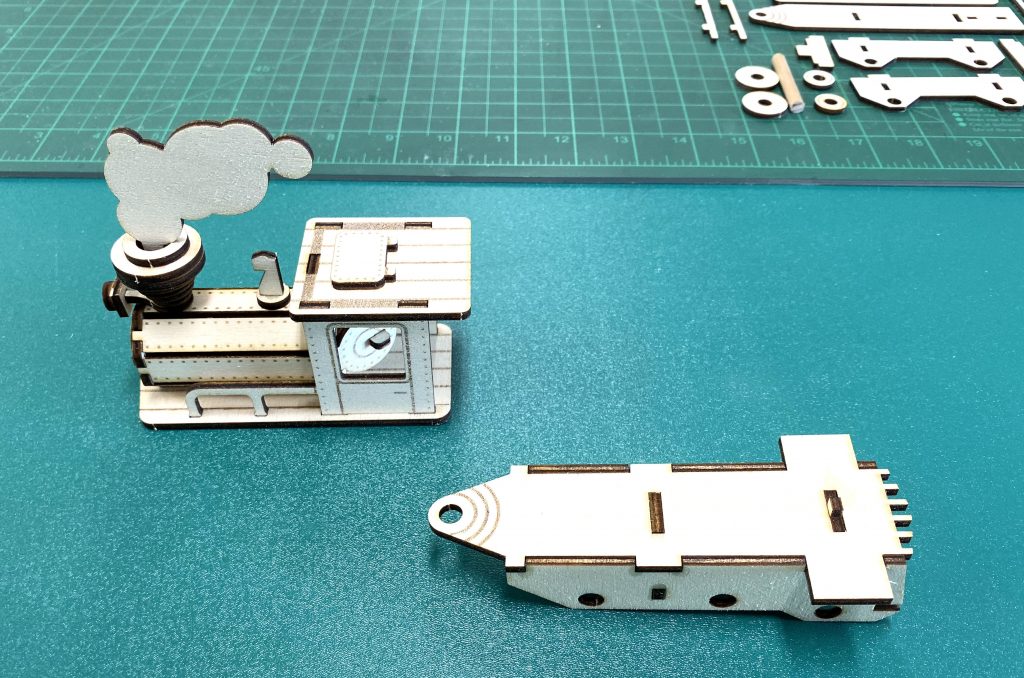
As always, I lay out all the pieces before starting assembly. It’s a habit of mine that helps find mistakes before starting.
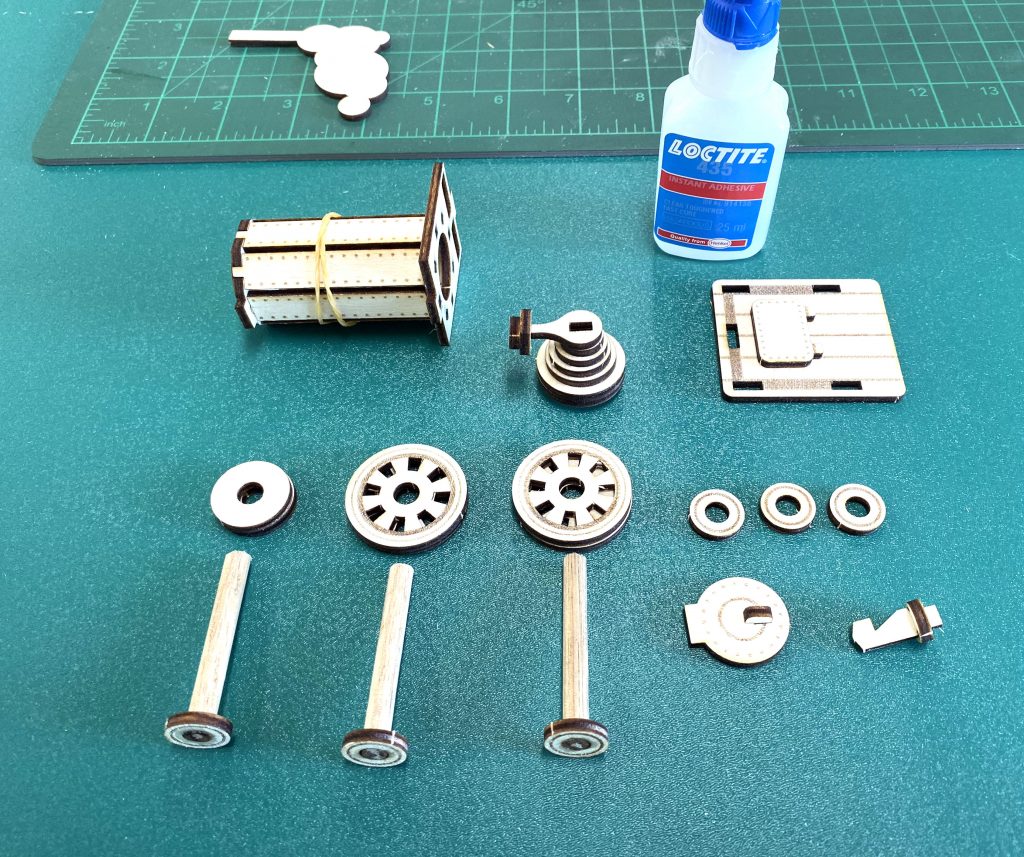
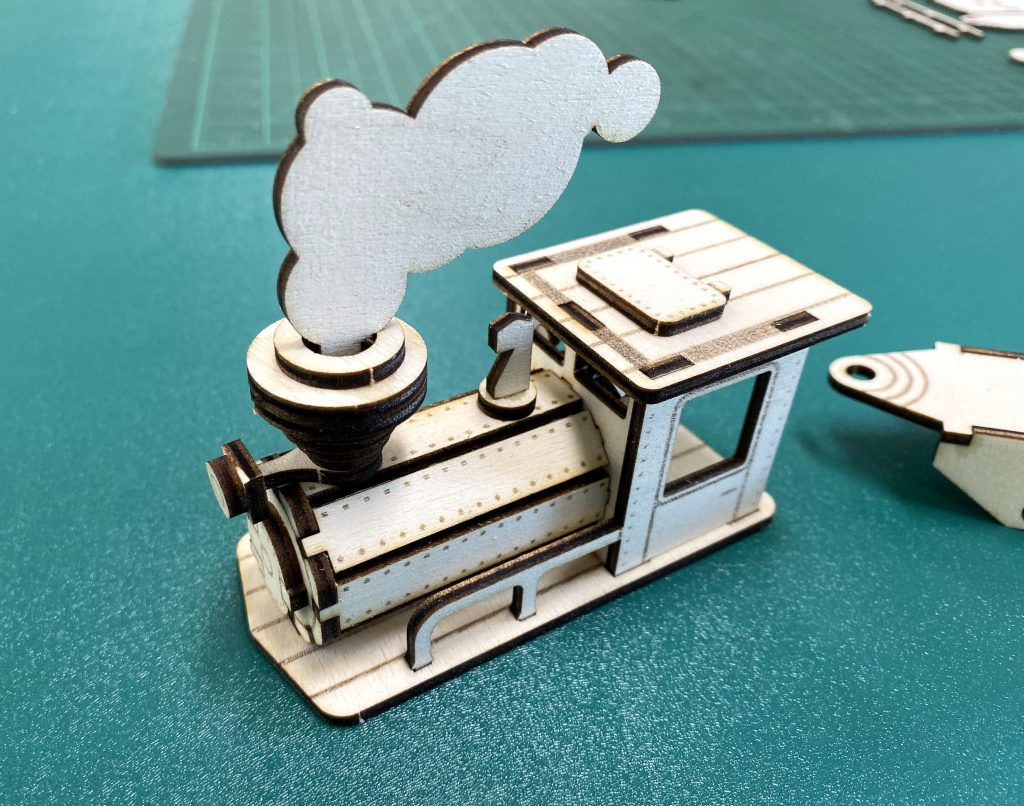
The assembly of parts went very smoothly. As usual I used a superglue instead of wood glue, since I am very impatient with waiting for glue to dry.
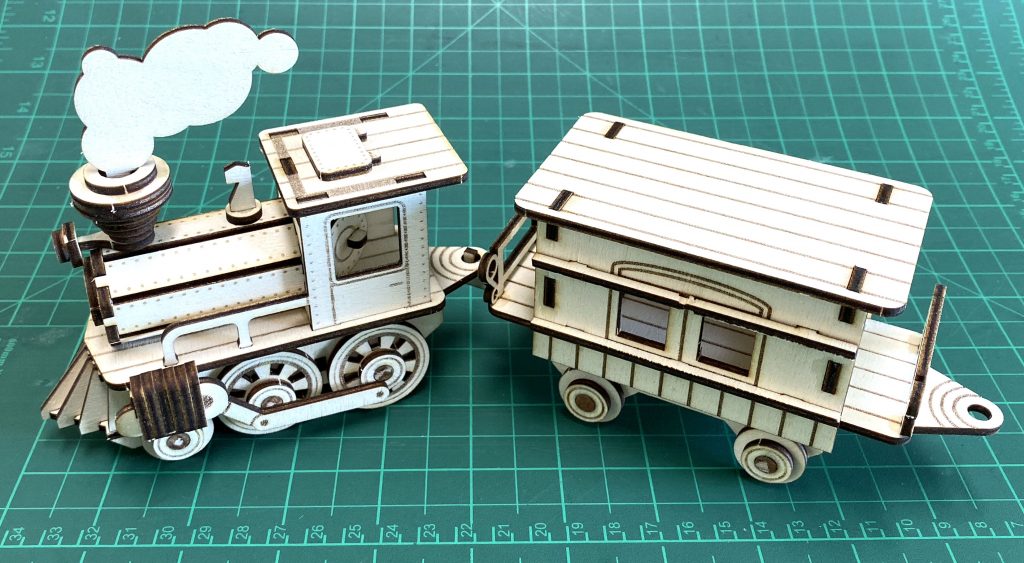
This a great project to spend an afternoon building. It would also look very interesting with some paint.
